What's in a Cap Tech-Pack: A Specification Template for Buyers - Supplier Checklist

What's in a Cap Tech-Pack: A Specification Template for Buyers - Supplier Checklist is one of the most-asked questions we receive from international buyers, and for good reason. With dozens of factories competing for your order and an alphabet soup of technical terms in every supplier quote, even experienced importers can feel lost. This guide consolidates what we have learned producing custom hats for clients in 40+ countries.
Why a tech-pack saves you weeks of email back-and-forth
Most sampling delays are not caused by sewing capacity; they come from factories reverse-engineering a buyer’s intent from incomplete inputs. If a supplier gets one AI logo, two reference photos, and “same fit as last season,” the pattern room still has to guess crown height, visor shape, buckram stiffness, seam tape width, sweatband quality, and closure construction. On a structured 6-panel cap, a 10 mm difference in front crown height or a switch from 1.2 mm to 2.0 mm buckram is enough to change the silhouette from retail-ready to dead on arrival. A solid cap tech pack template eliminates that guesswork by locking down measurable specs: fabric composition and weight such as 100% cotton twill at 260 gsm, Pantone TCX color callouts, visor length and width, embroidery size in millimeters, stitch count or fill type, label placement, carton pack-out, and point-of-measure tolerances. When the merchandiser, pattern maker, digitizer, and sample line all work from the same document, first samples usually move in 6-8 calendar days instead of 10-14 spent untangling email threads and WhatsApp screenshots.
The bigger advantage is that revisions become executable instead of subjective. “Please make it cleaner” is useless on the floor; “move the front logo up 8 mm from the center seam, reduce satin stitch density from 0.42 mm to 0.38 mm, change the undervisor to Pantone 19-3921 TCX, and replace self-fabric eyelets with metal eyelets” is a real instruction a Tajima or Barudan operator can run. That precision matters because every avoidable redigitizing round typically costs $25-$60 per logo and burns another 1-2 days on strike-off approval. A complete cap tech pack template also prevents bulk disputes by giving QC enforceable standards: shell fabric tolerance at 260-280 gsm, color acceptance under Delta-E 1.5, closure width and buckle finish, embroidery placement tolerance of plus or minus 2 mm, and final inspection at AQL 2.5. Once those numbers are written down, sourcing, sewing, and inspection are managing to the same target rather than negotiating quality after the goods are packed.
The seven sections of a complete cap tech-pack
A usable cap tech pack template removes guesswork at the pattern table and on the sewing line. The seven sections that matter are fixed: technical flats, measurement chart, material bill, color standards, decoration spec, construction details, and labeling/packaging. Technical flats need every view that affects build or balance: front, both sides, back, top, underbill, interior, and enlarged callouts for visor curve, front-panel shape, closure opening, and sweatband join. Dimension from hard reference points, not from “visual center.” For example, mark front logo width and height, then locate it from the center-front seam and visor stitch line; mark side embroidery from panel seam intersections; note top button diameter, eyelet diameter, back opening width, and strap end length. If the cap uses a high-profile 6-panel block versus a low-profile dad cap block, state that explicitly, because the silhouette changes even when the circumference does not. The measurement chart is where fit problems are either prevented or baked in. List finished measurements by size run with tolerances in millimeters or centimeters, then separate critical points from cosmetic ones. For a standard adult 58 cm cap, practical control points are head circumference 58.0 cm +/-0.5 cm, crown height 11.5 cm +/-0.3 cm, visor length 7.0 cm +/-0.2 cm, visor width 18.0 cm +/-0.2 cm, sweatband width 30 mm +/-2 mm, and rear opening width 80-90 mm depending on closure type. Add closure-specific data as well: snapback hole count and pitch, metal buckle inner width, or hook-and-loop strap cut length. At CrownsForge, if these values are absent, production defaults to the factory’s house pattern, which is exactly how buyers end up approving a sample that looks fine on table photos but wears too shallow, too square, or too tight in bulk.
Material, color, and decoration control are where most files still fall apart. Name every substrate by composition, construction, and weight: 100% cotton twill 270 gsm, brushed chino 285 gsm, polyester microfiber 150D with PU backing, or recycled poly mesh with specified hole shape and yarn denier. “Heavy cotton” tells sourcing nothing. For trims, specify visor board thickness such as 2.0 mm PE, buckram weight, sweatband material, seam tape width, closure hardware finish, and whether eyelets are self-fabric, embroidered, or metal. Color needs component-by-component callouts: shell, underbill, top button, eyelets, seam tape, sweatband, closure strap, embroidery thread, patch edge, and metal or plastic trims. Use Pantone TCX for dyed textiles and Pantone Solid Coated for coated trims or print inks, then state acceptable shade variation, such as Delta-E under 1.5 for bulk fabric and under 2.0 for molded trims. The last three sections lock the build so QC has something measurable at inline and final inspection. Decoration spec should state method and parameters, not just artwork: flat embroidery or 3D puff, EVA foam height at 2-3 mm, thread type, stitch count range, twill patch merrow width, heat-transfer temperature window, and exact placement from seam lines. Construction details should cover panel count, profile, structured or unstructured front, stitch rows on brim, seam direction, interior taping, needle count where relevant, and closure assembly. Labeling and packaging should finish the cap tech pack template with woven label fold type, main label location, care label content, barcode format, country-of-origin line, polybag size and warning text, carton pack-out, carton dimensions, and gross weight target below 15 kg for safer handling. That level of detail supports real inspection against AQL 2.5 instead of subjective arguments after goods are packed.
Tech sketches: front, side, back, optional underbrim
Most sample failures start on the sketch page, not the sewing line. A strong cap tech pack template needs clean vector views of the front, both sides, back, and any underbrim that differs from self-fabric. Lifestyle photos and Photoshop mockups are fine for mood, but they do not show the construction data a pattern master or Tajima digitizer actually works from: center-front seam, panel breaks, eyelet position, top button location, visor sandwich thickness, seam tape direction, sweatband line, and exact closure placement. Separate shell panels, embroidery zones, print areas, labels, rope, and stitch paths as distinct callouts. If left and right sides are different, draw both. Factories regularly get one side view and are expected to guess the other, which is how side embroidery lands 8 to 10 mm off, flag labels get sewn into the wrong seam, or rope sits too high above the brim seam. Put critical dimensions directly on the sketch, not buried in a size table. Use millimeters and call out crown height at center front, crown depth, visor length from crown seam to tip, visor width at the widest point, back opening width, strap cut length, and visor curve profile. On a shallow streetwear shape, a 5 mm reduction in crown depth or a 3 mm increase in brim width changes the silhouette immediately. Lock the construction on the same page: 6-row visor stitching at 5 mm pitch, 4 mm topstitch margin on panel seams, closure-tab edge stitch, and a 3D embroidery box centered 55 mm above the brim seam. Those notes tell the sample room what shape to build before buckram is fused or fabric is cut.
The underbrim is only optional when it is truly standard. If you want a green undervisor, printed underbrim, contrast stitch, satin binding, or woven taping wrapped into the visor edge, show a dedicated underbrim view and link it to the BOM with exact material, color, and finish references. Specify Pantone TCX for textile components and Pantone C for coated print elements, then state an acceptance tolerance such as Delta-E below 1.5 on critical brand colors. If the underbrim is not shown, many factories will default to self-fabric or black twill because that is normal production logic, not a mistake. Use the sketch page to flag internal construction that never reads clearly in photos: fused front panel yes or no, buckram weight such as 150 gsm or 180 gsm, seam tape width at 20 mm, sweatband height at 32 mm, and visor insert type such as standard PE board versus 2 mm EVA for a softer hand. If the brim is curved, note whether it ships pre-curved or flat for post-forming. Our standard practice is to treat any unstated internal detail as factory standard, which is exactly why this page matters. One missing note on buckram stiffness, underbrim fabric, or visor insert can trigger a full resample, add 7 to 10 days, and cost $35 to $80 in extra development expense.
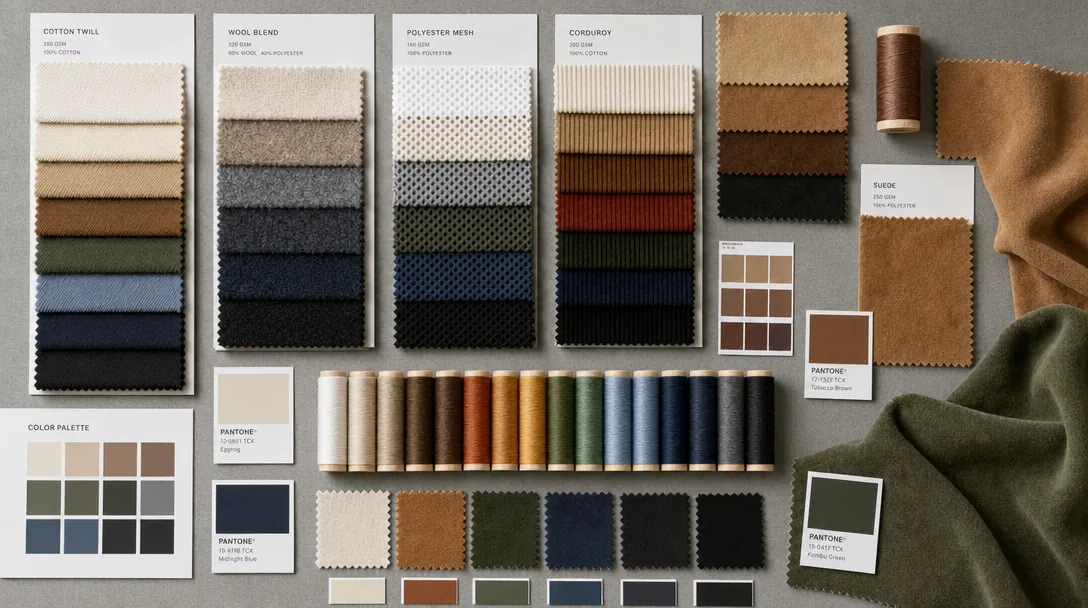
Fabric and color spec: GSM, weave, Pantone references
Most sampling mistakes start with a lazy fabric line. In a cap tech pack template, “cotton twill” tells a factory almost nothing; it leaves yarn count, weave, finish, and structure open to interpretation. The usable spec is the full construction: shell fabric by fiber content, weave, weight, and dye method, then supporting materials by location. A solid example is 100% cotton 3/1 twill, 16x12 yarn count, 260 gsm, reactive dyed, with 0.50-0.55 mm PE buckram laminated in the front 2 panels. For a softer build, write washed cotton canvas 280-320 gsm, brushed chino 210-230 gsm, or nylon taslan 120-160 gsm in 70D or 105D. These numbers directly affect crown collapse, seam bulk, visor binding, and embroidery performance on Tajima or Barudan heads; a 6,000- to 8,000-stitch front logo behaves very differently on 210 gsm brushed chino than on 260 gsm hard twill. Lock every material line separately instead of hiding everything under “self fabric.” Specify shell, underbill, sweatband, seam tape, eyelets, top button, closure strap, back arch tape, and any backing or fusing. If the underbill is 100% cotton twill but the closure is 65/35 poly-cotton, write both. If the sweatband is 180 gsm cotton jersey or 1.0 cm foam-backed polyester, write that too. On the factory floor, missing lines usually get filled with in-stock substitutes, and the sample still comes back marked “per spec.” Our standard practice is to treat open material fields as risk points, because even a small substitution can change shrinkage, shade uptake, panel stiffness, and final cap cost by $0.08-$0.30 per piece at normal MOQs.
Color should be written as a measurable approval standard, not a mood reference. Use Pantone FHI/TCX for dyed fabrics and Pantone Solid Coated only for printed logos, rubber patches, or hard trims; mixing those systems causes avoidable shade disputes. In the cap tech pack template, identify exactly where the color must match: crown, visor top, undervisor, eyelets, closure, sandwich brim, and embroidery thread. If the brand color is sensitive, require approval against a physical Pantone chip or signed fabric swatch, because screens, PDFs, and phone photos are useless for bulk dyeing. A practical tolerance is Delta-E 1.0-1.5 under D65 lighting in a light box, with shade band approval before cutting. For heather, washed, or pigment-dyed fabrics, you may need to relax tolerance slightly, but that should be stated up front. You also need to say whether shade approval is required before wash, after wash, or both. Enzyme wash, pigment wash, sulfur dye, and heavy garment wash can shift olive, khaki, off-black, and dusty pastels enough to fail a retail program even when the greige match looked fine. Separate stock fabric from custom-developed fabric in the supplier checklist: stock black/navy twill may carry no development fee, while a custom 280 gsm herringbone, wool-acrylic melton, or recycled poly ripstop usually means lab dips, a small dye lot surcharge, and an MOQ around 80-150 meters. Finish matters too: peached, brushed, cire coated, PU coated, or C0 water-repellent treatments typically move cost by roughly $0.10-$0.45 per cap and can change both color reading and hand feel.
Decoration spec: technique, placement, dimensions, color count
The decoration page is where most sampling mistakes start, so the cap tech pack template should lock down three things in plain numbers: technique, exact placement, and finished size. “Front logo” is not a usable instruction on a factory floor; “front center, 50 mm W × 30 mm H, bottom edge 12 mm above visor seam” is. If the artwork uses different methods on one cap—say 3D puff embroidery for the front, flat embroidery on the left panel, and a woven patch on the back arch—list each one separately in the hat specification sheet with its own callout. On structured 6-panel caps, front-center embroidery usually sits best between 55 and 65 mm wide, but that depends on crown height, seam spacing, and whether the buckram is 2.0 mm or softer unstructured construction. A good headwear tech pack also notes whether the logo must avoid crossing the center seam, because satin columns over a seam behave very differently from a flat fill on a clean panel.
Dimensions alone are not enough; stitch behavior matters. If you know the embroidery stitch count, include it, because 8,000 stitches and 18,000 stitches do not sew, cost, or look the same, even at similar artwork size. For reference, a standard front flat embroidery on a baseball cap often lands around 6,000 to 12,000 stitches, while dense 3D puff with underlay and foam coverage can run higher and needs wider column shapes to avoid thread breaks on Tajima, Barudan, or ZSK heads. For patches, specify border type and attachment method: merrow edge, laser-cut heat edge, satin border, stitched down, or heat-pressed plus edge tack. In a custom cap spec sheet, I would also call out embroidery thread type—usually 120D rayon or polyester—and any finish requirements such as metallic thread, glow thread, or matte tatami fill, because those choices affect needle speed, reject rate, and unit cost.
Color control is where buyers either save a week or lose one. Every decoration should list color count and Pantone references, ideally Pantone Solid Coated for logos and Pantone TCX only when the reference is tied to textile matching elsewhere in the cap design specification. If a front embroidery is 4 colors plus 1 foam layer, write that clearly; if the patch background is intentionally left as base fabric color, say so rather than letting the digitizer guess. Thread matching is never mathematically perfect, so serious programs should define an acceptable tolerance such as visual approval under D65 light box conditions or Delta-E target for patch print elements when relevant. Our standard practice for a tech pack for hat manufacturer is to flag any brand-critical shade—black, athletic gold, or retail red, for example—for lab dip or thread cone approval before bulk. That is especially important when the same Pantone has to be interpreted across embroidery thread, PVC patch ink, and twill applique, where the materials reflect light differently even when the reference code is identical.
Packaging and label spec: polybag, hangtag, sticker, carton
Chargebacks usually start on the packing line, not at sewing, so the packaging page in a cap tech pack template needs hard specs instead of "standard export packing." For each SKU, lock the individual polybag by material, finished size, thickness, venting, warning copy, and packing orientation. A structured adult cap typically takes a 280 x 320 mm bag; 30-50 micron LDPE or OPP is the safe range, because film below 30 microns tears when buckram crowns and sandwich brims rub during carton loading. Call out 2 or 4 vent holes at 5 mm diameter, flap type, and the exact location of the PE-LD 04 or PP 05 recycle mark. If the goods ship into the EU or California, specify whether suffocation text is required, the language set, and minimum type size. Also state whether caps are packed flat, with tissue crown support, or with an EVA head form, because that changes carton cube, brim memory, and deformation risk after 30-45 days of ocean transit. Our standard practice is to treat any missing packaging detail as a defect risk, not a factory discretion point.
Hangtags, stickers, and cartons should be controlled as print and logistics components with measurable approvals. For hangtags, specify finished size, paper stock, coating, Pantone reference, barcode symbology, human-readable text, and attachment method. A common spec is 50 x 90 mm on 350 gsm C1S with matte lamination, but 250 gsm uncoated kraft, soft-touch film, embossing, or foil stamping will shift both color and unit cost; separate foil dies usually run $40-80 per design. Define whether the tag is fixed by a 125 mm plastic loop, cotton string, or kimble through the sweatband seam allowance, and avoid tagging through visible crown panels on brushed cotton, suede, or peach twill because needle holes rarely recover cleanly. For stickers, state substrate, size, placement, and variable data: for example, a 45 mm PET size sticker on the top brim, a hologram on the undervisor, or a GS1 barcode label on the polybag exterior. Then close the cap tech pack template with carton controls: inner pack quantity, master carton pack-out, maximum gross weight, outer dimensions, board grade, and shipping marks. In real production, 24, 48, or 72 pcs per carton are common, but many U.S. 3PLs cap acceptance at 15 kg gross; specify 5-ply K=K or equivalent burst strength, plus PO, style, color, carton number, country of origin, and factory code exactly as printed.
Frequently Asked Questions
What logo decoration techniques do you offer?
3D puff embroidery, flat embroidery, woven patch, leather patch, PVC patch, screen printing, sublimation, applique and laser etching, all in-house with no subcontracting.
What file format should I send for my logo?
Vector files (AI, EPS, PDF) are ideal. High-resolution PNG or JPG at 300 dpi on transparent background works as a fallback. Provide Pantone color references for accurate reproduction.
Can I order a sample before bulk production?
Yes. We strongly recommend approving a pre-production sample before mass production. Samples are charged at 35 to 60 USD each plus express shipping, fully refundable against confirmed bulk orders over 500 pieces.
How long does production take?
Sampling takes 7 to 12 days. Bulk production runs 20 to 30 days depending on quantity, fabric availability and decoration complexity. Inspection and packing adds another 3 to 5 days before shipment.
Do you support sustainability certifications?
Yes. We work with GOTS organic cotton, GRS-certified recycled polyester, OEKO-TEX Standard 100 fabrics, and are BSCI and Sedex audited. Certification documentation can be provided per order.
How does ordering custom patch trucker hat work?
When evaluating custom patch trucker hat, the key considerations are construction quality, decoration capability, MOQ flexibility and lead time. Technique (3D puff / flat embroidery / patch), placement (front center, side, back), dimensions (e.g. 5cm wide × 3cm tall), stitch count if known, color count and Pantone references. Without a tech-pack, your factory invents details that contradict your assumptions. With one, sampling lead time drops from 14 days to 7 and revision rounds drop from 4 to 1.
How does ordering baseball cap custom work?
When evaluating baseball cap custom, the key considerations are construction quality, decoration capability, MOQ flexibility and lead time. Without a tech-pack, your factory invents details that contradict your assumptions. With one, sampling lead time drops from 14 days to 7 and revision rounds drop from 4 to 1. Tech sketches, fabric spec, color spec, decoration spec, construction spec (panels, closure, eyelets, sweatband), packaging spec, label/hangtag spec.
How does ordering custom baseball cap motorcycle helmet work?
When evaluating custom baseball cap motorcycle helmet, the key considerations are construction quality, decoration capability, MOQ flexibility and lead time. Without a tech-pack, your factory invents details that contradict your assumptions. With one, sampling lead time drops from 14 days to 7 and revision rounds drop from 4 to 1. Tech sketches, fabric spec, color spec, decoration spec, construction spec (panels, closure, eyelets, sweatband), packaging spec, label/hangtag spec.
How does ordering custom bucket hat embroidered work?
When evaluating custom bucket hat embroidered, the key considerations are construction quality, decoration capability, MOQ flexibility and lead time. Without a tech-pack, your factory invents details that contradict your assumptions. With one, sampling lead time drops from 14 days to 7 and revision rounds drop from 4 to 1. Tech sketches, fabric spec, color spec, decoration spec, construction spec (panels, closure, eyelets, sweatband), packaging spec, label/hangtag spec.
Ready to start your custom hat project?
Send us your tech-pack, sketch or even just an inspiration photo. We will respond with a detailed quotation and digital mock-up within 24 hours.
Request a free quoteRelated guides
Corduroy Hat Vintage Sample Approval Process for Custom Hat Buyers
Read article →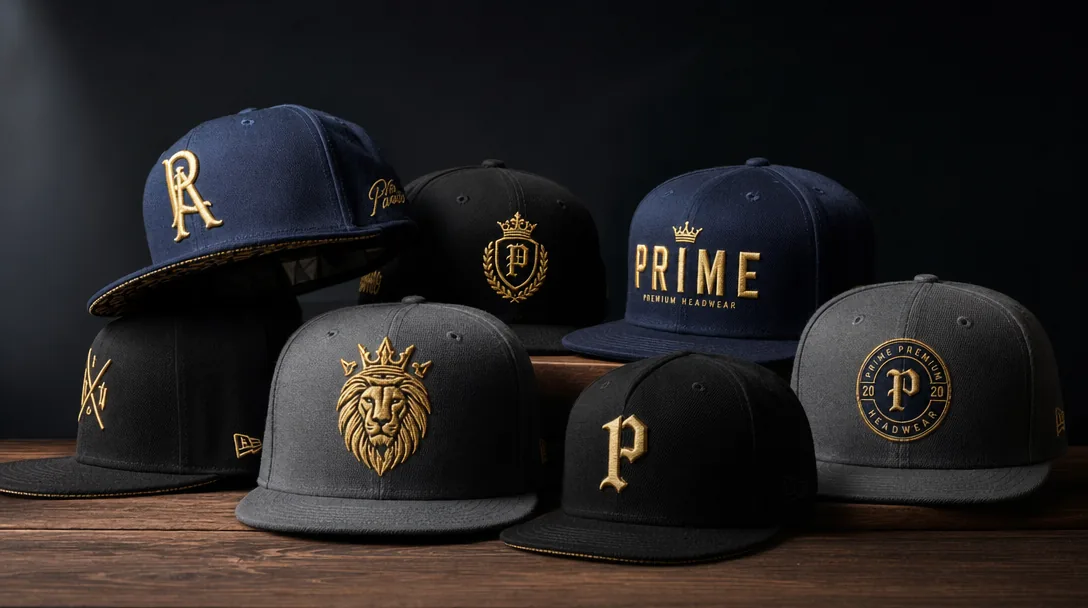
5 Panel Camp Cap Wholesale: A 2026 B2B Sourcing Guide
Read article →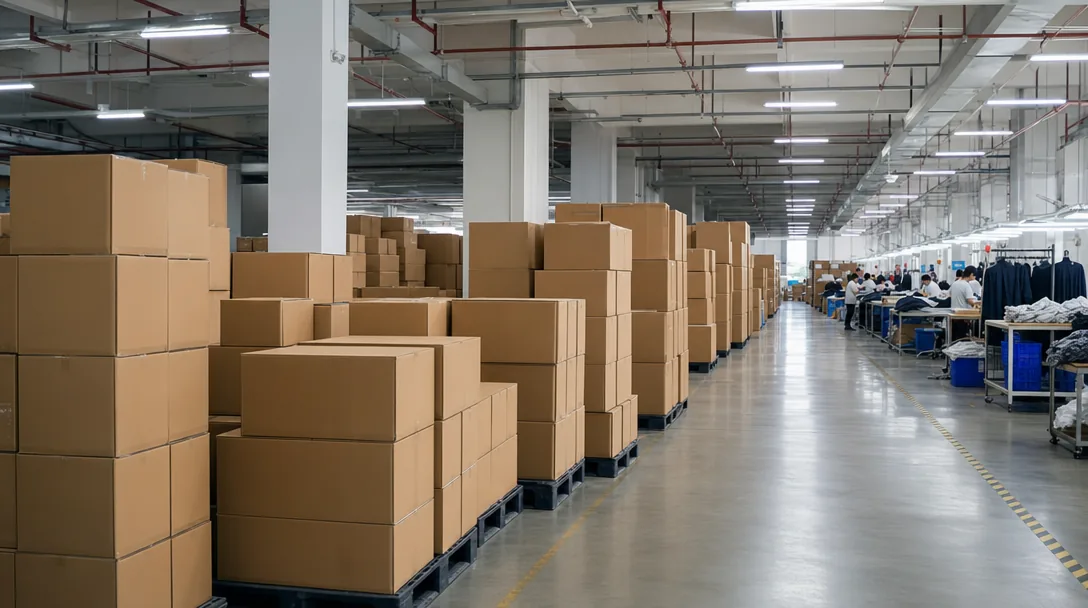
How to Vet a China Hat Manufacturer Before You Wire the Deposit
Read article →Sourcing custom hats does not have to be complicated. With the right manufacturing partner, clear specifications and a small upfront investment in sampling, you can launch a retail-quality product in 30 to 45 days.