What's in a Cap Tech-Pack: A Specification Template for Buyers - Cost & MOQ Breakdown
What's in a Cap Tech-Pack: A Specification Template for Buyers - Cost & MOQ Breakdown is one of the most-asked questions we receive from international buyers, and for good reason. With dozens of factories competing for your order and an alphabet soup of technical terms in every supplier quote, even experienced importers can feel lost. This guide consolidates what we have learned producing custom hats for clients in 40+ countries.
Why a tech-pack saves you weeks of email back-and-forth
A vague brief is how a 7-day sample turns into a 3-week email chain. If the buyer does not specify the block, the factory fills gaps with house standards: a 6-panel mid-profile shape instead of a true low-profile crown, 108x56 cotton twill instead of 100% brushed chino around 260-280 gsm, a pre-curved PE visor board instead of flat, or a stock 20 mm hook-and-loop closure instead of a self-fabric strap with antique brass buckle. A solid cap tech pack template eliminates that guessing before the sample room cuts fabric. It should lock crown height, panel structure, visor shape, shell fabric composition, sweatband material, seam tape artwork, eyelet method, closure construction, and Pantone TCX color references with an acceptable shade tolerance, typically Delta-E 1.5-2.0 against the approved lab dip. Once those points are fixed, pattern making, fabric sourcing, trim prep, and embroidery digitizing can run at the same time instead of waiting on clarifications. On a standard custom cap program, that usually cuts first-sample lead time from 12-14 calendar days to about 7-9.
Most failed samples are not blown up by major design changes; they fail on decoration and trim specs that were never properly written. “3D embroidery front logo” means nothing unless the file also states finished size in millimeters, puff foam thickness, stitch density, backing type, thread sheen, and whether the digitizing was built for cap frames on Tajima, Barudan, or ZSK machines. Leave that open and you get predictable floor problems: foam flattening after heat setting, satin borders tunneling on 75D polyester, side logos landing too close to the panel seam, or leather-look PU substituted for genuine split leather on the back strap. A usable headwear spec should also call out top button material, visor sandwich color, hardware finish, label position, and tolerances such as ±3 mm for logo placement and ±5 mm for visor width. At CrownsForge, if the sample room can release an internal cut ticket without sending a single clarification email, revision rounds usually fall from three or four to one, saving 3-5 working days per remake, $35-$80 per extra DHL shipment, and roughly $20-$60 each time embroidery has to be re-digitized.
The seven sections of a complete cap tech-pack
A reliable cap tech pack template lives or dies on the tech sketch. Most sampling errors do not come from bad sewing; they come from a drawing that leaves shape, proportion, or placement open to guesswork. A complete sketch page should show front, back, left, right, top, undervisor, and interior views, plus enlarged callouts for any non-standard detail such as a sandwich visor, braided rope, contrast eyelets, printed seam tape, or a high-profile front block. Put the actual measurements on the drawing where the sample room will see them: 6-panel structured snapback, base head size 58 cm, crown height 3.25 in, visor length 7 cm, visor width 18 cm, top button 12 mm, seam tape 20 mm, and 6 to 8 rows of visor stitching. If you already run a proven fit block, state it; if not, require a fresh paper pattern. On caps, even a 2 mm shift in front panel angle or crown depth can change how a 3D embroidery logo stands up on the machine. The next section has to lock down materials and color by component, not by vague style language. “Black cotton” is not a usable spec; the factory needs fiber content, construction, weight, and finish line by line: 100% cotton twill, 280 gsm, enzyme washed; 65/35 poly-cotton chino twill, 240 gsm; recycled polyester mesh, 75D hex-hole; sweatband 35/65 cotton-poly with moisture-wicking finish; visor insert 1.8 mm PE board instead of paperboard. Color should be assigned separately to crown, visor top, undervisor, button, eyelets, closure, sweatband, seam tape, and labels using Pantone TCX for dyed textiles and Pantone Solid Coated for printed trims. If shade consistency matters, write the tolerance into the cap tech pack template: Delta-E below 1.5 for same-fabric parts and below 2.0 where mixed materials are unavoidable. That single line prevents the classic problem of a navy crown passing next to a purple-cast visor.
Decoration, construction, and packing should be detailed tightly enough that a factory can quote, sample, and inspect to AQL 2.5 without sending basic clarification emails. Every logo needs method, size, position, and execution notes: front-center 3D puff embroidery with 5 mm EVA foam, maximum 9,000 stitches; left panel flat embroidery at 55 mm wide; rear woven loop label; undervisor heat transfer at 120 x 40 mm. If embroidery is involved, specify the machine family or at least the digitizing standard—Tajima, Barudan, and ZSK heads do not handle underlay, pull compensation, and foam the same way. Construction specs should also name the hidden parts buyers forget to control: buckram weight, eyelet material, seam tape fabric, sweatband composition, visor stitch count, insert thickness, and closure finish such as black nickel or antique brass. The final section should cover labeling and carton standards because that is where landed-cost surprises show up. A usable cap tech pack template should state inner and master pack ratios, for example 12 pcs per inner and 144 pcs per export carton, plus carton size, gross weight cap, barcode placement, country-of-origin label, fiber content label, hangtag attachment, polybag warning text, and carton marks. For retail or marketplace programs, add compliance requirements upfront: needle policy, silica gel if the caps ship by ocean, suffocation warning format for the US, and whether the order must meet Amazon-style prep under DDP terms. CrownsForge standard practice is to lock packaging before pre-production, because changing from bulk pack to individual polybag plus insert card can move unit cost by $0.12 to $0.35 and materially affect carton utilization.
Tech sketches: front, side, back, optional underbrim
A sketch page is where a sample stays controlled or goes off-spec on day one. In a practical cap tech pack template, show clean vector views of the front, back, left side, right side for any asymmetric detail, and an underbrim view whenever the style includes print, contrast fabric, sandwich trim, rope, seam tape, or a color break under the visor. Photos are weak reference for this job; lens distortion hides crown height, visor pitch, panel balance, and back-opening geometry, which is exactly where a high-profile 6-panel, a shallow unstructured dad cap, and a 5-panel camper get confused. Draw the cap flat but in true proportion, then label every construction point the sample room can misread: center-front seam, panel joins, eyelet position, top button, sweatband edge, back opening, visor seam, topstitch direction, and closure overlap. If a line is not clearly marked as seam join, single-needle topstitch, edge stitch, or decorative stitch, the first proto usually drifts before the embroidery file even reaches a Tajima or Barudan head.
The sketch must carry dimensions and tolerances, not just silhouettes. Call out crown depth, cap opening width, visor length from crown seam to tip, visor width at the widest point, back-opening width, and brim curve reference. For curved bills, a real note such as “match New Era 9FORTY curve, finished rise 38-42 mm at center” is far more useful than “slightly curved.” On youth caps or lightweight performance caps, a 5-8 mm change in crown depth or visor length is enough to alter fit and force a resample. Use tolerances that reflect actual factory capability: visor length ±3 mm, crown depth ±5 mm, embroidery centerline ±2 mm, closure alignment ±3 mm, rope placement ±2 mm. Those numbers are not arbitrary; buckram fusing, visor pressing, edge binding, and final shaping all stack small variations. A good cap tech pack template also states stitch count and build intent directly on the page: 6 rows or 8 rows on visor, binding width 5 mm, rope diameter 3 mm, structured front with 1.2-1.5 mm buckram, underbrim in black anti-glare 10x10 cotton twill or printed 210D polyester.
Line art also needs to communicate construction intent that affects cost, sewing sequence, and approval risk. Specify whether the cap is 5-panel, 6-panel, or camp style; structured, semi-structured, or unstructured; front-panel-only buckram or full crown support; self-fabric underbrim, black cotton twill, or sublimated poly underbrim. If mesh is used, note the type and gauge, such as 100% polyester trucker mesh at 160-180 gsm; if performance fabric is used, give the weight, backing, and finish, for example 120 gsm micro polyester with laminated foam or laser-cut vents. Different line weights or redline notes should separate seam joins from topstitching and show exact placement of sandwich layers, rope, taping, visor stitch rows, and closure hardware. Buyers should remember that one vague underbrim or back-closure callout can change the quote immediately; a sublimated undervisor, eight-row visor stitching, or metal clasp alignment within ±2 mm will price differently than a basic self-fabric build. In real sampling, that kind of miss usually adds about $35-$120 in avoidable development cost, especially on orders below 300 pieces.
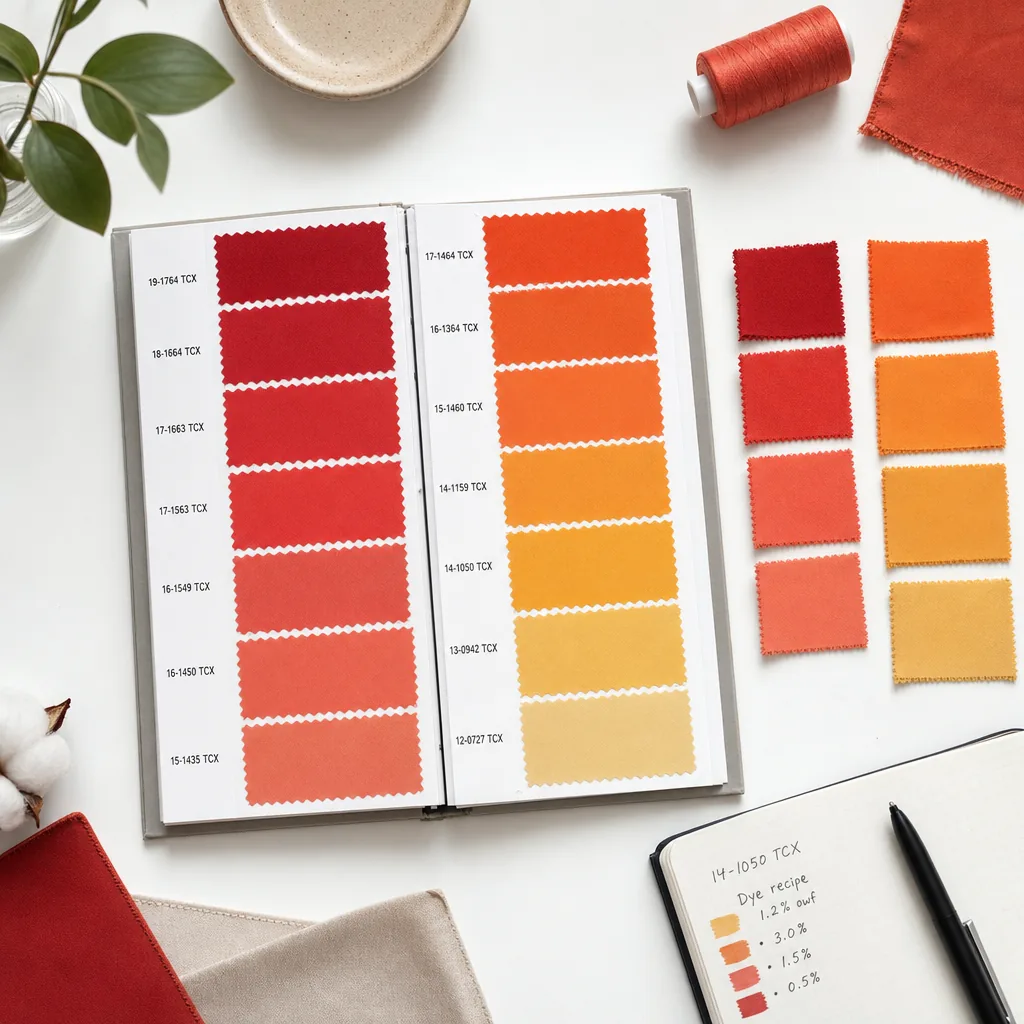
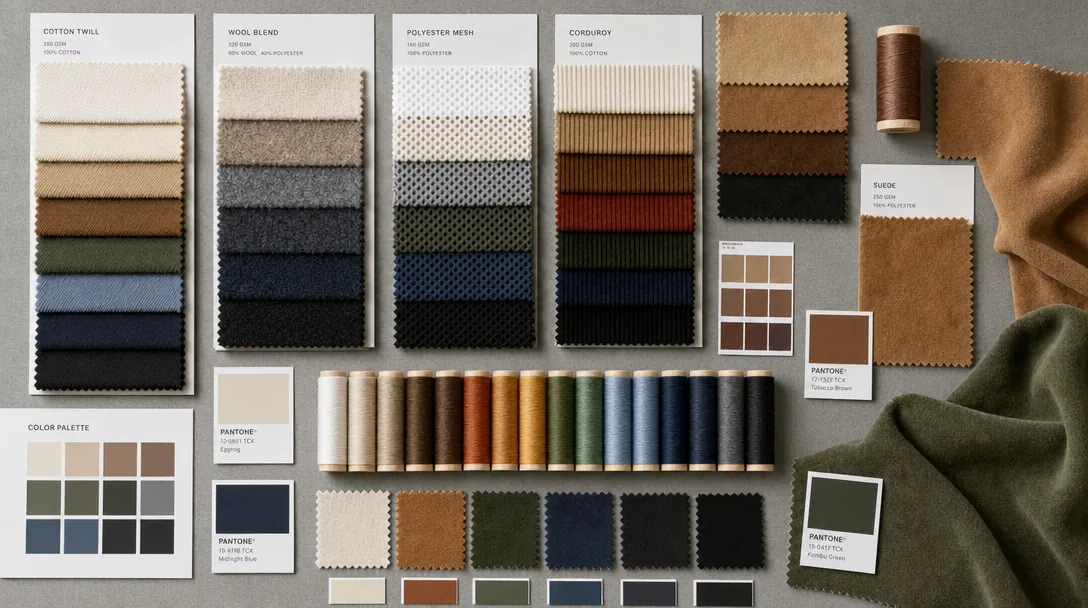
Fabric and color spec: GSM, weave, Pantone references
The fabric line in a cap tech pack template decides whether the factory buys the right cloth on day one or starts guessing and billing you for the correction later. “Cotton twill” is not a production spec. Write fiber content, weave, yarn count, construction, and finished weight in gsm: 100% cotton 3/1 twill, 16s x 12s, 108 x 56, 280 gsm is a normal range for a structured baseball cap; 65/35 poly-cotton canvas, 20s x 16s, around 240 gsm works for promo programs; 80/20 wool-acrylic melton, 430 gsm, is common on premium 6-panels. If the hand feel matters, name the finish exactly: enzyme wash, peach finish, brushed face, mercerized, C0 water-repellent, or PU coating. Those finishes change shrinkage, crown stiffness, brim wrapping, and seam slippage. On the floor, a 30-40 gsm variance is enough to make a buckram-backed front panel collapse after carton compression or fail a wash test. Separate shell, underbill, sweatband, eyelets, top button, and closure instead of assuming one fabric covers the whole cap. A 3/1 twill hides needle marks better than plain weave canvas; corduroy needs wale count; denim should list ounce weight and whether slub is acceptable; performance builds should call out exact construction, such as 150 gsm polyester interlock or 120 gsm microfiber with PU backing. Nylon ripstop also needs precision: 210D and 420D behave differently under embroidery, and Tajima or Barudan heads often need top-tension adjustment and different backing to avoid puckering. Mixed-material caps are where MOQs and unit costs jump fast. In our standard practice, adding a second shell material or custom-matched closure tape below 300 pieces per colorway can push MOQ from 144 units to 300-500 and add roughly $0.35-$1.20 per cap in sourcing, trim matching, and extra cutting loss.
Color control should be written for textiles, not for screens. Use Pantone FHI/TCX references or an approved physical fabric swatch, and state exactly which components must match: shell only, or shell plus underbill, eyelets, button, sweatband tape, and closure. “Black” on a JPEG is how you end up with five different blacks from five suppliers. Different mills dye cotton twill, hook-and-loop tape, woven labels, and binding tape to different baselines, so your cap tech pack template needs a measurable tolerance. For solid cotton twill, Delta-E 1.0-1.5 under D65 lighting is realistic with approved lab dips; for wool blends, heather jerseys, or mélange fabrics, a wider tolerance is usually necessary because fiber mix distorts the instrument reading and the visual read changes panel to panel. If the program is licensed, uniform-based, or intended for retail replenishment, require lab dips before sample sewing and note whether piece dye, yarn dye, or stock greige dyeing is allowed. Custom dyeing usually adds 7-12 days and often requires 80-150 meters per color, depending on the mill and fabric type. Also specify whether contrast stitching, embroidery thread, and woven label ground must match the shell Pantone or only be visually close. That one clarification prevents a common bulk failure: approved body fabric with off-shade trims that gets rejected before AQL 2.5 inspection even starts. CrownsForge normally checks shell-to-trim shade grouping under D65 and TL84 because a color that passes in daylight can still drift badly under store lighting, especially on navy, charcoal, and deep red programs.
Decoration spec: technique, placement, dimensions, color count
Decoration is where most cap samples go off-track, and a good cap tech pack template removes ambiguity before artwork reaches digitizing. Lock four items in writing: technique, exact placement, finished dimensions, and approved color references. “Front logo embroidery” tells the factory almost nothing; “front-center 3D puff embroidery, 52 x 34 mm finished, bottom edge 14 mm above visor seam, Pantone 186 C / Black C / White” is usable. Name the method precisely: flat embroidery, 3D puff embroidery, merrowed patch, laser-cut twill patch, woven patch, TPU badge, felt appliqué, sublimated patch, or heat-transfer print. Each route changes machine setup, rejection risk, and cost. A typical front puff logo on a 6-panel cotton twill snapback uses 2-3 mm EVA foam, wider satin columns, reduced underlay, and art edited to prevent small counters from collapsing. On Tajima, Barudan, or ZSK heads, the puff file is usually digitized separately from the flat version. Flag technical risks early: text under 4 mm height, lines below 0.8 mm, fill areas that exceed clean coverage, or gradients that must be converted into solid thread breaks. If stitch count is known, list it; if not, specify “estimated 7,000-9,000 stitches” so costing is grounded in something real.
Placement must be measured from fixed construction points because “front center” shifts dramatically between a low-profile unstructured dad cap, a foam trucker, and a high-crown fitted shape. Use seam-based coordinates and state whether the size is taken on the flat panel, sewn crown before blocking, or finished cap after forming. A proper line item looks like this: front logo centered on CF seam, finished size 50 mm W x 32 mm H, bottom edge 15 mm above visor join seam; left panel logo centered between CF and side seam, 30 mm W; back wordmark centered above snap closure, 58 x 10 mm. On shallow crowns, even a 5 mm vertical drift is obvious, so this is not a cosmetic detail. For patches, specify border and attachment method: merrow edge, laser-cut heat edge, fold-under edge, stitch-down, heat seal, or stitch plus heat seal. Color count should read like production data, not brand language. List every thread and ground color against Pantone Solid Coated or Pantone TCX, and note material where it matters because 120D/2 rayon and trilobal polyester reflect differently at the same target shade. Also state tolerance and approval path: visual thread match, strike-off required, or pre-production sew-out mandatory; licensed programs sometimes request Delta-E below 1.5 under D65 for dyed patch grounds. That level of clarity prevents avoidable resets, surprise setup charges, and MOQ creep on custom trims or multi-technique decoration.
Packaging and label spec: polybag, hangtag, sticker, carton
Packaging errors block shipments as fast as bad embroidery, so the packaging page in a cap tech pack template needs the same sign-off discipline as fabric, artwork, and trims. Never write “1 pc per bag” and leave it there. Specify film type, finished bag size, thickness, vent holes, flap style, warning copy, and recycle mark. For most adult 6-panel caps, a 300 x 300 mm or 320 x 280 mm bag works; film is typically LDPE or OPP at 0.03-0.05 mm (30-50 microns). High-profile snapbacks, flat brims, and rope caps usually need extra width or a side gusset so the visor is not pushed down in transit. Call out whether the closure is self-adhesive flap or open mouth plus tape seal, and whether suffocation text must be bilingual. On the factory floor, I treat cheap high-haze film as a defect risk: weak side seals split during carton loading, and glossy barcode stickers on cloudy film often fail scan checks at final inspection.
Hangtags and stickers are cheap parts with expensive consequences when the spec is soft. State hangtag size, board grade, gsm, coating, print colors, Pantone references, hole position, and fastening method. A common retail setup is 50 x 90 mm on 350 gsm C2S card, matte laminated, printed 4C + 1 Pantone, attached with a 150 mm black elastic loop or nylon fastener through the back strap or sweatband label. If you want foil, emboss, spot UV, or soft-touch lamination, lock it before sampling; those finishes often push printer MOQ from 500 to 1,000 pcs and extend lead time from about 5 days to 10-12. For stickers, define facestock, adhesive, size, barcode type, quiet zone, and placement; a 50 x 25 mm thermal-transfer or offset label with Code 128 or EAN-13 is standard, but only if it scans cleanly after bagging.
Carton instructions should read like a packing SOP, not a note to the warehouse. Specify units per carton, carton dimensions, board construction, burst strength or edge crush requirement, max gross weight, inner packing method, and exact shipping marks. For structured baseball caps, 24 or 48 pcs per 5-ply export carton is safer than 72 because buckram crowns and pre-curved PE visors take a compression set under stacking. For washed unstructured dad caps, 72 pcs can work if gross weight stays around 12-15 kg and the top layer is protected with a clean poly sheet. Shipping marks should list PO, style number, color, carton count, quantity, country of origin, and any retailer routing label such as FNSKU or SSCC-18. Our standard practice is to cap carton Delta-E risk by approving outer print color against the master artwork, because even corrugate marks get rejected when retailer compliance teams are strict.
Frequently Asked Questions
What logo decoration techniques do you offer?
3D puff embroidery, flat embroidery, woven patch, leather patch, PVC patch, screen printing, sublimation, applique and laser etching, all in-house with no subcontracting.
What file format should I send for my logo?
Vector files (AI, EPS, PDF) are ideal. High-resolution PNG or JPG at 300 dpi on transparent background works as a fallback. Provide Pantone color references for accurate reproduction.
Can I order a sample before bulk production?
Yes. We strongly recommend approving a pre-production sample before mass production. Samples are charged at 35 to 60 USD each plus express shipping, fully refundable against confirmed bulk orders over 500 pieces.
How long does production take?
Sampling takes 7 to 12 days. Bulk production runs 20 to 30 days depending on quantity, fabric availability and decoration complexity. Inspection and packing adds another 3 to 5 days before shipment.
Do you support sustainability certifications?
Yes. We work with GOTS organic cotton, GRS-certified recycled polyester, OEKO-TEX Standard 100 fabrics, and are BSCI and Sedex audited. Certification documentation can be provided per order.
How does ordering custom patch trucker hat work?
When evaluating custom patch trucker hat, the key considerations are construction quality, decoration capability, MOQ flexibility and lead time. Technique (3D puff / flat embroidery / patch), placement (front center, side, back), dimensions (e.g. 5cm wide × 3cm tall), stitch count if known, color count and Pantone references. Without a tech-pack, your factory invents details that contradict your assumptions. With one, sampling lead time drops from 14 days to 7 and revision rounds drop from 4 to 1.
How does ordering baseball cap custom work?
When evaluating baseball cap custom, the key considerations are construction quality, decoration capability, MOQ flexibility and lead time. Without a tech-pack, your factory invents details that contradict your assumptions. With one, sampling lead time drops from 14 days to 7 and revision rounds drop from 4 to 1. Tech sketches, fabric spec, color spec, decoration spec, construction spec (panels, closure, eyelets, sweatband), packaging spec, label/hangtag spec.
How does ordering custom baseball cap motorcycle helmet work?
When evaluating custom baseball cap motorcycle helmet, the key considerations are construction quality, decoration capability, MOQ flexibility and lead time. Without a tech-pack, your factory invents details that contradict your assumptions. With one, sampling lead time drops from 14 days to 7 and revision rounds drop from 4 to 1. Tech sketches, fabric spec, color spec, decoration spec, construction spec (panels, closure, eyelets, sweatband), packaging spec, label/hangtag spec.
How does ordering custom bucket hat embroidered work?
When evaluating custom bucket hat embroidered, the key considerations are construction quality, decoration capability, MOQ flexibility and lead time. Without a tech-pack, your factory invents details that contradict your assumptions. With one, sampling lead time drops from 14 days to 7 and revision rounds drop from 4 to 1. Tech sketches, fabric spec, color spec, decoration spec, construction spec (panels, closure, eyelets, sweatband), packaging spec, label/hangtag spec.
Ready to start your custom hat project?
Send us your tech-pack, sketch or even just an inspiration photo. We will respond with a detailed quotation and digital mock-up within 24 hours.
Request a free quoteRelated guides
Corduroy Hat Vintage Sample Approval Process for Custom Hat Buyers
Read article →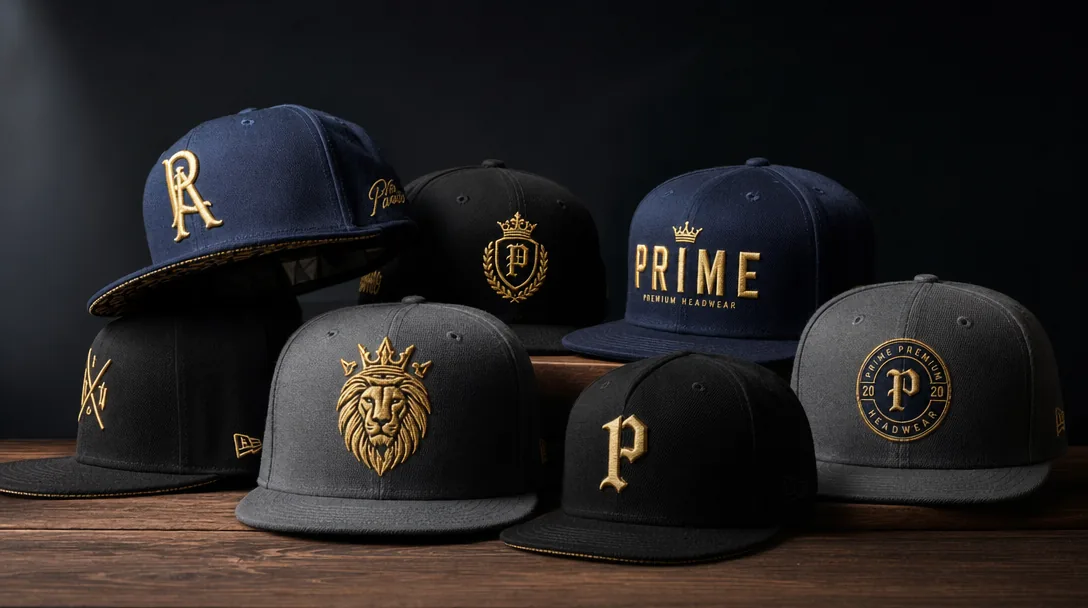
5 Panel Camp Cap Wholesale: A 2026 B2B Sourcing Guide
Read article →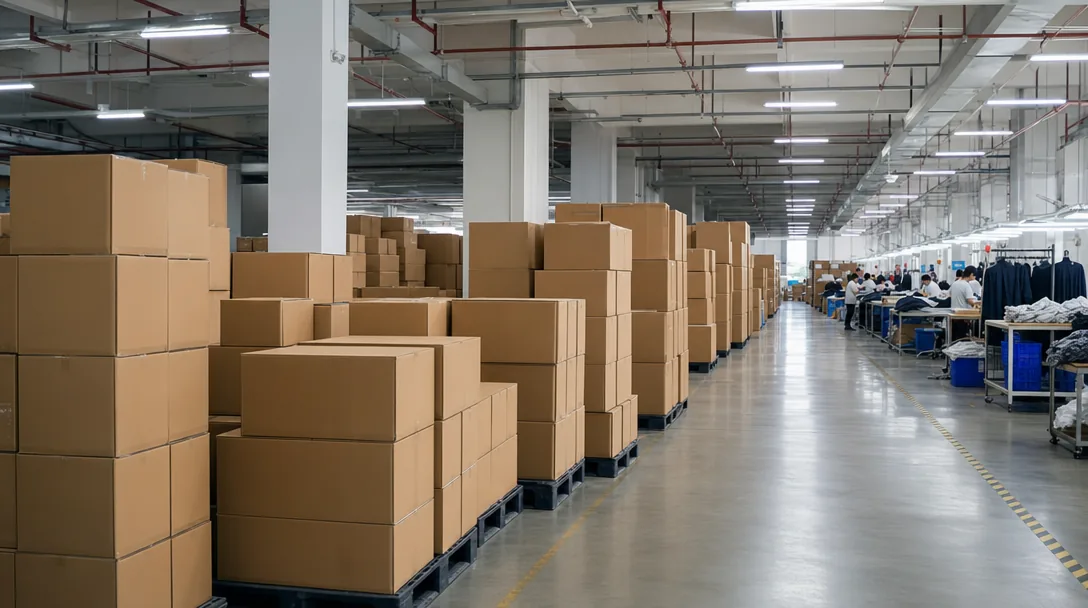
How to Vet a China Hat Manufacturer Before You Wire the Deposit
Read article →Sourcing custom hats does not have to be complicated. With the right manufacturing partner, clear specifications and a small upfront investment in sampling, you can launch a retail-quality product in 30 to 45 days.