What's in a Cap Tech-Pack: A Specification Template for Buyers - 2026 Buyer's Guide (2026 Update)
For brand owners, wholesalers and procurement teams entering the custom headwear category, what's in a cap tech-pack: a specification template for buyers - 2026 buyer's guide (2026 update) is one of the highest-leverage decisions you will make. Get it right and your unit economics, retail story and reorder cycle all improve. Get it wrong and you carry the cost for years.
Why a tech-pack saves you weeks of email back-and-forth
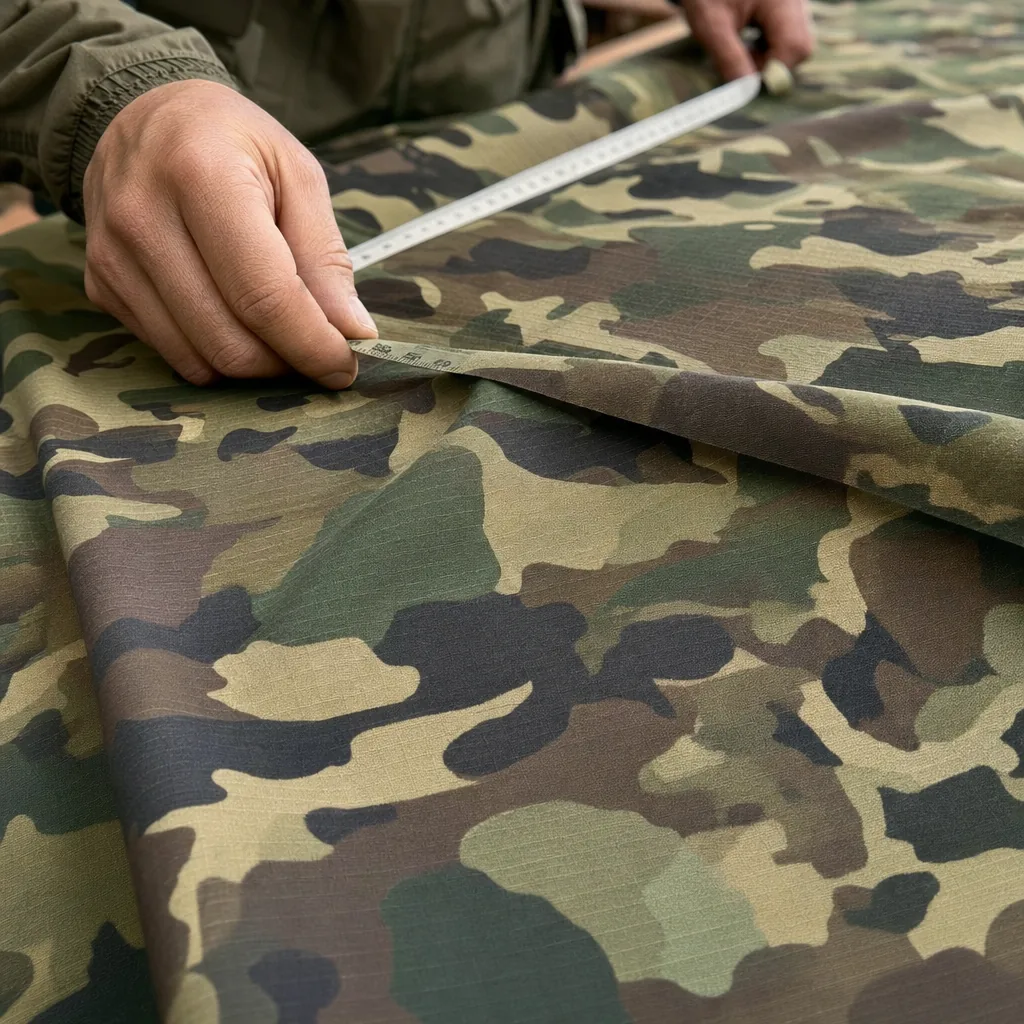
The fastest way to lose two weeks on a custom cap order is to send a logo file, one front-view photo, and “same as picture.” Without a proper cap tech pack template, the sample room fills gaps with factory defaults: 6-row visor stitching instead of 8-row, 150 gsm buckram instead of 180 gsm, 11 cm crown depth instead of 12 cm, or a black plastic snap because no Pantone TCX, resin chip, or molded-color reference was listed. Those defaults may be acceptable for a promo cap, but they are costly when the target is a licensed team cap, retail streetwear drop, or repeatable private-label program. One pattern revision, trim reorder, embroidery repositioning, and DHL reshipment can add $45 to $90 and 5 to 7 calendar days per sample round. A disciplined hat specification sheet fixes silhouette, panel construction, fabric weight, closure, seam tape, sweatband, visor curve, logo size, and placement before fabric is cut.
A useful tech pack removes subjective language before it reaches the pattern table or embroidery room. “Premium twill,” “structured fit,” and “slightly curved brim” mean different things to a buyer, pattern master, Tajima operator, and final QC inspector. The spec should translate those phrases into measurable requirements: 100% cotton brushed twill at 260 gsm, fused front buckram at 180 gsm, visor pre-curve at 12 to 15 degrees, front embroidery 58 mm wide with 9,000 stitches, Madeira 40 wt thread, and self-fabric top button. When the custom cap spec sheet is complete, first sample timing usually drops from 12 to 14 calendar days to 7 to 9 because the factory is not pausing for one-line confirmations. More importantly, sample development often moves from three or four revision rounds to one correction round, which protects the launch date far more than negotiating a $50 sample fee.
The approved tech pack also becomes the QC contract, not just a sampling guide. A buyer cannot enforce AQL 2.5 workmanship standards or measurement claims if the file never defined crown depth tolerance at +/-0.5 cm, visor length tolerance at +/-0.3 cm, embroidery placement at +/-2 mm, or fabric shade within Delta-E 1.5 to 2.0 against the approved lab dip. Our standard practice at CrownsForge is to treat the signed tech pack as the control document for purchasing, cutting, embroidery, sewing, packing, and final inspection. That matters when production moves from one polished salesman sample to 5,000 units. The inspector needs written standards for loose threads, puckering around 3D puff embroidery, seam tape spelling, carton marks, polybag warning text, hangtag position, and barcode placement. When those details are documented once, the final dispute changes from “this is not what we wanted” to a factual check against the approved specification.
The seven sections of a complete cap tech-pack
A complete cap tech pack template needs seven controlled sections: technical drawings, finished-cap measurements, materials, color standards, decoration, construction, and labeling/packing. Put drawings first because they stop the factory from silently choosing the product category. Show front, left, right, back, top, and inside views with panel breaks, seam tape, eyelets, visor curve, closure, sweatband, top button, buckram area, and label positions called out. Name the cap plainly: low-profile 6-panel unstructured dad cap, mid-profile A-frame trucker, 5-panel camper, 6-panel structured snapback, foam-front trucker, or performance runner. Measurements must be finished-goods points of measure, not pattern dimensions: crown height, front panel height, visor length, visor width, circumference range, sweatband width, back strap length, button diameter, and closure opening. For normal bulk production, use +/-0.3 cm on fit-critical visible points and +/-0.5 cm on secondary dimensions; washed 270 gsm cotton twill, brushed canvas, 228T nylon taslon, and polyester mesh will block differently after steaming, enzyme wash, or silicone softener.
Materials and color deserve separate pages because vague fabric notes are where sample rounds get wasted. List every component: front panels, side/back panels, visor top, underbill, sweatband, seam tape, buckram, mesh, closure, eyelets, button, label backing, and patch substrate. Good material lines read like factory purchasing instructions: 100% cotton twill 270 gsm, recycled polyester mesh 120 gsm, 210 denier polyester ripstop, 228T nylon taslon with PU coating, 0.8 mm nonwoven buckram for light structure, or 1.2 mm buckram for a firmer A-frame front. Color references should be Pantone TCX or TPX, approved by lab dip or strike-off under D65 light. For retail caps, Delta-E under 1.5 is a reasonable target; for promo programs, Delta-E under 2.0 is more realistic, especially on garment-dyed cotton. State whether the color is judged before wash, after pigment dye, after enzyme wash, or after softener, because black, navy, olive, and burgundy can shift a full shade after finishing.
Decoration, construction, and packing should read as production instructions, not brand preference notes. For embroidery, specify placement from seam or visor edge, finished logo size in millimeters, stitch count range, thread such as Madeira 40 wt polyester, backing type, density limits, and process: flat embroidery, 3D puff, applique, woven patch, rubber patch, leather patch, or heat transfer. Puff work needs 2 mm or 3 mm foam called out, with small text kept flat; a dense 11,000-stitch logo can run clean on a Tajima head and still need rebalancing on Barudan or ZSK machines if the cap crown is highly curved. Construction must lock panel count, visor board thickness, visor stitch rows, seam tape width, sweatband material, eyelet type, closure, and structured versus unstructured crown. The last section covers care label, COO marking, woven label fold, hangtag stock, UPC/EAN placement, polybag warning, carton quantity, carton marks, and carton burst strength. At CrownsForge, Amazon FBA, club-store, and licensed-retail packing are checked under AQL 2.5 because label errors trigger chargebacks even when the cap passes workmanship inspection.
Tech sketches: front, side, back, optional underbrim
A production-ready cap tech pack template starts with flat orthographic sketches, not lifestyle renders. Front, left side, and back are the minimum; add an underbrim view whenever the visor underside has print, contrast fabric, edge binding, woven label, or embroidery. The drawing should lock down construction choices the sample room would otherwise guess: 5-panel camp cap versus 6-panel baseball cap, center-front seam versus seamless foam trucker front, buckram weight, eyelet count and placement, top button, pre-curve level, visor sandwich color, seam tape coverage, sweatband finish, and closure type. Call out visible stitch details on the sketch itself, especially visor rows; 6, 8, and 10 rows are standard, but that choice changes the visual density immediately. If the cap has a braid rope, pinch front, laser-cut perforation, mesh back splice, welded patch zone, or appliqué area, mark the exact location rather than leaving it to notes. The silhouette notes matter just as much as the line art because factories default to their house blocks. For a high-crown trucker, specify front foam thickness and backing, for example 3 mm EVA foam laminated to 100% polyester tricot. For a washed dad cap, state low-profile crown, soft front, and no buckram so the line does not get built on a stiffer 6-panel block. If color is relevant to the sketch, reference Pantone TCX or coated values and note whether matching tolerance is visual or instrument-based; on dyed cotton panels, Delta-E under 1.5 is realistic only on bulk-approved lab dips, not on sketch PDFs. Our standard practice is to issue vector sketches with numbered callouts tied to BOM lines, which cuts interpretation errors faster than adding more rendered images.
The biggest miss is not weak artwork; it is failing to place POM references directly on the sketch. A factory needs measurement points as much as target specs: crown depth from top button to bottom edge at center front, front panel height at seam, visor length from crown seam to bill tip at center, visor width at the widest point, back opening width at the arch, and closure strap cut length. If the style is sensitive, add left and right panel heights separately and note finished circumference by size run, such as 58 cm sample size with grading to 56 to 60 cm. On caps, a 3 mm shift changes stance, brim proportion, and how embroidery reads on-head, so tolerances must fit the material. ±3 mm on visor length and width is reasonable, ±5 mm on crown depth is common, and tighter tolerances should be reserved for stable fabrics like 14 oz cotton twill or 600D polyester, not washed chino, corduroy, or trucker mesh. The underbrim view needs more than artwork placement. State print orientation, fabric grain direction, seam-safe area, and the distance from artwork to visor seam; for embroidery near the seam, give the offset in millimeters. On Tajima, Barudan, or ZSK cap frames, a logo sitting 2 mm off center on a curved underbrim will look visibly crooked even if the file itself is correct. Also note whether the underbrim is cut self-fabric, contrast 210 gsm twill, or printed poly with laminated backing, because thickness affects turning and edge cleanliness. If there is a woven label or taping on the underside, specify finished size, fold type, and needle path so the sample room does not improvise. That is what separates a presentation drawing from a cap tech pack template that a line leader can actually build against.
Fabric and color spec: GSM, weave, Pantone references
Most cap failures start with vague fabric language, so the cap tech pack template needs mill-grade specs, not retail descriptors. "100% cotton" is useless; "100% cotton twill, 3/1 weave, 16s x 12s ring-spun yarn, 245 gsm ±10%, reactive dyed, pre-shrunk, residual shrinkage ≤3% after 30°C wash, crocking min. grade 3-4 dry/wet" is something a factory and mill can both execute. For a standard 6-panel baseball cap, 220-260 gsm cotton twill is the practical range. Below 200 gsm, crowns collapse and front embroidery tends to tunnel; above 280 gsm, seam stacking gets bulky, eyelets distort, and visor-edge binding becomes harder to keep even. On polyester programs, gsm alone is not enough. Call out denier, weave, and finish: 150D x 150D micro-twill with C0 moisture-wicking finish behaves very differently from 300D recycled polyester oxford with PU back-coating, even if the finished weight looks similar on paper.
Weave and support materials determine sewability as much as hand feel. Twill takes needle penetration better, masks needle marks, and holds dense satin or 3D puff embroidery more cleanly than plain-weave canvas. Canvas and duck can be better for screen print or woven patches because the face is flatter, but lighter constructions pucker at the center-front seam unless the panel is fused correctly. A usable spec should separate shell fabric from support materials: front panel fused with 30-40 gsm tricot or nonwoven fusible, sweatband composition such as 65/35 poly-cotton at 180-220 gsm, undervisor fabric and color, and buckram type if the style is structured. Color approval also needs hard numbers. Use Pantone FHI TCX for textiles, state the full code, require lab-dip approval, and set tolerance by program: Delta-E ≤1.5 under D65 light for branded retail, or ≤2.0 for most promo orders. If shell, top button, closure strap, undervisor, and embroidery thread must match, say so explicitly; cotton twill, polyester mesh, and Madeira or Gunold thread will never reflect color the same without a pre-production approval set.
Decoration spec: technique, placement, dimensions, color count
If the decoration page is vague, the cap tech pack template is not production-ready. Call out the exact method by position and build the embroidery like a machine operator would read it: front logo = 3D puff embroidery, 52 mm W x 31 mm H, centered on center front seam, 3 mm EVA foam, 120D/2 polyester thread, black cutaway backing, target 8,500-9,200 stitches. That is materially different from “front embroidery.” On structured 6-panel cotton twill, a puff file can run cleanly on Tajima or Barudan heads at 700-800 spm; put the same art on washed chino and the underlay, density, and pull compensation change immediately because the fabric collapses more under tension. If the file is already digitized, include the native format (.DST, .DSB, or .EMB), stitch count, and any sequencing notes for trims, color changes, or foam knockdown. Do not leave legibility decisions to the sample room. Small text under 4 mm cap height should usually be specified as flat embroidery, not puff, and satin columns under 0.8 mm wide need widening or conversion to fill to avoid closing after steaming and crown blocking. Placement must be referenced from construction points, never from an artwork mockup: front logo bottom edge 12 mm above visor seam; right-side logo 18 mm back from panel seam and 10 mm above eyelet center; back wordmark centered above rear arch, 65 mm W x 10 mm H. State left/right as worn, note whether the front art splits across the seam or sits between seams, and prohibit unapproved resizing. On low-profile unstructured caps, usable front embroidery height is often 8-15 mm less than on high-crown snapbacks, so silent scaling is how logos get distorted and approvals get delayed.
Color control needs the same discipline as fabric color control. List color count by decoration position and tie each element to a standard: Pantone Solid Coated for logo artwork, Pantone TCX for dyed fabric references, and an approved thread card for final sewout sign-off. Example: front logo = 5 polyester thread colors + 1 metallic gold; side mark = 1 color; back wordmark = 1 color. If substitution is allowed, write the rule. Metallic thread routinely frays when pushed beyond roughly 750-850 spm, so if the machine speed must be reduced or metallic replaced with polyester simulation, that approval path should already be in the spec. For licensed programs, visual match should be held to Delta-E under 2.0 against the master under D65 lighting, with the practical note that rayon sheen and metallic reflection can make spectrophotometer readings unreliable. Patches and badges need their own build sheet, not a one-line label. Specify patch type and edge finish: woven patch, 1.2 mm thickness, laser-cut edge, black merrow prohibited; or felt appliqué, 2.0 mm wool-blend felt, satin stitch attachment, 3 mm border width. For TPU or silicone badges, define hardness range if relevant, surface finish matte or gloss, and attachment method such as heat seal plus edge stitch, hidden tack, or direct molded sew channels. Printed twill patches should state base cloth weight, for example 210 gsm twill, print method, and whether a white underbase is required for dark grounds. CrownsForge’s standard practice is to freeze decoration specs before sampling and inspect logo execution to AQL 2.5, because most avoidable remakes come from missing dimensions, color references, or attachment details rather than sewing defects.
Packaging and label spec: polybag, hangtag, sticker, carton
Packaging is a fit-and-freight control point, not decoration. In a cap tech pack template, the polybag line should state finished bag size in mm, film resin, thickness, venting, recycle mark, suffocation warning, and packing orientation. A standard adult 6-panel cap normally fits a 290 x 240 mm or 300 x 250 mm LDPE bag; structured buckram fronts, rope trim, 3D puff embroidery, or high curved visors usually need 320 x 260 mm, or a gusseted bag, to stop the crown from being pressed flat. LDPE 4 at 0.04 mm is forgiving inside export cartons; OPP/CPP at 0.03 mm looks cleaner for retail but cracks more easily around visor edges during cold handling. If the market requires a suffocation warning, specify the exact wording, print color, and minimum letter height, commonly 3 mm or larger depending on bag opening. Also define whether caps ship flat, with tissue crown stuffing, or with EVA, PET, or molded paper shapers, because that can move carton cube by 15-25% and add roughly $0.03-$0.08 per cap in labor and material.
Hangtags need factory instructions, not only PDF artwork. Specify finished size, paper stock, coating, hole diameter, hole position, corner radius, barcode type, attachment method, and attachment location. A 50 x 90 mm tag on 350 gsm C1S with matte lamination behaves very differently from 300 gsm kraft; coated stock can hold Pantone Solid Coated targets within Delta-E 2.0-3.0 if the printer is controlled, while kraft will warm up whites, reds, and skin-tone graphics. For retail programs, set an ANSI/ISO barcode grade of C or better, with a 3 mm quiet zone around UPC-A, EAN-13, Code 128, or QR codes. Attachment must be locked before bulk: nylon loop through the back strap, cotton string through the sweatband label, kimble gun through a woven label, or safety pin through a defined seam allowance. Do not let the sewing line choose the pierce point; one careless kimble pin can tear seam tape, mark leather straps, or puncture raised embroidery, and it will be counted during AQL 2.5 final inspection.
Stickers and cartons belong in the same packaging block because both affect sell-through presentation and landed cost. For brim stickers, call out diameter, substrate, adhesive grade, finish, print process, and placement tolerance from visor edge and centerline; 45 mm and 50 mm round PP stickers are common, while metallic foil or holographic stickers need tighter surface testing to prevent edge lift. Low-tack adhesive is safer on suede, brushed cotton twill, pigment-dyed canvas, and enzyme-washed fabric; aggressive glue can leave oil shadowing after 30-45 days in a 35-40 C warehouse. Carton specs should state inner quantity, master quantity, corrugated grade, carton dimensions, gross-weight cap, sealing method, desiccant requirement, and shipping marks. Our standard practice at CrownsForge is usually 25 pcs per inner pack and 100 pcs per 5-layer K=K or K=A master carton, capped around 12-14 kg gross weight. Mark PO, style, color, size ratio, country of origin, carton count, and barcode format, and specify black inkjet, stencil, or adhesive carton label.
Frequently Asked Questions
Do you support sustainability certifications?
Yes. We work with GOTS organic cotton, GRS-certified recycled polyester, OEKO-TEX Standard 100 fabrics, and are BSCI and Sedex audited. Certification documentation can be provided per order.
How long does production take?
Sampling takes 7 to 12 days. Bulk production runs 20 to 30 days depending on quantity, fabric availability and decoration complexity. Inspection and packing adds another 3 to 5 days before shipment.
What is the minimum order quantity (MOQ) for custom hats?
Our standard MOQ is 100 pieces per design and color, with sampling available from 1 piece. For complex multi-color logos or premium fabric upgrades, the MOQ can be lowered with a small per-piece surcharge.
Which shipping methods do you support?
We support FOB, CIF and DDP shipping. Air express for samples and small orders, sea LCL for 100 to 500 pieces, sea FCL for 5,000+ pieces. Door-to-door DDP available for US, EU, UK, Canada and Australia.
What file format should I send for my logo?
Vector files (AI, EPS, PDF) are ideal. High-resolution PNG or JPG at 300 dpi on transparent background works as a fallback. Provide Pantone color references for accurate reproduction.
How does ordering custom patch trucker hat work?
When evaluating custom patch trucker hat, the key considerations are construction quality, decoration capability, MOQ flexibility and lead time. Technique (3D puff / flat embroidery / patch), placement (front center, side, back), dimensions (e.g. 5cm wide × 3cm tall), stitch count if known, color count and Pantone references. Without a tech-pack, your factory invents details that contradict your assumptions. With one, sampling lead time drops from 14 days to 7 and revision rounds drop from 4 to 1.
How does ordering baseball cap custom work?
When evaluating baseball cap custom, the key considerations are construction quality, decoration capability, MOQ flexibility and lead time. Without a tech-pack, your factory invents details that contradict your assumptions. With one, sampling lead time drops from 14 days to 7 and revision rounds drop from 4 to 1. Tech sketches, fabric spec, color spec, decoration spec, construction spec (panels, closure, eyelets, sweatband), packaging spec, label/hangtag spec.
How does ordering custom baseball cap motorcycle helmet work?
When evaluating custom baseball cap motorcycle helmet, the key considerations are construction quality, decoration capability, MOQ flexibility and lead time. Without a tech-pack, your factory invents details that contradict your assumptions. With one, sampling lead time drops from 14 days to 7 and revision rounds drop from 4 to 1. Tech sketches, fabric spec, color spec, decoration spec, construction spec (panels, closure, eyelets, sweatband), packaging spec, label/hangtag spec.
How does ordering custom bucket hat embroidered work?
When evaluating custom bucket hat embroidered, the key considerations are construction quality, decoration capability, MOQ flexibility and lead time. Without a tech-pack, your factory invents details that contradict your assumptions. With one, sampling lead time drops from 14 days to 7 and revision rounds drop from 4 to 1. Tech sketches, fabric spec, color spec, decoration spec, construction spec (panels, closure, eyelets, sweatband), packaging spec, label/hangtag spec.
Ready to start your custom hat project?
Send us your tech-pack, sketch or even just an inspiration photo. We will respond with a detailed quotation and digital mock-up within 24 hours.
Request a free quoteRelated guides
Custom Made Trucker Hat: The 2026 Sourcing & Manufacturing Playbook (2026 Update) (2026 Update) - 2026 Buyer's Guide - 2026 Buyer's Guide
Read article →
Bulk Trucker Hats Fabric And Trim Spec Guide for Custom Hat Buyers
Read article →
Men's Bucket Hat: A Vertical-Specific Sourcing Guide - 2026 Buyer's Guide
Read article →Sourcing custom hats does not have to be complicated. With the right manufacturing partner, clear specifications and a small upfront investment in sampling, you can launch a retail-quality product in 30 to 45 days.