Custom Logo Hats: When to Use It, Costs, and What to Ask Your Factory - Supplier Checklist (2026 Update)
Custom Logo Hats: When to Use It, Costs, and What to Ask Your Factory - Supplier Checklist (2026 Update) is one of the most-asked questions we receive from international buyers, and for good reason. With dozens of factories competing for your order and an alphabet soup of technical terms in every supplier quote, even experienced importers can feel lost. This guide consolidates what we have learned producing custom hats for clients in 40+ countries.
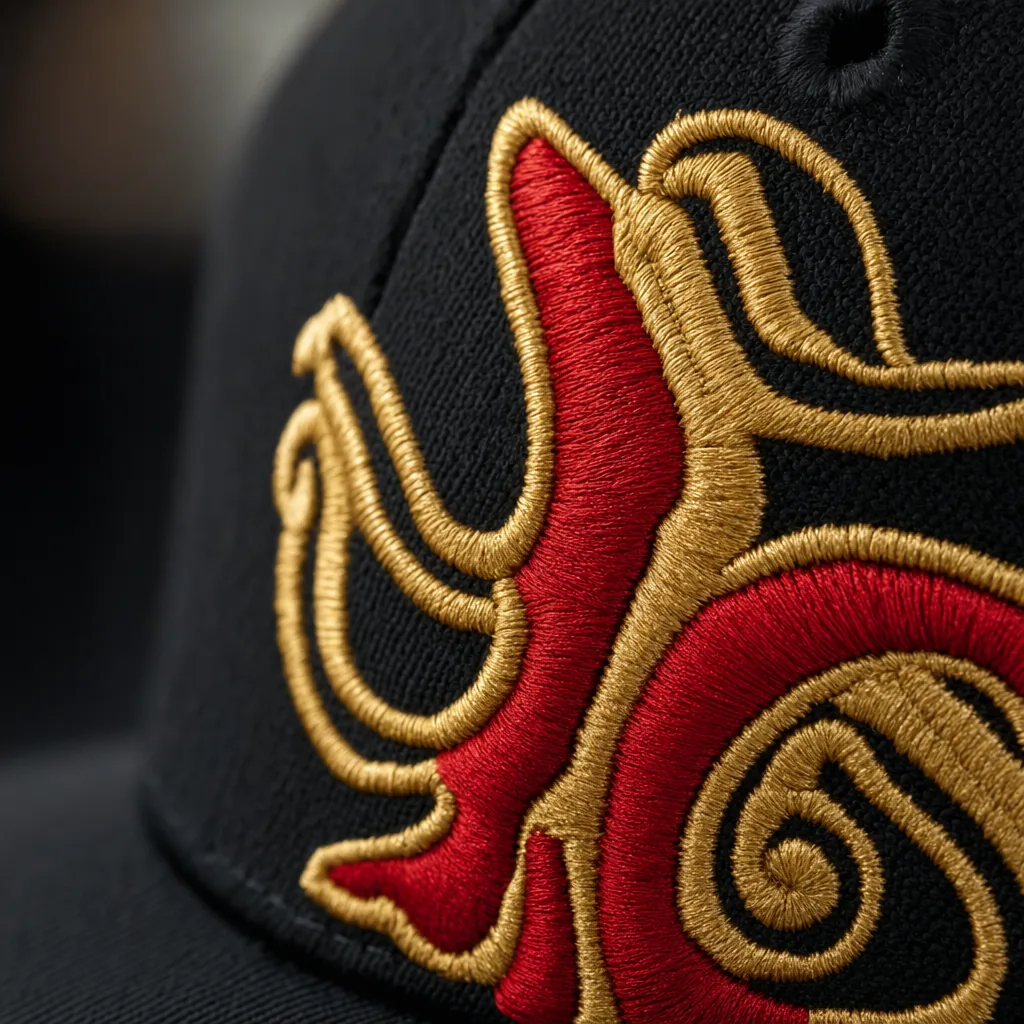
Custom Embroidered Patches
Treat embroidered patch caps as two products joined together: the patch and the hat. Most rejects I see are not dramatic failures; they are small process misses that become obvious at retail distance, such as loose jump threads, fuzzy satin borders, uneven merrow tension, glue bleed through light twill, heat-press shine, scorch marks, and patch drift after the crown is shaped. For custom logo hats, set inspection rules before the salesman sample is approved: AQL 2.5 for major defects, AQL 4.0 for minor appearance defects, left-right placement tolerance of +/-2 mm, and vertical tolerance of +/-3 mm from the approved sample. Check brand colors under a D65 light box against Pantone TCX for fabric references or Pantone Coated for printed artwork; a Delta-E above 2.0 should trigger buyer approval, not factory judgment on the sewing floor.
Use patches when the logo needs detail that direct embroidery cannot hold cleanly on a curved crown. Woven patches can usually keep lettering legible down to about 1.5 mm; standard embroidered patches need closer to 3 mm, even on well-maintained Tajima, Barudan, or ZSK heads. Ask for the stitch-count sheet, thread brand, backing material, border method, adhesive film type, and attachment settings. Typical heat-press parameters are 150-165 C for 12-18 seconds at medium pressure, but nylon, foam trucker fronts, waxed cotton, and pigment-dyed caps need separate testing because shine and migration can appear after cooling. Patches are also not automatically cheaper. At 1,000 pieces, a simple 60 mm direct embroidery logo may save USD 0.20-0.60 per cap, while chenille, felt applique, PVC-backed, or layered woven patches can add USD 0.80-2.50 depending on size, border, minimums, and attachment labor. Our standard practice at CrownsForge is to approve the loose patch first, then approve it again after it is attached to the actual crown fabric.
Custom Hat with Patch
A custom hat with patch is not one decoration method; it is a small component-production job attached to a curved textile product. For custom logo hats, the factory should quote the patch construction first: woven label at 50D or 75D yarn, embroidered patch on twill or felt, PVC/rubber with a private mold, genuine leather, PU leather, faux suede, chenille, sublimation, or metal badge. Each option changes MOQ, tooling, wash behavior, and hand feel. Woven patches can hold sharper detail than embroidery, but strokes below 0.7-0.8 mm still need artwork cleanup or they fill in. Embroidered patches should specify Tajima, Barudan, or ZSK production, thread type, stitch density, backing, and edge finish: merrowed border, satin stitch, laser cut, or heat cut. PVC and debossed leather need thickness called out, usually 1.5-2.5 mm for PVC and 1.0-1.4 mm for leather, because heavy patches can collapse an unstructured crown.
Patch placement is where attractive samples often fail in bulk production. A 60 x 45 mm woven patch works well on a structured 6-panel cap because buckram supports the front panel; the same patch on a washed dad hat may pucker unless the patch is thinner, the presser-foot pressure is adjusted, and the operator follows the crown curve instead of forcing a flat sew line. Ask for patch size in millimeters, border width, backing type, Pantone TCX or Pantone Coated references, Delta-E tolerance, thread color, attachment method, and placement tolerance. Practical bulk tolerances are +/-2 mm for placement, +/-1 mm for patch size, Delta-E under 2.0 for dyed fabric, and under 3.0 for woven thread. Our standard practice at CrownsForge is to test-sew patches on the actual cap body, because 260 gsm cotton twill, 320 gsm canvas, brushed chino, nylon taslan, and polyester performance fabric all react differently under needle tension.
For 2026 China sourcing, sewn woven and embroidered patch hats usually start at 100-300 pieces per colorway; PVC, metal badges, and debossed leather commonly need 300-500 pieces because molds, dies, or hide cutting losses have to be absorbed. A basic 6-panel cotton twill cap with a sewn woven patch typically lands at USD 3.20-5.80 FOB China at 300-1,000 pieces, depending on fabric weight, closure, sweatband, carton packing, and whether the patch is pre-made or produced inline. Embroidered patches usually add USD 0.30-1.20 over direct flat embroidery; PVC molds run about USD 40-120 per design, while metal dies can reach USD 80-180. Inspect patch hats under AQL 2.5 for crooked placement, loose edge stitching, glue bleed, curling after steam shaping, color mismatch, needle cuts in leather, and broken thread. Pull-test random pieces after finishing; if the patch edge lifts before the crown seam strains, the attachment method is wrong.
Custom Patch for Hat
Specify a custom patch for hat by construction, not by the loose word "patch." Woven patches are the right choice for fine sponsor marks, small lettering, and thin outlines because a good loom can hold 1.5-2.0 mm strokes that Tajima, Barudan, or ZSK embroidery heads will usually close up. Embroidered twill patches use 75D or 120D polyester thread on cotton twill, felt, or polyester backing, with the edge called out as heat-cut, laser-cut, satin stitch, or Merrow. Chenille needs bold artwork and generous spacing; it looks rich on varsity and streetwear caps but becomes messy below about 3 mm line width. PVC and silicone rubber suit workwear, fishing, and outdoor custom logo hats, but they add front-panel weight and can collapse soft unstructured crowns. Leather must be specified as full-grain, split leather, microfiber PU, or suede PU, with deboss, emboss, burn mark, or foil detail approved before sampling.
Quote the patch and cap as one finished assembly, because crown shape decides whether the patch sits cleanly. A 70 x 45 mm patch behaves differently on a structured 6-panel with buckram than on a washed cotton dad hat with no fuse backing. Ask the factory for patch size in millimeters, edge finish, backing material, attachment method, thread chart, Pantone TCX references, placement tolerance, and whether the front panel needs buckram, EVA, or light fusible support. Our standard practice at CrownsForge is +/-2 mm placement tolerance for front patches, D65 lightbox review, and Delta-E below 2.0 when dyed fabric and thread lots can realistically be controlled. In 2026 China factory pricing, woven patches usually add US$0.35-US$0.90 per cap, embroidered twill US$0.60-US$1.50, PVC US$0.80-US$2.20, and genuine leather US$1.20-US$3.50 before freight, duty, polybags, hangtags, or retail cartons. MOQ may be quoted at 100-300 pieces, but PVC molds, leather dies, and loom setup often make 500 pieces the more honest starting point.
Inspect patch hats before bulk sewing gets too far, because most failures cannot be repaired without leaving needle holes or glue marks. Pull samples from the first 50 pieces and check patch angle, centerline, edge lift, stitch tension, glue bleed, scorched PU, loose Merrow yarn, fuzzy embroidery, needle cuts, and color shift between thread lots. For shipment inspection, I use AQL 2.5 for major defects and AQL 4.0 for minor defects, with a tighter internal rule for crooked front patches because buyers notice a 3 mm tilt immediately on a curved crown. A patch is the better choice when custom logo hats need texture, retail shelf presence, or one logo system across washed cotton dad hats, corduroy 5-panels, foam truckers, and structured snapbacks. Direct embroidery is faster and cheaper for clean block logos, often US$0.30-US$0.90 per cap, but it struggles on rough fabric, high-pile corduroy, seams, and soft crowns where a properly backed patch hides surface variation.
Custom Patch Hat
Use a patch when the logo is too fine or too texture-sensitive for direct embroidery. On caps, serif text below about 3.0 mm letter height, counters inside letters like A/R/O, and linework under 1.0 mm will usually close up once the stitch sinks into chino twill, corduroy wale, brushed cotton, or foam-backed trucker fronts. Woven patches are the cleanest fix for detail; a good loom setup can hold roughly 0.8-1.0 mm lines with far better edge definition than a 5,000-8,000 stitch direct embroidery file. Embroidered twill or felt patches suit athletic crests and collegiate looks, while molded PVC makes sense for workwear, fishing, moto, and any program exposed to mud, sweat, or repeated wipe-downs. For custom logo hats, treat the patch as a separate engineered component, not a line item that just says “apply patch front.”
The spec has to be explicit or the factory will fill in the blanks for you. Lock the patch size in millimeters, substrate weight or thickness, border construction, backing, and placement tolerance before sampling. In practice, that means things like 65 x 50 mm finished size, 0.8 mm merrow border or laser-cut edge, 1.2-1.5 mm PVC thickness, edge stitch attachment at 6-7 SPI, and front-center placement tolerance of ±2.0 mm max. Color control should match the material: Pantone TCX for textile grounds, Pantone Solid Coated for PVC and printed badges, with an agreed Delta-E target of 1.5-2.0 against the approved standard under D65 lighting. On a 300-piece order, basic patch-based custom logo hats usually land around US$3.20-US$5.80 FOB China for embroidered patches, US$3.50-US$6.20 for woven, and US$4.20-US$7.50 for PVC, with patch setup typically US$35-US$120 depending on mold, loom file, or embroidery digitizing complexity.
Most patch-hat problems come from attachment and panel behavior, not from the artwork itself. The common failures are easy to spot on the line: patch placement drifting more than 2-3 mm off center, puckering along the border on curved 6-panel fronts, thread tails trapped under satin edge stitching, adhesive bleed from heat-seal backings, and crown collapse on unstructured caps where the patch is too stiff or oversized. That is why experienced factories approve the loose patch strike-off before cap assembly; replacing a bad patch is cheap, but scrapping a sewn crown after eyelets, tape, visor, and sweatband are in is where margin disappears. CrownsForge treats patch approval as a separate gate for that reason.
A usable RFQ should combine cap specs and patch specs on one sheet so production, purchasing, and QC are reading the same instructions. On the cap side, call out fabric content, gsm, panel construction, buckram, crown height, visor curve, sweatband, closure, and stitch count per inch. On the patch side, define finished dimensions, border width, cut method, backing, attachment method, and machine process; if embroidered, ask whether the factory is running Tajima, Barudan, or ZSK heads, because tension and underlay settings affect satin border pull and edge clean-up. For inspection, require AQL 2.5 with dedicated checkpoints for alignment, edge cleanliness, stitch security, and color variance, plus wash or abrasion testing for reflective films, metallic yarns, and PVC surfaces. If the factory has sedex-audit-cap-supplier-guide.html">BSCI 2.0 or Sedex SMETA 4-Pillar, that helps on compliance, but it does not replace a tight patch spec.
Custom Patch Hats
Patch hats solve a very specific failure mode in custom logo hats: artwork that will not survive direct embroidery on a curved crown. If your logo has text under 3 mm high, keylines under 0.4 mm, tonal gradients, or more than 7-8 clean color breaks, embroidery on a structured 6-panel or high-profile A-frame usually loses edge definition once the front buckram starts pushing the stitch path off line. A patch separates image-making from cap assembly. You build the logo on a flat substrate first—embroidered twill, woven damask, dye-sub polyester, TPU, molded PVC, wool felt, or PU—then attach it by perimeter stitch, heat activation, or a combined method. In practice, the most forgiving construction is a laser-cut or merrow-border patch stitched onto a 5-panel or 6-panel crown, because it absorbs about ±2 mm placement tolerance without looking visibly crooked and resists wash, abrasion, and edge lift better than glue-only application. The quote is not real until the patch spec is real. Buyers should lock finished size in millimeters, corner radius, border type, placement from visor seam and center front, backing, attachment method, stitch coverage, and color reference. Use Pantone Solid Coated for graphic logos; use Pantone TCX only when the starting point is a textile swatch. For embroidered patches, ask for satin border width, fill density, thread brand such as Madeira or Gunold, and whether sampling runs on Tajima, Barudan, or ZSK heads; for woven patches, confirm whether the supplier can hold 50D yarn detail for micro text. Also define whether the patch is applied pre-assembly or post-sew. On corduroy, brushed cotton twill, or foam-front truckers, post-sew attachment on a buckrammed crown is where puckering and corner lift show up, even when the flat strike-off looked clean.
MOQ and price are driven more by patch construction than by the cap blank itself. A stock chino twill cap with a 60-70 mm embroidered or woven patch usually starts around 144 pieces per colorway, but once you add custom fabric, custom closure, printed seam tape, woven labels, and private packaging, the working MOQ is typically 300-500 pieces. In current FOB China buying ranges, a basic patch cap at 300 pieces usually lands around $2.20-$3.60 each. Leather, TPU, and molded rubber patch versions more often sit in the $3.80-$6.50 range because you are paying for dies or molds, slower attachment, higher reject rates, and tighter appearance standards on edge finish and placement. That is why physical strike-offs matter more on patch hats than on plain embroidery hats. Inspection points are predictable and should be written into the PO instead of argued at final inspection. The repeat failures are off-center placement beyond ±2 mm, loose perimeter stitching, heat-press corner lift, merrow fray, glue bleed on light fabrics, and needle marking on PU or suede. AQL 2.5 is a reasonable final standard, but visual inspection alone is not enough. Pull-test all four corners, verify bulk color to the approved standard under D65 lighting, and set a commercially acceptable Delta-E tolerance before production starts. Also check patch thickness against crown shape retention after carton compression. Thick PVC and multi-layer leather patches can flatten the front panel in transit, so a patch may protect artwork detail while still damaging presentation if patch making, cap sewing, and packing are not controlled as one process.
Hat Patch Custom
Lock the patch type before sampling, not after artwork approval, because it changes unit cost, setup, sew sequence, and failure rate on the line. For custom logo hats, the real factory choices are embroidered patch, woven patch, molded PVC, printed twill, and sublimated polyester. Each behaves differently once it is mounted on a curved crown. Embroidered patches deliver the classic raised look, but text under 4.5 mm, lines below 0.8 mm, and crowded negative space will close up on Tajima or Barudan heads unless the digitizer cuts stitch density, changes underlay, and simplifies the art. Woven patches hold finer detail because the image is formed by yarn construction rather than satin stitches, so they are usually the safer call for small type, crest details, or streetwear labels with layered outlines. PVC works well for bold 2D or 3D marks, but it needs a mold, carries a thicker edge, and can bridge or lift on soft unstructured crowns where the front panel has no buckram support.
Treat the patch as its own component on the PO. List finished size in millimeters, border type, backing, attachment method, Pantone TCX or TPX references, and an accepted color tolerance; Delta-E 2.0 to 3.0 against the approved sample is a normal standard. If the patch ground is white, call out optical white yarn versus stock off-white twill, because under retail LED lighting the mismatch is obvious. Also specify the hat body the patch will sit on: 280 gsm cotton twill, 320 gsm washed canvas, 600D recycled polyester, foam trucker front, structured buckram crown, or a soft six-panel dad cap. Merrow borders are durable but bulky on low-profile caps; laser-cut edges look cleaner but need proper satin coverage to avoid fray. Heat-film mounting is fast for flat panels, yet on curved fronts it can bubble or print through if press temperature and dwell time are wrong, so full sew-down is still the safest method for washed cotton and low-profile silhouettes. Our standard practice is to approve patch placement on a worn sample, not a flat table sample, because the crown shape changes how the edge sits.
China pricing for a six-panel cotton twill patch hat usually lands around $2.10 to $3.40 FOB at 300 pieces, depending on fabric, closure, patch size, decoration method, and packing. A 55 to 70 mm embroidered patch typically adds $0.35 to $0.75 per cap; woven patches are often $0.15 to $0.35 lower than dense embroidery at the same footprint. PVC normally adds $0.40 to $0.90 per piece plus a one-time mold charge of about $80 to $180, depending on cavity count and relief depth. Those numbers move fast if you add retail polybags, size stickers, care labels, or a premium snapback closure. Buyers who only compare patch cost usually miss the larger variable, which is attachment labor and reject risk.
Inspect the mounted patch, not the loose patch in a separate bag. Set placement tolerance at plus or minus 2 mm, reject visible tilt above 3 mm, and write clear defect rules: no exposed adhesive, no skipped perimeter stitches, no edge lifting, no melted heat-film bleed, and no thread tails longer than 3 mm. Final inspection at AQL 2.5 is standard, but it is too late to catch a bad setup if the line has already run 1,000 caps with the wrong tension or press temperature. Ask for first-article approval and in-line checks after the first 20 to 30 pieces. If the factory has BSCI 2.0 or Sedex SMETA 4-Pillar records, that helps on compliance, but it does not replace process control. The practical checkpoint is simple: confirm patch angle, crown conformity, and edge finish on the actual cap model before bulk sewing starts.
Working with CrownsForge for custom logo hats programs
Sampling discipline is what makes custom logo hats scalable instead of expensive to manage. The real decision point is not MOQ on a sales sheet; it is construction risk. A clean 6-panel unstructured cap in stock 180 to 220 gsm cotton twill can often start at 48 to 72 pieces per colorway, but a structured snapback in 300 gsm brushed canvas with buckram, rope, contrast underbill, and 3D puff embroidery is usually safer at 144 pieces or more because crown shape, thread coverage, and brim balance are less forgiving. At CrownsForge, a first prototype typically takes 5 to 7 working days once vector art, Pantone TCX references, crown height, visor curve, closure type, and size specs are locked. Add 2 to 4 working days for molded silicone patches, laser-cut suede, raised PVC or rubber badges, or oversized merrowed emblems because tooling, edge finish, and attachment behavior need to be proven before bulk sewing. Keep the first sample deliberately narrow: one fabric, one closure, one decoration method, one sweatband, one label package. That is how you isolate the variables that actually cause revisions, such as front-panel buckling, stitch density that is too aggressive for the fabric, visor torque, or a hand feel that changes after the logo goes on. Decoration should follow logo geometry, not a PDF mockup. On Tajima, Barudan, or ZSK heads, flat and 3D embroidery work well on firm front panels, but text below roughly 4 mm high, thin serifs, and tight negative space usually reproduce more cleanly as woven patches, sublimated twill, TPU badges, or heat-transfer labels. For patch-based custom logo hats, specify thickness in millimeters, backing, border style, thread color, and placement tolerance; +/-3 mm is standard production control, while premium retail programs often hold +/-2 mm.
The approved sample is only half the job; the factory workflow is what protects the order when volume moves from 300 pieces to 3,000. Ask for current BSCI 2.0 or Sedex SMETA 4-Pillar audit status, plus needle policy, broken-needle logs, metal detection records where applicable, and whether inline and final inspections are run to AQL 2.5 for major defects and AQL 4.0 for minor defects. For licensed sports, campus retail, or chain-store programs, many buyers push tighter standards on logo placement, panel symmetry, and carton assortment accuracy. Fabric shade control needs to happen before cutting, not after sewing. If crown fabric, visor, top button, closure tab, and patch ground color drift too far from the approved Pantone TCX or lab-dip standard, the cap will read mismatched at shelf distance even if each component is individually within tolerance; in practice, many buyers try to keep visible shade variance within a Delta-E range that the eye will not catch under store lighting. The other place factories fail is documentation. A reliable custom logo hats program should have a clear chain: approved tech pack, digitizing proof with stitch count, pre-production sample if the construction is new, inline inspection notes, finished-goods photos, carton marks, polybag spec, and shipping terms defined as FOB Ningbo, FOB Shanghai, or DDP with duty assumptions spelled out. Costs also need to be broken down honestly. A standard embroidery setup may add $20 to $50 per logo file, while molded patch tooling can run $80 to $150 and unit decoration cost can range from about $0.35 for a woven patch to $1.20 or more for molded silicone, depending on size and attachment method. If a supplier cannot show that system clearly on a small run, the risk compounds fast when the program scales.
Frequently Asked Questions
Can I order a sample before bulk production?
Yes. We strongly recommend approving a pre-production sample before mass production. Samples are charged at 35 to 60 USD each plus express shipping, fully refundable against confirmed bulk orders over 500 pieces.
What logo decoration techniques do you offer?
3D puff embroidery, flat embroidery, woven patch, leather patch, PVC patch, screen printing, sublimation, applique and laser etching, all in-house with no subcontracting.
What is the minimum order quantity (MOQ) for custom hats?
Our standard MOQ is 100 pieces per design and color, with sampling available from 1 piece. For complex multi-color logos or premium fabric upgrades, the MOQ can be lowered with a small per-piece surcharge.
What file format should I send for my logo?
Vector files (AI, EPS, PDF) are ideal. High-resolution PNG or JPG at 300 dpi on transparent background works as a fallback. Provide Pantone color references for accurate reproduction.
Do you support sustainability certifications?
Yes. We work with GOTS organic cotton, GRS-certified recycled polyester, OEKO-TEX Standard 100 fabrics, and are BSCI and Sedex audited. Certification documentation can be provided per order.
How does ordering custom embroidered logo hat work?
When evaluating custom embroidered logo hat, the key considerations are construction quality, decoration capability, MOQ flexibility and lead time. Cover everything buyers ask about custom embroidered patches: how it's manufactured, what specs to request from a factory, typical MOQ and pricing, common quality issues to inspect for, and how this ties back to the broader custom logo hats sourcing decision. Cover everything buyers ask about custom hat with patch: how it's manufactured, what specs to request from a…
How does ordering custom hat leather patch work?
When evaluating custom hat leather patch, the key considerations are construction quality, decoration capability, MOQ flexibility and lead time. Cover everything buyers ask about custom hat with patch: how it's manufactured, what specs to request from a factory, typical MOQ and pricing, common quality issues to inspect for, and how this ties back to the broader custom logo hats sourcing decision. Cover everything buyers ask about custom patch for hat: how it's manufactured, what specs to request from a factory,…
How does ordering custom embroidered baseball hats work?
When evaluating custom embroidered baseball hats, the key considerations are construction quality, decoration capability, MOQ flexibility and lead time. Cover everything buyers ask about custom embroidered patches: how it's manufactured, what specs to request from a factory, typical MOQ and pricing, common quality issues to inspect for, and how this ties back to the broader custom logo hats sourcing decision. Cover everything buyers ask about custom hat with patch: how it's manufactured, what specs to request from a…
What's the MOQ for custom embroidered patches no minimum?
When evaluating custom embroidered patches no minimum, the key considerations are construction quality, decoration capability, MOQ flexibility and lead time. Cover everything buyers ask about custom embroidered patches: how it's manufactured, what specs to request from a factory, typical MOQ and pricing, common quality issues to inspect for, and how this ties back to the broader custom logo hats sourcing decision. Cover everything buyers ask about custom hat with patch: how it's manufactured, what specs to request from a…
Need a low-MOQ test order?
We help emerging brands launch with as few as 100 pieces. Premium fabric, in-house embroidery, retail-ready packaging.
Start a small orderRelated guides
Promotional Hat Pricing Tiers: What $2, $4 and $7 Each Get You (2026 Update)
Read article →
Merino Wool Beanie: Properties, Costs and How to Spec It Right - Cost & MOQ Breakdown - Supplier Checklist
Read article →
Refreshing a Hat Collection: A Repeat-Order Playbook for Established Brands - Supplier Checklist
Read article →We hope this guide demystifies custom logo hats: when to use it, costs, and what to ask your factory - supplier checklist (2026 update) and helps you move forward with confidence. If you have questions specific to your project, our English-speaking sales engineers are one message away.