What's in a Cap Tech-Pack: A Specification Template for Buyers - Cost & MOQ Breakdown - 2026 Buyer's Guide
What's in a Cap Tech-Pack: A Specification Template for Buyers - Cost & MOQ Breakdown - 2026 Buyer's Guide is one of the most-asked questions we receive from international buyers, and for good reason. With dozens of factories competing for your order and an alphabet soup of technical terms in every supplier quote, even experienced importers can feel lost. This guide consolidates what we have learned producing custom hats for clients in 40+ countries.
Why a tech-pack saves you weeks of email back-and-forth
The biggest schedule leak in cap development is not sewing complexity; it is undocumented assumptions. When a buyer sends only artwork and reference photos, the factory still has to infer crown profile, front rise, buckram stiffness, visor board thickness, eyelet spacing, closure type, sweatband material, seam-tape print, and even whether the top button should match the shell, underbill, or trim. That guesswork turns the first proto into a translation exercise. A solid cap tech pack template replaces adjectives with measurable specs: panel-by-panel construction, fabric content and weight in gsm, Pantone TCX or PMS references with acceptable Delta-E, visor stitch-row count, embroidery size in mm, target stitch count, label positions, master carton pack-out, and sewing tolerances such as ±3 mm on visor length or ±5 mm on crown height. On the factory floor, that usually cuts first-sample lead time from 12-14 calendar days to 6-8 because pattern making, fabric booking, digitizing, and cutting can move in parallel instead of waiting for clarification emails across three time zones.
Most sample revisions come from ambiguity, not lack of capability. "Premium structured snapback" is useless as a production spec: one buyer means a high-profile 6-panel with 1.8-2.0 mm PE visor board, hard buckram, and a flat bill; another means a softer 5-panel with light buckram, a 7 cm visor, and slight pre-curve. A usable cap tech pack template locks that down with numbers: front crown height 11 cm, visor length 7 cm, 6 rows of visor stitching at 5 mm pitch, 3 mm sandwich piping, 12 mm seam tape with 1-color repeat print, snap closure in Black PMS C, and shell fabric in 260 gsm brushed cotton twill. Embroidery is where vague instructions get expensive fast. On Tajima, Barudan, or ZSK cap frames, a 3D puff logo with 2.5-3.0 mm satin columns, proper underlay, and controlled pull compensation needs to be specified up front or you get edge blowout, pinching, and warped panels. When those rules are written into the pack, revision rounds usually drop from 3-4 to 1-2, and comments move from construction failures to minor fit or hand-feel adjustments.
The commercial benefit is just as real as the technical one. Missing specs slow quoting, fabric booking, MOQ planning, and QC setup. If the pack states 300 pcs per color in 260 gsm twill, flat plus 3D puff embroidery, 100% polyester woven label, and a 22 x 22 x 58 cm export carton packed 144 pcs, the merchandiser can calculate trim usage accurately, the fabric buyer can check dye-lot minimums, and QA can define checkpoints under AQL 2.5 before bulk starts. If those details are absent, many factories quote against stock shell fabric and standard flat embroidery, then reprice once they learn you wanted 380 gsm wool blend, printed underbill, satin seam tape, and a custom zinc-alloy clasp. That is how a $3.20 FOB quote becomes $4.10, and how a 28-day ex-factory plan turns into 40 days after re-approval. At CrownsForge, the tech pack is treated as the single source of truth because undocumented preferences always reappear later as remake cost, airfreight, or preventable disputes over what was supposedly implied.
The seven sections of a complete cap tech-pack
A factory-ready cap tech pack template should cover seven control points, because those are the same seven checkpoints used in quoting, sample development, inline QC, and final audit: technical sketch, material specification, color standard, decoration spec, construction BOM, packaging, and labels/hangtags. The sketch page carries more risk than buyers realize. It needs front, back, left, right, top, underside visor, and inside views, plus dimensions tied to fixed landmarks: crown height, visor length and width, front panel width, eyelet pitch, button diameter, sweatband width, closure opening, and logo placement from center front or seam line. For a 5-panel foam trucker, write it like a pattern maker would: 11.5 cm crown height, 7.0 cm visor length, 18.0 cm front panel width, 3 mm topstitch margin, and 58 cm finished circumference on the base size. If the brim curve has to match an existing retail cap, state the arc height at center or provide a sealed counter-sample. When those anchors are missing, the sample room guesses, and that usually costs one extra revision, $35 to $80 in remake charges, and 5 to 7 calendar days.
Materials and color are where weak files collapse. A proper cap tech pack template should list every shell and secondary material by composition, construction, and weight: 100% cotton twill 270 gsm, recycled polyester taslan 120 gsm, nylon ripstop 70D, trucker mesh 140 gsm, brushed chino with 10x10 yarn count, or suede-look microfiber at 0.8 mm thickness. Add finishing requirements that change hand feel, shrinkage, or embroidery performance, such as C0 water-repellent, enzyme wash, peach finish, anti-wicking backing under logo zones, or UPF 50+ treatment. Color should never be written as “navy” or “bone.” Use Pantone TCX for dyed textiles and Pantone Coated for printed components, then define tolerance: Delta-E under 1.0 for logos, patches, and molded trims; under 1.5 to 2.0 for fabric lab dips depending on fiber and dye method. Our standard practice is to approve lab dips or strike-offs under D65 and TL84 light boxes before bulk, because reactive-dyed cotton, sublimated polyester, and pigment-washed canvas can all pass in daylight and fail in store lighting.
Decoration, construction, packaging, and trims are what make the file executable instead of merely descriptive. For each logo, specify method, size, placement, and build-up: flat embroidery, 3D puff with 2 to 3 mm EVA, woven patch with merrow edge, TPU heat-transfer badge, screen print, chenille, or sublimated brim sandwich. Include dimensions in millimeters and machine-relevant limits: minimum text height 4 mm for clean satin readability, satin column width at least 1.2 mm, max stitch density around 0.40 to 0.45 mm for most cotton twills, and total stitch count if the front panel is prone to puckering on Tajima, Barudan, or ZSK heads. Then lock the BOM: 6-panel structured cap, 180 gsm front buckram, 2.0 mm PE visor board, 4 sewn eyelets, 32 mm moisture-wicking sweatband, 8-row visor stitching, snapback in Pantone-matched PP, seam tape print, top button diameter, and closure opening tolerance. Finish with packaging and compliance: 25 pcs per inner, no individual polybag if retailer policy bans it, crown support insert, export carton dimensions, barcode symbology, country-of-origin label, fiber-content care label, and hangtag stock if FSC-certified paper is required. Those are the details that let a cap tech pack template survive AQL 2.5 final inspection instead of falling apart at pre-production.
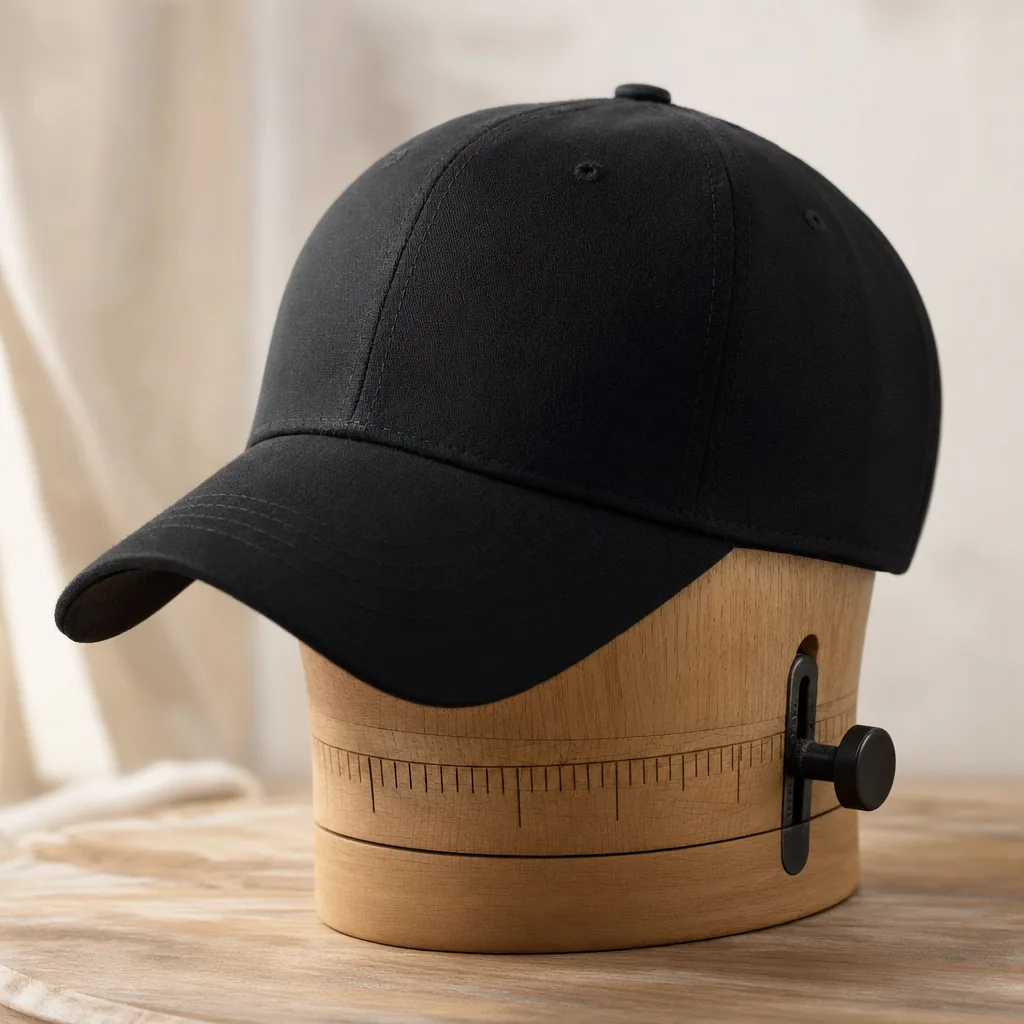
Tech sketches: front, side, back, optional underbrim
Sampling mistakes usually start with bad drawings, not bad sewing. A cap tech pack template should use vector line art with construction points the pattern maker can actually build from: center-front seam, panel splits, crown height, visor seam, back opening geometry, eyelet placement, top button diameter, and visible stitch paths. Four views are the minimum for a custom cap: front, left side, back, and an underbrim view any time the visor underside is not plain self-fabric. If you have sandwich piping, contrast underbrim, woven label at the visor edge, taping callouts, or embroidery under the bill, that fourth view stops the sample room from falling back to house standard. On the factory floor, "house standard" can move visor length, crown pitch, or back arch by 5-8 mm and still pass internally, but it will change silhouette, forehead presentation, and logo posture enough for a buyer to reject the sample. The sketch only becomes usable when dimensions and operations sit on the drawing itself. Call out the cap category first—6-panel structured, 5-panel foam trucker, unstructured dad cap, camper—then specify seam construction such as single-needle topstitch, 2-needle lap seam, 6-row visor stitch, or 8-row visor stitch on heavier twill. Put real dimensions on the relevant view: visor length 70-75 mm from seam to tip, visor width 180-190 mm at widest point, crown depth 165-180 mm, front panel width, back opening width, strap length, and closure overlap. Tolerances should be written, not assumed: typically ±3 mm on visor length, ±3 mm on strap width, and ±5 mm on crown depth. Avoid vague language like "low profile" or "slightly curved brim" unless you provide a side profile or 1:1 visor outline. If front embroidery crosses a seam, locate it from seam references; once buckram stiffness, visor curvature, and hoop tension hit a Tajima or Barudan head, 2 mm of registration drift becomes visible fast.
The underbrim is only optional when absolutely nothing changes below the visor. If the style uses sublimated poly underbrim, 260 gsm cotton twill contrast fabric, terry sweat-facing, printed seam tape, or a woven label at the sweatband join, isolate that zone in its own sketch and note fabric code, grain direction, print orientation to center front, and color standard. For dyed fabric matching, specify the approved standard as Pantone TCX or a signed swatch under D65 lighting; for printed underbrims, asking for Delta-E under 1.5 is reasonable if the design includes skin tones, brand reds, or tonal camouflage. That one drawing also needs visor board spec if relevant—PE board, recycled board, or paperboard—because underbrim appearance changes when the bill is pressed over different cores. The back view deserves the same rigor because fit complaints often trace there. Draft the closure type and hardware clearly: 7-hole PVC snap, self-fabric strap with antique brass tri-glide, hook-and-loop, fitted back seam, or elastic tuck strap. Then add measurable details: snap row count, strap width at 18-22 mm, tuck-in slot width, back arch height, rear eyelet position, woven flag label placement, and button-to-opening distance. Our standard practice is to treat the back view as a control point during first proto review, because missing those notes can burn one or two extra sample rounds. In China, that usually means $80-180 per revision sample plus 7-10 calendar days, and longer if custom hardware or underbrim printing needs to be remade.
Fabric and color spec: GSM, weave, Pantone references
Fabric mistakes are expensive because they usually show up after cutting, embroidery, or washing, when salvage is poor and rework turns into write-offs. A usable cap tech pack template should read like a mill purchase spec, not a mood-board note. “100% cotton twill” is not enough; specify fiber content, weave, weight, finish, width, and any backing that affects sewing or cap shape. For example: “100% cotton 3/1 twill, 280 gsm +/-5%, reactive-dyed, sanforized, 57/58 in width.” For unstructured dad caps, 220-240 gsm brushed cotton twill or enzyme-washed chino gives a softer hand and less front-panel memory. For structured 6-panels with raised embroidery, 260-320 gsm twill paired with 0.35-0.50 mm fused buckram holds profile better during Tajima or Barudan runs and reduces panel distortion around the logo field. Performance styles need even tighter language because “poly” can mean ten fabrics with different shrinkage, needle drag, and print behavior. Call out denier, construction, and finish: “100% recycled polyester taslon, 110 gsm, 75D x 150D, C0 DWR” or “92/8 polyester-spandex micro ripstop, 140 gsm, 4-way stretch, moisture-wicking finish.” If you want a trucker front, specify the foam and lamination, not just “foam cap”: 3 mm EVA-backed polyester jersey behaves differently from softer PU foam under embroidery. Also note whether the shell is yarn-dyed, piece-dyed, peach-finished, enzyme-washed, PU-coated, or anti-wicking treated. Those choices routinely move cost by $0.08-$0.35 per cap and can change seam puckering, crown collapse, and stitch registration enough to matter at bulk production.
Color control is where most headwear specs fall apart. “Black,” “navy,” and “cream” are not standards; they are future arguments. A solid cap tech pack template should name a Pantone Textile reference for every visible component, usually Pantone TCX or TPG, and tie approval to a physical standard rather than a screen proof. Reactive-dyed cotton, brushed finishes, and garment washing can all shift shade from the original lab dip, so list crown, visor top, underbill, top button, eyelets, seam tape, sweatband, closure strap, and embroidery thread separately when they differ. For dyed fabric, set a measurable tolerance such as Delta-E 1.5 max to the approved lab dip under D65 lighting, with both buyer and factory keeping sealed swatches for bulk comparison. MOQ reality also belongs in the fabric and color section, otherwise the spec looks precise but cannot be sourced at the quoted price. Stock cotton twill in common shades may work from 144 pieces with no fabric surcharge, but custom dyeing often needs 300-500 meters per color and can add roughly $0.25-$0.60 per cap on smaller runs. Specialty materials such as 420 gsm wool-poly melton, 14-wale corduroy, reflective ripstop, or GRS-certified recycled nylon usually carry higher MOQs and 7-21 extra days if the mill has to match a non-stock Pantone chip. Our standard practice is to lock material, weave, gsm tolerance, finish, Pantone reference, and approval method—lab dip, strike-off, or bulk swatch—before costing. Add colorfastness to rubbing, dimensional stability, and lot-to-lot shade continuity if you need consistent AQL 2.5 results across repeat orders.
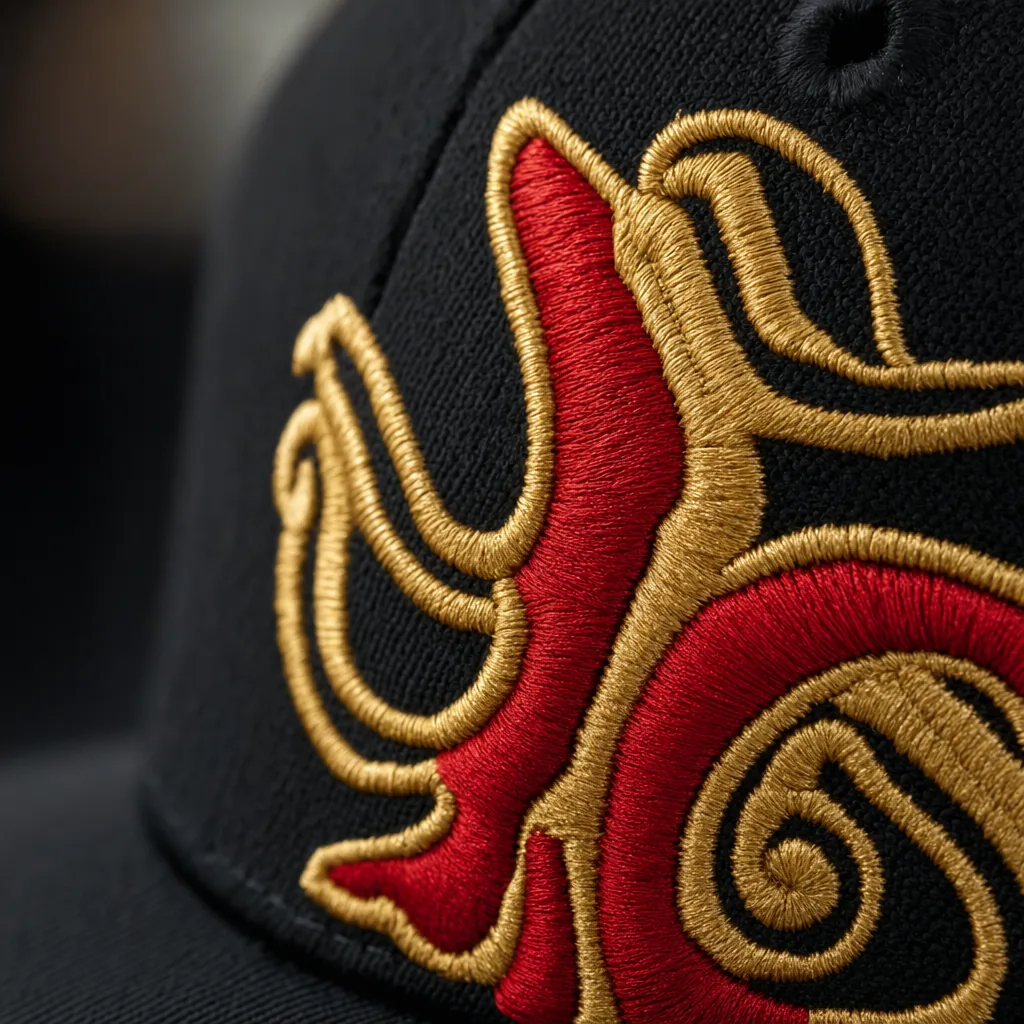
Decoration spec: technique, placement, dimensions, color count
Most decoration failures come from ambiguity, not sewing quality. In a cap tech pack template, every logo needs its own line item with four non-negotiables: technique, placement, finished dimensions, and color references. “Front embroidery” is not a spec. “Front center, 3D puff embroidery, 50 mm W x 30 mm H, centered on CF seam, bottom edge 12 mm above visor seam, 3 colors, Pantone 19-4052 TCX / 11-0601 TCX / 186 C, target 8,500-10,000 stitches” is usable by a sample room and digitizer without guesswork. That single line tells the embroidery team how to plan underlay, pull compensation, run order, satin width, and foam coverage on Tajima, Barudan, or ZSK heads. If size is missing, one factory may scale the art to 58 mm for shelf impact while another cuts it to 45 mm to avoid thread breaks and excessive density; both can still claim they followed the artwork. Placement should always reference fixed construction landmarks, never a rendered mockup. Measure from the visor seam, center front seam, side seam, eyelet line, or back opening, and state method-specific tolerance: embroidery is typically ±2 mm, while heat-applied TPU, silicone transfer, or patch placement is usually ±3 mm unless a hard jig is used. For 6-panel caps, any logo crossing the CF seam needs a seam-split note so letters do not collapse into the fold. Side embroidery generally runs safest at 35-45 mm wide because crown curvature and seam bulk reduce registration, especially with puff. Back-arch text above a snapback closure is usually limited to 90 mm W x 12 mm H; on a dad cap with a tuck strap, practical width is closer to 70-75 mm.
Technique affects both manufacturability and cost, so each decoration position should be broken out separately rather than grouped as “all embroidery.” Front-center 3D puff usually uses 2 mm or 3 mm EVA foam and works best on blocky artwork with open counters. Satin columns under roughly 1.2 mm tend to cut foam, sink, or expose edges at corners, so those details should be converted to flat embroidery, woven patch, or printed twill before sampling. Fabric weight and structure matter just as much as the art file: a 15,000-stitch fill may run clean on a 300 gsm wool blend with fused buckram, but the same file on 120 gsm mechanical-stretch polyester will often pucker unless speed drops from around 850 spm to 650-700 spm and the backing changes to cut-away or laminated support. Color count belongs in the decoration spec because it directly affects quoting, line efficiency, and shade control. Do not write “red, white, blue.” Specify Pantone TCX when matching thread on textile surfaces and Pantone Solid Coated when the decoration is ink, silicone, or a printed patch. If the front logo is 4-color flat embroidery and the side hit is 1-color, list them separately; thread changes, trims, and machine downtime on a 12-head line are real costs. As a working China benchmark, flat embroidery typically adds $0.35-$0.90 per location, while 3D puff front logos run closer to $0.55-$1.20 because of slower machine speed and higher reject risk. If color is brand-critical, note an acceptable Delta-E of 1.5-2.0 against approved thread cards or lab dips and require a thread pull card before strike-off approval.
Packaging and label spec: polybag, hangtag, sticker, carton
Packaging is where a cap tech pack template stops the factory from making low-cost substitutions that create chargebacks later. “1 pc/polybag” is not a spec. For adult caps, call out the exact bag size, resin, thickness, venting, and flap position: 280 x 320 mm or 300 x 350 mm LDPE, 30–40 micron, 2 x 6 mm vent holes, self-adhesive flap outside the bag body so glue never touches the crown or visor. Structured 6-panel, high-crown A-frame, rope caps, and pom beanies usually need one size up to prevent front-panel crush and brim deformation under carton compression. If you want recyclable film, write PE-LD 04 or PP 05 directly into the pack spec; otherwise many suppliers will switch by resin spot price. If your destination requires a suffocation warning, multilingual legal text, FSC insert, or EPR/PPWR declaration, tie it to an artwork version and placement in the tech pack, not a WhatsApp note that gets lost before bulk packing.
Hangtags and stickers create a surprising amount of rework because packing lines only follow what is printed on the spec sheet. State hangtag size, paper stock, finish, print reference, barcode direction, and attachment point. A practical standard is 50 x 90 mm or 60 x 100 mm on 300 gsm SBS or C2S board, matte lamination, Pantone Coated references, and print tolerance capped at Delta-E 3.0 on key brand colors. Attachment method affects both appearance and cost: nylon swift tack through the top button area is cheapest, while cotton string with a crimped metal seal typically adds $0.03–0.06 per cap. On wool blend, suede visor, or premium brushed twill, routing the tag through the sweatband label avoids visible needle marks.
Cartons deserve the same level of detail because freight damage usually starts with overpacking. For structured crowns, 24 or 36 pcs per export carton is safer than 48 pcs; once gross weight goes past about 12–14 kg, carton collapse and visor pressure rise fast in sea freight stacking. Specify 5-ply export corrugate as the minimum, and for long-haul FOB shipments ask for verified ECT/BCT performance, such as 32 ECT or equivalent board strength, rather than vague “strong carton” wording. Add outer carton dimensions, net/gross weight, inner arrangement, and shipping marks line by line: PO, style, color, carton count, country of origin, and made-for address if required. Our standard practice is to verify packed dimensions, gross weight, barcode scanability, and assortment accuracy during final inspection to AQL 2.5, because a perfect cap can still become a claim if the carton spec is sloppy.
Frequently Asked Questions
What file format should I send for my logo?
Vector files (AI, EPS, PDF) are ideal. High-resolution PNG or JPG at 300 dpi on transparent background works as a fallback. Provide Pantone color references for accurate reproduction.
Can I order a sample before bulk production?
Yes. We strongly recommend approving a pre-production sample before mass production. Samples are charged at 35 to 60 USD each plus express shipping, fully refundable against confirmed bulk orders over 500 pieces.
How long does production take?
Sampling takes 7 to 12 days. Bulk production runs 20 to 30 days depending on quantity, fabric availability and decoration complexity. Inspection and packing adds another 3 to 5 days before shipment.
Which shipping methods do you support?
We support FOB, CIF and DDP shipping. Air express for samples and small orders, sea LCL for 100 to 500 pieces, sea FCL for 5,000+ pieces. Door-to-door DDP available for US, EU, UK, Canada and Australia.
What logo decoration techniques do you offer?
3D puff embroidery, flat embroidery, woven patch, leather patch, PVC patch, screen printing, sublimation, applique and laser etching, all in-house with no subcontracting.
How does ordering custom patch trucker hat work?
When evaluating custom patch trucker hat, the key considerations are construction quality, decoration capability, MOQ flexibility and lead time. Technique (3D puff / flat embroidery / patch), placement (front center, side, back), dimensions (e.g. 5cm wide × 3cm tall), stitch count if known, color count and Pantone references. Without a tech-pack, your factory invents details that contradict your assumptions. With one, sampling lead time drops from 14 days to 7 and revision rounds drop from 4 to 1.
How does ordering baseball cap custom work?
When evaluating baseball cap custom, the key considerations are construction quality, decoration capability, MOQ flexibility and lead time. Without a tech-pack, your factory invents details that contradict your assumptions. With one, sampling lead time drops from 14 days to 7 and revision rounds drop from 4 to 1. Tech sketches, fabric spec, color spec, decoration spec, construction spec (panels, closure, eyelets, sweatband), packaging spec, label/hangtag spec.
How does ordering custom baseball cap motorcycle helmet work?
When evaluating custom baseball cap motorcycle helmet, the key considerations are construction quality, decoration capability, MOQ flexibility and lead time. Without a tech-pack, your factory invents details that contradict your assumptions. With one, sampling lead time drops from 14 days to 7 and revision rounds drop from 4 to 1. Tech sketches, fabric spec, color spec, decoration spec, construction spec (panels, closure, eyelets, sweatband), packaging spec, label/hangtag spec.
How does ordering custom bucket hat embroidered work?
When evaluating custom bucket hat embroidered, the key considerations are construction quality, decoration capability, MOQ flexibility and lead time. Without a tech-pack, your factory invents details that contradict your assumptions. With one, sampling lead time drops from 14 days to 7 and revision rounds drop from 4 to 1. Tech sketches, fabric spec, color spec, decoration spec, construction spec (panels, closure, eyelets, sweatband), packaging spec, label/hangtag spec.
Need a low-MOQ test order?
We help emerging brands launch with as few as 100 pieces. Premium fabric, in-house embroidery, retail-ready packaging.
Start a small orderRelated guides
Custom Logo Hats: When to Use It, Costs, and What to Ask Your Factory (2026 Update)
Read article →
Custom Hat Embroidery: The 2026 Sourcing & Manufacturing Playbook
Read article →
Festival Bucket Hats Reorder Planning Guide for Custom Hat Buyers
Read article →We hope this guide demystifies what's in a cap tech-pack: a specification template for buyers - cost & moq breakdown - 2026 buyer's guide and helps you move forward with confidence. If you have questions specific to your project, our English-speaking sales engineers are one message away.