What's in a Cap Tech-Pack: A Specification Template for Buyers (2026 Update) - Supplier Checklist
What's in a Cap Tech-Pack: A Specification Template for Buyers (2026 Update) - Supplier Checklist is one of the most-asked questions we receive from international buyers, and for good reason. With dozens of factories competing for your order and an alphabet soup of technical terms in every supplier quote, even experienced importers can feel lost. This guide consolidates what we have learned producing custom hats for clients in 40+ countries.
Why a tech-pack saves you weeks of email back-and-forth
Blank space in a hat order is never neutral; the sample room fills it with factory defaults. If a PO says “black 6-panel cap with raised embroidery,” someone still chooses the crown profile, buckram hardness, visor curve, seam tape width, sweatband fabric, eyelet type, top button color, thread finish, embroidery backing, and carton pack. Those choices may fit Yiwu commodity production, but they may be wrong for a streetwear drop or licensed team program. A usable cap tech pack template locks these decisions before the cutting room starts: Pantone TCX/TPX or coated ink reference, fabric composition and gsm, panel construction, visor board thickness, embroidery size in millimeters, closure hardware, label position, care label content, and measurement tolerances. Without that, the first sample becomes a guessing exercise. With it, the supplier is reviewing against a written standard instead of negotiating what “slightly lower logo” or “premium structure” was supposed to mean.
The time savings are easy to see on a normal 6-panel cotton twill snapback or dad cap. A vague inquiry often takes 12–14 days to produce a first sample because the merchandiser, pattern maker, digitizer, and trim buyer must clarify details one at a time. Then preventable rejections start: crown height off by 8 mm, visor too flat, embroidery placed 5 mm too low, sweatband dyed black instead of matched to shell fabric, or logo thread selected as generic red instead of a Pantone 186 C match within Delta-E 1.5–2.0. With a complete headwear tech pack, the same sample can usually move in 6–8 days because the pattern, BOM, artwork, decoration file, and inspection checklist are aligned from day one. At CrownsForge, organized files commonly need one revision round; loose reference photos often turn into three or four rounds before fit, color, and logo placement are approved.
A tech pack for a hat manufacturer is not a mood board; it is a production control document. The best custom cap spec sheet includes front, side, back, top, and inside views; graded measurements with tolerances such as ±3 mm on crown height, ±2 mm on embroidery placement, and ±5 mm on circumference; material callouts like 16x12 cotton twill at 280 gsm, 100% polyester ripstop at 150D, or wool-blend serge at 320 gsm; and decoration instructions for Tajima, Barudan, or ZSK embroidery heads. Specify flat embroidery, 3D puff with 2–3 mm foam, appliqué edge stitching, woven patch density, or heat-transfer size and temperature. Bulk approval should also define AQL 2.5 for major defects, AQL 4.0 for minor defects, fabric color Delta-E limits, snapback or buckle pull strength, needle detection if required, and carton packing. That is why a cap tech pack template cuts weeks from development: it converts opinions into measurable acceptance criteria.
The seven sections of a complete cap tech-pack
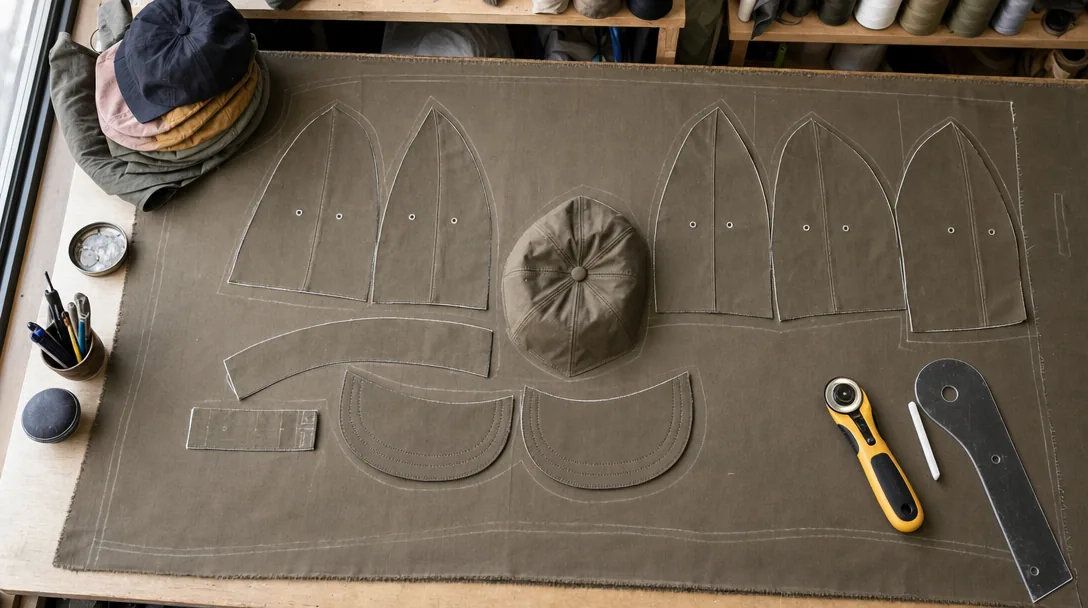
A usable cap tech pack template starts with line drawings, not reference photos. You need front, left side, back, top, undervisor, interior, and closure views, each dimensioned in millimeters: crown height at center front, visor length from seam, visor width at widest point, panel seam spacing, top button diameter, eyelet position, sweatband width, and logo placement from the center-front seam and visor seam. Silhouette cannot be left to interpretation. Call it exactly what it is: 6-panel structured twill cap, 5-panel camper, low-profile unstructured dad cap, trucker with polyester mesh back, or flat-visor snapback with high crown. A 4 mm shift in embroidery placement or a change from 58 mm to 62 mm logo height can alter stitch count, push density past 0.40 mm spacing, and create buckram drag on Tajima or Barudan multi-head runs. “Same as sample” is not a specification unless the counter-sample is sealed, dated, and tagged with a sample ID. Material and color specs are where avoidable cost overruns usually start. The fabric page should name fiber content, construction, weight, finish, backing, and performance target: 100% cotton twill 16x12, 280 gsm, enzyme wash; 150D polyester ripstop with PU 600 mm coating; 120 gsm nylon taslan with WR finish; trucker mesh 110-130 gsm. Color control must separate dyed fabric from decoration references: Pantone TCX for textiles, Pantone C or U for print, woven labels, and embroidery thread equivalents. If shade matters, state the tolerance: Delta-E less than 1.5 for solid reactive-dyed panels, less than 2.0 for garment-washed cotton. Decoration needs its own matrix: flat embroidery, 3D puff foam at 2-3 mm, woven patch, TPU badge, sublimated patch, screen print underbill, stitch count estimate, Madeira or Gunold thread, and placement tolerance of plus or minus 2 mm. On ZSK runs, metallic thread or logos above 8,000 stitches should require a digitized preview and physical strike-off before bulk approval. Construction, labeling, and packing are what turn a drawing into something a factory can quote, sew, and inspect consistently. Specify panel count, seam tape width, front buckram type and gsm, visor insert material, number of visor stitch rows, eyelet style, sweatband composition, inner taping print, and closure type: 7-hole plastic snap, self-fabric strap with tri-glide, brass buckle, hook-and-loop, or elasticized fitted band. Tolerances should be written part by part, not as one blanket note: visor length plus or minus 3 mm, crown circumference plus or minus 5 mm, embroidery centering plus or minus 2 mm, patch skew no more than 1.5 mm. Inspection language should reference AQL 2.5, with major defects including crooked embroidery, broken stitches, panel shading, oil marks, twisted visors, and wrong labels. Packing and labeling need just as much precision because most export claims happen after sewing is finished. State whether caps ship flat-packed, crown-supported with tissue, or individually stuffed to protect a structured front. Include polybag thickness such as 0.03 mm or 0.05 mm, carton quantity, target carton gross weight under 12 kg for manual handling, carton dimensions, desiccant requirement for sea freight, and whether stickers go on the visor or the bag. The labeling page should show main label, size label, care content, country-of-origin statement, barcode format and position, hangtag stock such as 350 gsm FSC paper, and any retailer-specific packaging rules. If the program requires compliance review, note it directly in the cap tech pack template: sedex-audit-cap-supplier-guide.html">BSCI 2.0 status, Sedex SMETA 4-Pillar availability, CPSIA or REACH restrictions for trims, and any licensed-team audit points around logo security and carton traceability.
Tech sketches: front, side, back, optional underbrim
If your sketch does not lock down measurement points, the factory and QC team will each invent their own method and you will lose time arguing over numbers that were never standardized. A usable cap tech pack template should mark every POM directly on the front, side, back, and optional underbrim views with arrows, check method, and tolerance. Crown depth is the one buyers misstate most often: specify whether it is measured from top button to sweatband edge along the center-front seam, or vertically on a head form. On washed cotton twill or other soft unstructured caps, those two methods can differ by 5-8 mm, which is enough to fail a fit approval. Brim length should be measured from the front crown seam to the brim tip at center; for most baseball caps that target is 70-75 mm, with a practical production tolerance of ±2 mm. Also call out brim width at the widest point, seam alignment tolerance within 2 mm, and closure placement from side seam to centerline so inspection follows the same standard used at AQL 2.5.
The underbrim view is optional only if nothing is happening there; the moment you add contrast fabric, sublimation, edge binding, sandwich trim, or a woven label, it needs its own sketch. Do not write “black underbrim” and expect consistency. Use a Pantone TCX reference or approved lab dip, and if color is critical, set an acceptance target such as Delta-E below 1.5 against the standard under D65 lighting. Printed underbrims should show artwork orientation, centerline position, bleed area, and whether stitching or binding will cover 3-5 mm of the image at the edge. If the brim uses 8-row stitching, note row spacing and thread color; if it uses a pre-curved insert, state the curve gauge or radius rather than the vague word “curved.” At CrownsForge, our standard practice is to add section details for seam allowance, typically 6 mm on crown panels and 10 mm turn-in at sweatband joins, because those hidden construction notes prevent rework faster than any email chain after sampling has started.
Fabric and color spec: GSM, weave, Pantone references
If your cap tech pack template says “black cotton” or “premium wool,” you are leaving the factory to guess, and factories are very good at guessing in ways buyers do not like. The fabric line should specify fiber content, weave, yarn count or denier, finish, and finished weight: for example, “100% cotton 16s x 12s twill, enzyme washed, 280 gsm” or “70/30 wool-polyester serge, anti-pilling finish, 340 gsm.” For a structured 6-panel baseball cap, 260–320 gsm cotton twill is the safe commercial range; under 240 gsm, the front crown often loses shape after 3D puff embroidery or heavy satin coverage. Canvas usually sits at 300–380 gsm and wears hard, but on youth caps it can feel boardy unless the crown is softened in finishing. Performance polyester should name construction, such as “150D mechanical-stretch polyester, 190 gsm, moisture-wicking,” and recycled claims should state the exact GRS-certified percentage plus whether transaction certificates are required with bulk shipment.
Weave is not cosmetic; it changes sewability, embroidery quality, and how the cap blocks after assembly. Twill’s diagonal wale is forgiving on Tajima and Barudan flat embroidery heads, while plain-weave canvas resists needle penetration more aggressively and can torque small text unless the digitizer reduces stitch density and changes underlay. Ripstop should call out grid size—typically 5 mm or 7 mm—and wool blends should list every fiber because price, steam response, and shrinkage move fast between, say, 50/50 wool-acrylic and 80/20 wool-nylon. In production we normally hold finished fabric weight to ±5% gsm; if a bulk lot creates crown-height variation greater than 3 mm after blocking, the cap will not stack consistently across sizes or colorways.
Color control belongs in the same level of detail. Use a Pantone TCX reference, not a JPEG, RGB value, or a previous cap photo: “Pantone 19-4007 TCX Jet Black” is usable, “match our website black” is not. When shade is critical, attach a physical cotton chip and approve lab dips under D65 light; digital Pantone libraries are only a communication tool. For piece-dyed cotton twill, a practical lab-dip tolerance is Delta-E 1.5–2.0, while enzyme-washed or garment-washed caps should allow more movement because wash chemistry shifts shade between panels. Your spec should also define color placement for each component—crown, visor top, undervisor, top button, eyelets, sweatband, seam tape, closure, and embroidery thread—using “self,” “match crown,” or separate Pantone references. That single line prevents common bulk errors like a true-black crown paired with a charcoal hook-and-loop strap or a navy sweatband that reads purple under retail lighting.
Decoration spec: technique, placement, dimensions, color count
Decoration errors are the fastest way to turn an approved sample into a rejected bulk order, so the cap tech pack template should lock down four points in writing: technique, exact placement, finished dimensions, and thread color references. “Front logo embroidery” is not a usable instruction for a production floor. A workable callout looks more like: front center, 3D puff embroidery, 50 mm W × 32 mm H, centered on seam, bottom edge 12 mm above visor stitch line, 8,500 to 10,000 stitches, 3 colors, Pantone 19-4052 TCX navy, 11-0601 TCX white, 200 C red equivalent in rayon thread. If you want a patch instead, specify merrowed edge vs heat-cut edge, woven vs twill base, backing type, and attachment method—run stitch, zigzag, or heat press plus stitch-down. Those details change both cost and failure rate in wear testing.
Placement has to be measurable from physical landmarks on the cap, not from artwork assumptions in Illustrator. On a 6-panel baseball cap, front-center art is usually referenced from the center seam and visor seam; side embroidery should be measured from the panel seam or eyelet position; back decoration should note whether it sits above the arch opening, above a snapback strap, or on the closure itself. For example: wearer-left panel, flat embroidery, 35 mm W × 18 mm H, centered between front and back seams, top edge 10 mm below eyelet. On low-profile unstructured caps, the same logo may need to be reduced by 10 to 15 percent to avoid distortion over panel curvature. Our standard practice is to reject approvals that do not define orientation, because even a 5 mm shift on a small side logo is obvious at final inspection and often fails AQL 2.5 on appearance.
Color count affects price, lead time, and machine setup more than most buyers expect, so your headwear tech pack or hat specification sheet should name the exact number of thread colors per location and whether gradients must be simulated. Standard flat embroidery on Tajima or Barudan multi-head machines typically runs cleanest at 9 to 12 colors max, but commercial cap programs usually stay at 3 to 6 colors to control trims and machine changeover. If the buyer knows stitch count, include it; if not, ask for a digitizing estimate because a front logo can range from 4,000 stitches for simple text to 12,000+ for dense 3D puff with satin borders. Add acceptable color tolerance language too: embroidery thread should match approved Pantone reference within practical textile limits, typically visual approval under D65 light, since thread libraries do not map perfectly to coated print chips. A precise custom cap spec sheet or tech pack for hat manufacturer also flags where 3D puff foam is allowed and where it is not, because small text below 3 mm height will collapse or chip after washing.
Packaging and label spec: polybag, hangtag, sticker, carton
Packaging causes more first-run chargebacks than stitching defects because buyers write “standard packing” in the cap tech pack template and leave the pack-out method open to interpretation. The polybag spec should lock down five measurable items: finished bag size, film thickness, resin, venting, and printed/legal content. For an adult 6-panel cap, 28 x 22 cm fits most unstructured or low-profile shapes; for high-crown structured caps with buckram and a hard visor curve, 30 x 25 cm prevents front-panel compression. I would not ship export orders in film under 0.04 mm. A 0.05 mm LDPE bag is the safe default because it resists puncture better than thin OPP during carton loading and devanning. If the program carries a sustainability claim, specify PE mono-material, recycle code #4, and minimum 30% post-consumer recycled content; otherwise converters often swap in lower-cost virgin blend without notice. Venting and labeling need the same level of precision. If vent holes are required, call out the exact pattern, such as two 6 mm holes centered 40 mm below the flap; delete them for moisture-barrier packing, silica-gel inclusion, or long ocean transit into humid markets. State cap orientation and support method as well: brim down, crown filled with one recycled paper insert around 250-300 gsm, self-adhesive flap closure, one cap per bag. Barcode labels should sit inside the packaging block, not in email. A 50 x 30 mm thermal-transfer label placed top right within +/-5 mm is standard, but matte film usually needs stronger adhesive to avoid edge lift below 10°C. For hangtags, specify finished size, hole position, string type, board stock such as 350-400 gsm C1S, Pantone Solid Coated references, and print tolerance; Delta-E under 3.0 is realistic on offset print, while tighter limits on uncoated stock usually increase spoilage without improving shelf appearance.
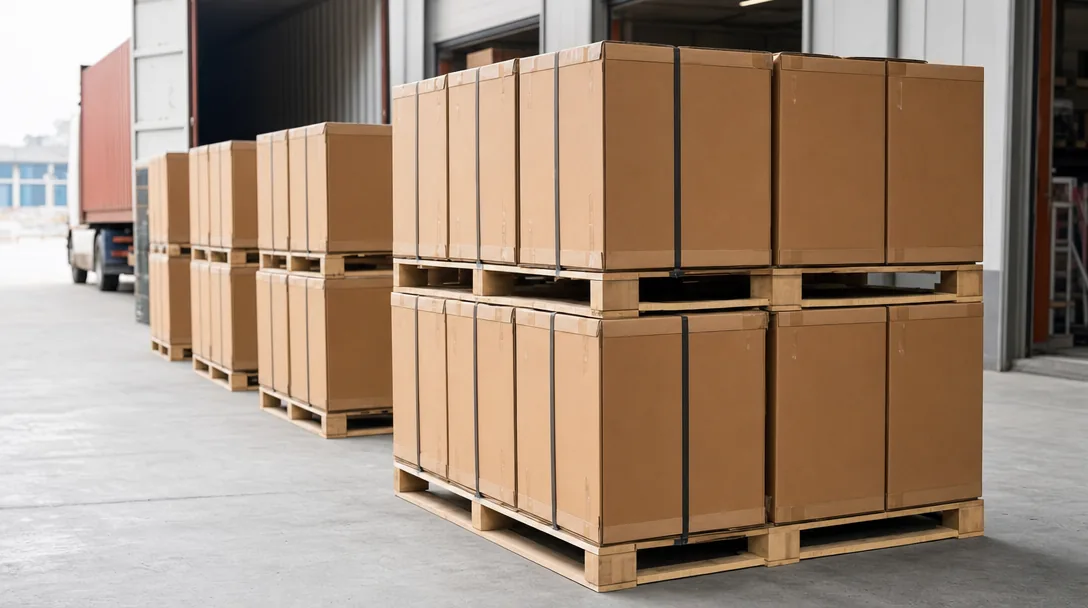
Carton spec is where freight cost, damage rate, and receiving compliance intersect, so adjectives like “strong export carton” are useless. State pieces per carton, gross-weight ceiling, board grade, outer dimensions, sealing method, and shipping marks. For standard adult baseball caps, 72 pcs per master carton is common, but 48 pcs is safer for high-profile structured styles because vertical stacking pressure can print through the crown and distort the visor set. Keep gross weight under 12 kg for wholesale distribution and under 10 kg if the shipment feeds EU retail back rooms, hand-load fulfillment, or parcel rework. A typical 72-piece carton lands around 60 x 45 x 58 cm, but dimensions should be confirmed from a physical pack test using the actual visor curve, insert, and polybag, not from a spreadsheet estimate. Board grade should be written in a way both the factory and carton vendor can execute: 5-ply corrugated, K=K or equivalent, or burst strength 200-250 psi if that is how your sourcing team buys cartons. Call out sealing as 48 mm BOPP tape in H-tape method unless retailer routing says otherwise. Shipping marks should include PO, style number, color, size, quantity, country of origin, destination code, and carton sequence such as 1/20, printed in black at a legible minimum size. If the shipment goes to Amazon FBA, TikTok Shop fulfillment, or a 3PL, require final routing labels and specify whether PP strapping, palletization, corner boards, or ISTA-style drop testing is permitted. Our standard practice is to inspect carton assortment and mark accuracy under AQL 2.5 because one mixed carton can create more downstream cost than a whole sewing defect lot.
Frequently Asked Questions
What logo decoration techniques do you offer?
3D puff embroidery, flat embroidery, woven patch, leather patch, PVC patch, screen printing, sublimation, applique and laser etching, all in-house with no subcontracting.
What file format should I send for my logo?
Vector files (AI, EPS, PDF) are ideal. High-resolution PNG or JPG at 300 dpi on transparent background works as a fallback. Provide Pantone color references for accurate reproduction.
Can I order a sample before bulk production?
Yes. We strongly recommend approving a pre-production sample before mass production. Samples are charged at 35 to 60 USD each plus express shipping, fully refundable against confirmed bulk orders over 500 pieces.
How long does production take?
Sampling takes 7 to 12 days. Bulk production runs 20 to 30 days depending on quantity, fabric availability and decoration complexity. Inspection and packing adds another 3 to 5 days before shipment.
Do you support sustainability certifications?
Yes. We work with GOTS organic cotton, GRS-certified recycled polyester, OEKO-TEX Standard 100 fabrics, and are BSCI and Sedex audited. Certification documentation can be provided per order.
How does ordering custom patch trucker hat work?
When evaluating custom patch trucker hat, the key considerations are construction quality, decoration capability, MOQ flexibility and lead time. Technique (3D puff / flat embroidery / patch), placement (front center, side, back), dimensions (e.g. 5cm wide × 3cm tall), stitch count if known, color count and Pantone references. Without a tech-pack, your factory invents details that contradict your assumptions. With one, sampling lead time drops from 14 days to 7 and revision rounds drop from 4 to 1.
How does ordering baseball cap custom work?
When evaluating baseball cap custom, the key considerations are construction quality, decoration capability, MOQ flexibility and lead time. Without a tech-pack, your factory invents details that contradict your assumptions. With one, sampling lead time drops from 14 days to 7 and revision rounds drop from 4 to 1. Tech sketches, fabric spec, color spec, decoration spec, construction spec (panels, closure, eyelets, sweatband), packaging spec, label/hangtag spec.
How does ordering custom baseball cap motorcycle helmet work?
When evaluating custom baseball cap motorcycle helmet, the key considerations are construction quality, decoration capability, MOQ flexibility and lead time. Without a tech-pack, your factory invents details that contradict your assumptions. With one, sampling lead time drops from 14 days to 7 and revision rounds drop from 4 to 1. Tech sketches, fabric spec, color spec, decoration spec, construction spec (panels, closure, eyelets, sweatband), packaging spec, label/hangtag spec.
How does ordering custom bucket hat embroidered work?
When evaluating custom bucket hat embroidered, the key considerations are construction quality, decoration capability, MOQ flexibility and lead time. Without a tech-pack, your factory invents details that contradict your assumptions. With one, sampling lead time drops from 14 days to 7 and revision rounds drop from 4 to 1. Tech sketches, fabric spec, color spec, decoration spec, construction spec (panels, closure, eyelets, sweatband), packaging spec, label/hangtag spec.
Ready to start your custom hat project?
Send us your tech-pack, sketch or even just an inspiration photo. We will respond with a detailed quotation and digital mock-up within 24 hours.
Request a free quoteRelated guides
Embroidery Hats Machine: When to Use It, Costs, and What to Ask Your Factory (2026 Update)
Read article →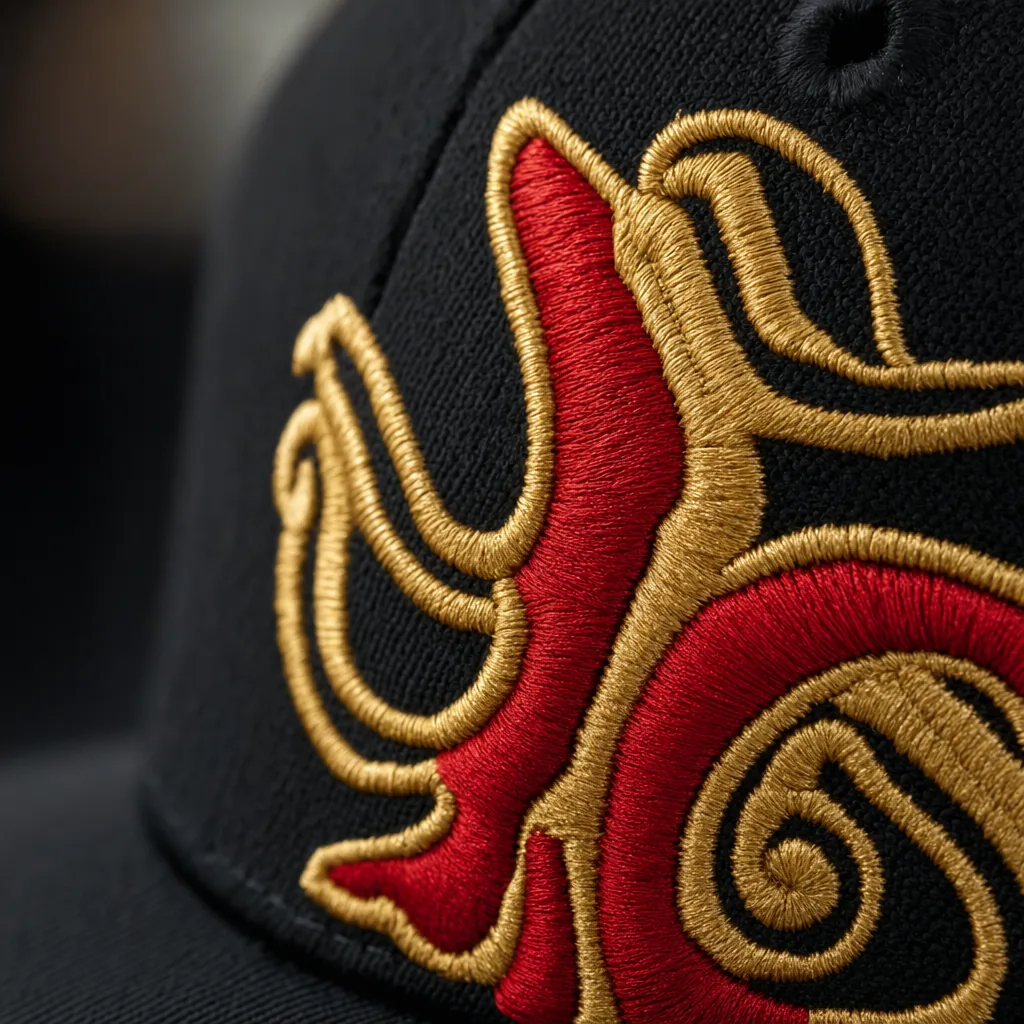
Custom Logo Hats: When to Use It, Costs, and What to Ask Your Factory (2026 Update)
Read article →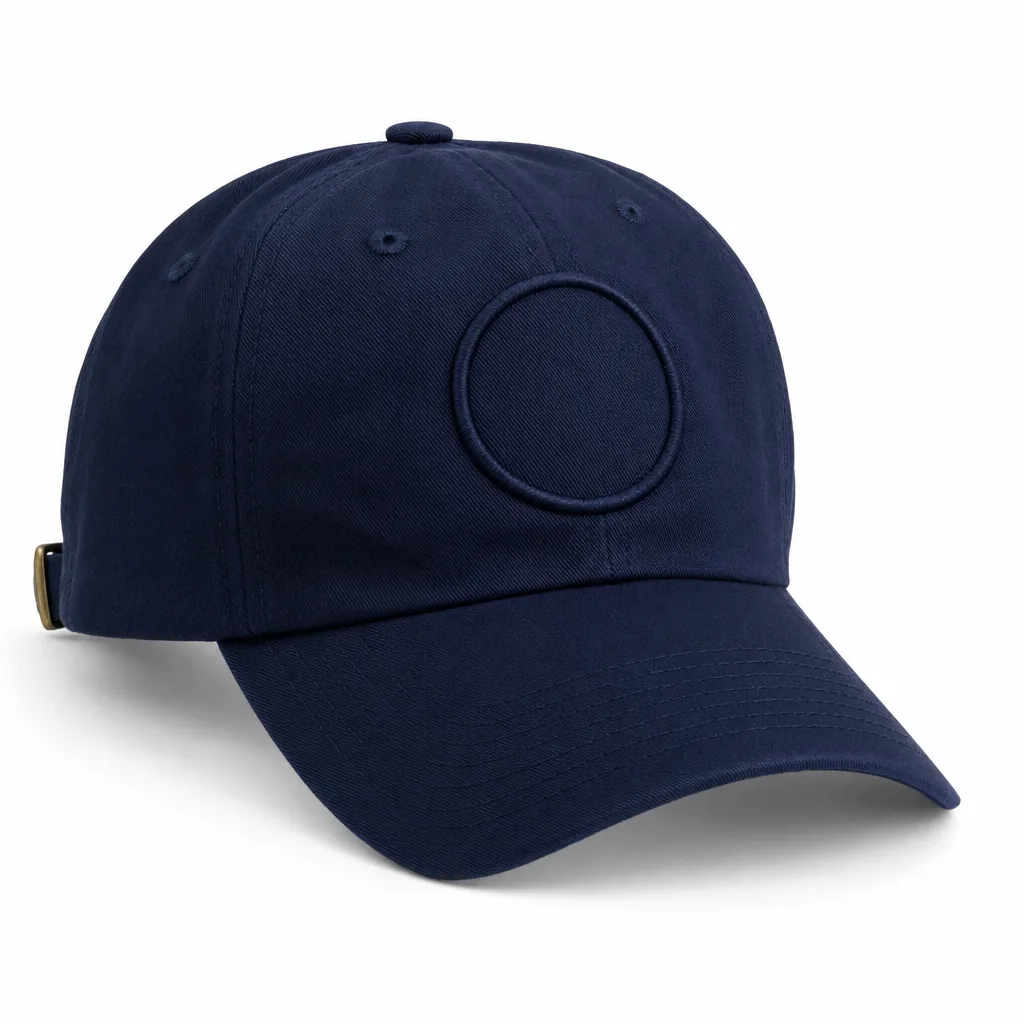
Custom Hat Embroidery: The 2026 Sourcing & Manufacturing Playbook
Read article →Sourcing custom hats does not have to be complicated. With the right manufacturing partner, clear specifications and a small upfront investment in sampling, you can launch a retail-quality product in 30 to 45 days.