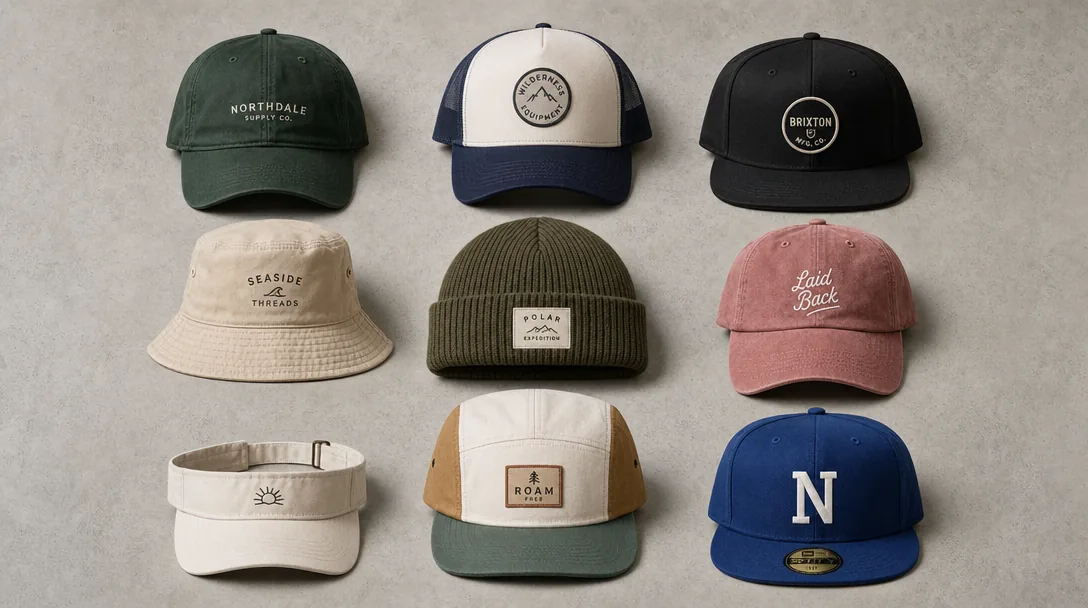
What's in a Cap Tech-Pack: A Specification Template for Buyers - 2026 Buyer's Guide - Supplier Checklist
Every week, our sales team answers detailed questions about what's in a cap tech-pack: a specification template for buyers - 2026 buyer's guide - supplier checklist. We wrote this guide so that wholesalers, streetwear brands, corporate buyers and promotional resellers can compare options with full information, and avoid the traps that show up only after production has started.
Why a tech-pack saves you weeks of email back-and-forth
A reference photo starts the conversation; a cap tech pack template starts production. If the file does not lock crown profile, panel count, front-panel structure, visor shape, closure type, fabric weight, and decoration position, the sample room will default to its house block. In many China cap factories that means a 6-panel mid-profile crown around 65–70 mm, fused front panels with 1.6–1.8 mm buckram, PE visor board, and a stock 7-hole snapback. That is how a buyer requesting a soft, shallow dad cap receives a structured promotional cap with the wrong visor curve and a logo sitting 8 mm too high. A complete file lets the pattern maker, cutter, embroidery operator, and merchandiser work from the same sheet. In practice, first sample lead time often drops from 12–14 calendar days to 7–8 because nobody is waiting overnight for answers about seam tape color, eyelet placement, or whether “low profile” means 58 mm or 62 mm at center front.
Most cap sample delays come from missing tolerances and material definitions, not bad sewing. “Black cotton twill with 3D embroidery” is not a production instruction. Specify 108x56 cotton twill at 285 gsm, brushed chino at 240 gsm, or 60/40 poly-cotton at 260 gsm; list sweatband construction, taping width, button fabric, eyelet thread, and whether the closure is POM plastic, PP snap, brass buckle, or zinc alloy slide. Decoration needs the same discipline: logo width in mm, placement from center front seam and visor edge, puff foam thickness, stitch count range, Madeira or Gunold thread color, backing type, and whether the run is set for Tajima, Barudan, or ZSK heads. Color should reference Pantone TCX for fabric or Pantone C for print, with Delta-E agreed at lab dip approval, usually ≤1.5 for solid shades. Our standard practice at CrownsForge is to pair these specs with crown height ±3 mm, visor length ±2 mm, logo position ±2 mm, and AQL 2.5 inspection criteria, which typically reduces revisions from three or four rounds to one.
The seven sections of a complete cap tech-pack
A usable cap tech pack template breaks the style into seven execution blocks the sample room can follow without improvising: technical sketch, measurement chart, bill of materials, color standards, decoration specs, construction notes, and labels/packaging. If any one of those is vague, the factory falls back to house defaults on visor board, buckram stiffness, seam tape width, snap closure resin, or embroidery density, and that is where cost and consistency slip. The sketch package should cover front, left, right, back, top, underbill, interior, and one sectional view for any nonstandard build such as EVA-backed front panels, sandwich visor piping, rope on visor seam, or a woven flag label caught into the sweatband seam. Measurements should be in millimeters with tolerances, never “approx.” For a standard adult snapback, that means crown height 165 mm ± 3 mm, bill length 75 mm ± 2 mm, bill width 185 mm ± 2 mm, opening circumference 580 mm at center snap position, and button-to-bill center alignment within 2 mm. The bill of materials needs engineering-level detail, not just “cotton twill” or “mesh back.” Call out fiber content, construction, weight, finish, and thickness for every component: 100% cotton twill 260 gsm for crown panels, 100% polyester mesh 120 gsm for rear panels, 0.55 mm medium buckram, 35 mm poly-cotton sweatband tape, 1.8 mm PE visor insert, and 1680D polyester backing for patches where needed. Color control must use real references and acceptance criteria: Pantone 19-4052 TCX on dyed fabric, Pantone 186 C on printed matter, and bulk shade approval within Delta-E 1.5 under D65 lighting. If substitutions are allowed, define the boundary in writing—fabric weight tolerance ±5%, crocking minimum grade 4 dry and 3–4 wet, and no more than a half-grade shade split within one PO. Trims need the same specificity: POM snapback instead of recycled PP, nickel-free antique brass buckle, stitched eyelets versus metal vents, 20 mm seam tape, and carton gross weight capped at 12 kg for both FOB ocean and DDP parcel handling.
Decoration, construction, and packing are the three blocks that usually decide whether goods pass AQL 2.5 or become a claim. Decoration specs should state position, method, size limit, and production constraint: front logo in 3D puff embroidery with 3 mm EVA foam, maximum width 110 mm; left panel flat embroidery at 7,000–9,000 stitches; back arch text with 4 mm minimum letter height; underbill plastisol print in Pantone Black 6 C; inside main label as a heat transfer qualified for 20 home-laundry cycles. For embroidery, attach native vector artwork, approved digitized file, target thread brand and count—Madeira Classic No. 40 or Gunold Sulky are common—and note if the sample must match output from Tajima, Barudan, or ZSK heads, because pull compensation and satin coverage do not sew identically across platforms. Construction notes should cover what inline QC and final inspectors actually measure: 5-panel or 6-panel layout, seam allowance 6 mm, topstitch 7–9 SPI, visor stitch rows 6 or 8, sweatband join location, crown seam matching tolerance, and whether the front is structured with fused buckram or left unstructured. Add closure attachment method, eyelet reinforcement, button wrap material, and any requirement for taping the interior seams. The last section of a cap tech pack template is labels and pack-out, and buyers often under-specify it. Include country-of-origin statement, RN or CA number when applicable, barcode type and exact placement, hangtag fastening with 125 mm black nylon loop, polybag suffocation warning by market, silica gel quantity, carton dimensions such as 60 x 45 x 38 cm, and pack ratio—for example, 25 pcs per export carton with no inner carton. Our standard practice is to treat pack-out as a quality issue, because crushed crowns and bent visors usually come from bad carton specs, not bad sewing.
Tech sketches: front, side, back, optional underbrim
A usable cap tech pack template begins with production line art, not a styled mockup. The minimum is four views: front, side, back, and an underbrim view whenever the undervisor, seam tape, or visor underside carries custom work. Each view should expose construction, not hide it: center-front seam on a 6-panel, panel break angle, eyelet placement, top button diameter, sweatband turn line, visor join seam, back opening shape, and closure attachment points. If the cap is cut-and-sew, put stitch construction on the sketch itself—single-needle edge stitch, 2-row or 6-row visor stitch, 10 mm seam tape, overlock vs taped crown seams, clean-finished interior, and binding at the back opening. Leaving these details on a separate notes page is how one factory samples a high-profile crown and another builds a shallow dad cap from the same artwork. Measurement arrows need to sit directly on the sketch so pattern room, sewing, and QC are reading the same geometry. Crown depth should state the method, usually top button to bottom edge at center front on the finished cap; for adult baseball profiles, 16.5-18.0 cm is normal, and a 5 mm miss is visible on-head. Visor length is typically measured from crown seam to tip at 7.0 cm, with visor width at the widest point around 18.0-19.0 cm. Do not write only “curved brim.” Specify flat ship condition or pre-curved, target arc if relevant, and insert material—1.8 mm PE board, EVA, or paperboard—because stiffness, recovery, and freight deformation differ. Decoration must key off construction: logo size in mm, baseline from bottom edge, center alignment to seam, and no-stitch zones around eyelets, seams, and patch edges. For 3D puff, call out 2 mm or 3 mm foam and edge finish, since digitizing changes across Tajima, Barudan, and ZSK heads.
The underbrim view is only optional when the underside is genuinely standard and carries no approval risk. In streetwear, golf, and licensed programs, that area often holds the margin and the trouble: black anti-glare cotton twill, contrast undervisor, sublimated 220-240 gsm brushed poly, woven label at the visor seam, or seam-tape print crossing the center line. Show the print-safe area, seam interruption, and whether the undervisor is one-piece or center-seamed; if it is pieced, note seam allowance and print registration tolerance. Visor details also need dedicated callouts because they get missed in the front view: 6-row athletic stitch versus 8-row heritage stitch, self-fabric wrap or sandwich trim, piping cord diameter, and trim width tolerance, typically +/-1.5 mm. Tie QC checkpoints to the drawing so the sketch can be inspected on the table under AQL 2.5 without subjective debate. That means measurable callouts for visor symmetry, left-right panel balance, embroidery position tolerance of +/-2.0 mm, closure centering, and underbrim print alignment. At CrownsForge, we also mark color-critical parts against Pantone TCX references and note acceptable shade variation, usually Delta-E below 1.5 on bulk fabric lots when the program is licensed. A cap spec sheet that depends on a rendering is not a manufacturing document; a real cap tech pack template lets a sample room, inline inspector, and final QC arrive at the same conclusion from the same page.
Fabric and color spec: GSM, weave, Pantone references
Fabric language in a cap tech pack template has to be mill-readable, not mood-board-readable. Put fiber content, yarn count or denier, weave, finish, and finished weight on one line: “Shell: 100% cotton twill, 20s x 16s ring-spun, 108 x 56, 245 gsm finished, reactive dyed, peach finish.” That gives the sourcing team enough to quote, test, and cut without guessing. “Heavy vintage twill” does none of that. For performance styles, specify the actual substrate and finish stack: “100% recycled polyester, 150D/144F, 2/2 twill, 180 gsm, C0 DWR, moisture-wicking sweatband.” For melton caps, “80/20 wool/acrylic, 360 gsm, brushed face” is usually sufficient for both costing and crown behavior. Also state whether the gsm tolerance applies greige, post-finish, or post-wash; a 10-15 gsm deviation can change seam bulk, visor turn, and how an unstructured 6-panel recovers after carton compression.
Face fabric is only half the story. Backing, coating, and wash treatment directly affect sewability and embroidery registration, especially on front panels carrying 6,000-12,000 stitches. PU coating, foam backing, brushed surfaces, enzyme wash, or laminated buckram all change needle heat, flagging, and push-pull on Tajima, Barudan, and ZSK heads, so the backing stack should be written into the spec instead of discovered in sampling. Call out mesh weight, sweatband composition, underbill fabric, and whether eyelets and top button use self-fabric or stock substitutes. A practical line would read: “Front panel backing: 0.45 mm hard buckram; visor insert: 1.8 mm recycled PE; mesh: 120 gsm polyester; sweatband: 35% cotton / 65% polyester, 180 gsm.” That level of detail prevents avoidable sample loops and keeps bulk goods inside AQL 2.5 for appearance and assembly consistency.
Color problems usually start when buyers mix reference systems or assume one Pantone behaves the same on every substrate. For dyed fabrics, use Pantone FHI/TCX rather than Pantone Solid Coated, which is an ink standard. A usable callout is: “Crown/visor: Pantone 19-3921 TCX Mood Indigo; sweatband: black, dyed to match approved standard; Delta-E <= 1.5 under D65.” Then break out every material separately: shell, mesh, closure strap, eyelets, top button, visor sandwich, woven label ground, and embroidery thread. Thread can often match within Delta-E 1.0-2.0, but rayon and polyester reflect differently, so identical references can still look off under retail LEDs. Physical approval should override digital art every time; our standard practice is signed lab dip or approved Pantone chip under a D65 light box, not office lighting. On custom dye lots below 300 pieces, budget about $80-$180 per color and 3-5 extra days for lab-dip approval.
Decoration spec: technique, placement, dimensions, color count
Most decoration failures begin with the phrase “front logo embroidery.” A usable cap tech pack template must treat decoration as a production instruction: technique, placement reference, finished size, color count, thread or ink standard, and construction limits. Write “front center over panels 1+2 seam, 3D puff embroidery, 50 mm W x 30 mm H finished size, 6 thread colors, 2 mm EVA foam under black fill only, 2.5 mm satin border, minimum open counter 1.2 mm after stitching, polyester thread nearest Pantone 19-0303 C.” That gives the digitizer enough information to build underlay, pull compensation, stitch direction, and foam cut strategy for Tajima, Barudan, or ZSK heads. If it is flat embroidery, say flat. If texture matters, specify fill angle, such as 45° fill on the main icon and 0° satin on lettering. Small lettering below 4 mm high, thin lines under 0.8 mm, and tight enclosed counters should be flagged before sampling, not discovered after 500 bad sew-outs.
Placement needs coordinates, not opinions. “Centered” can mean centered on the front seam, visually centered between eyelets, or shifted to compensate for a split seam or curved low-profile crown. For structured 6-panel caps, a realistic bulk tolerance is ±2 mm on front embroidery and ±3 mm on side or back placements after blocking, hooping, and panel sewing variation; tighter tolerances usually create inspection arguments. Specify each zone separately: front, wearer’s left, wearer’s right, back arch, closure tab, undervisor, sweatband, and inside seam tape. A clear side logo note reads: “wearer’s left panel, center 25 mm above bottom edge and 15 mm behind front/side seam, 35 mm W max, reads level when worn.” Common safe size ranges are 75–85 mm wide for front flat embroidery, 45–60 mm wide for 3D puff, 30–38 mm wide for side marks, and about 90 mm x 45 mm for undervisor print depending on crown height and visor curve.
Color and attachment specs control cost, lead time, and approval risk. List color count by decoration, not by artwork file, and give references by component: embroidery thread nearest Pantone Solid Coated, fabric coordination by Pantone TCX or approved lab dip, and printed patch or heat-transfer tolerance at Delta-E ≤ 2.0 against the signed master. A 6-color woven patch, 6-color flat embroidery, and 6-color silicone transfer are not interchangeable; each needs its own approved file, scale, and color standard. For patches, avoid the vague word “patch.” Specify woven patch with merrow edge, laser-cut twill with satin stitch border, PVC patch with direct sew, TPU badge, leather deboss patch, or heat-applied label with temperature, pressure, and dwell time. Stitch count should be included when known: moving from a 5,000-stitch flat logo to an 11,000-stitch dense fill can add roughly $0.08–$0.35 per cap at 3,000 pieces and slow output. At CrownsForge, any 3D puff, metallic thread, or decoration above 8 colors requires physical sew-out approval before bulk production.
Packaging and label spec: polybag, hangtag, sticker, carton
Most packaging failures happen after sewing is perfect: wrong polybag size, missing warning text, or a barcode hidden under the sweatband will trigger retail chargebacks faster than a crooked seam. A practical cap tech pack template should lock down the unit pack by finished dimensions and material, not vague notes like “1 pc per bag.” For a standard adult 6-panel baseball cap, 280 × 320 mm LDPE in 0.03–0.05 mm thickness is a safe baseline; high-crown trucker caps, flat-brim snapbacks, or styles with rope trims usually need 300 × 350 mm or a gusseted PP/OPP bag so the crown and visor do not distort in transit. Specify resin code 4 LDPE or 5 PP, vent holes if permitted, suffocation warning language by destination market, and whether the opening faces visor-up or crown-up for consistent pack-out. Also define barcode location in writing: outside polybag for 3PL scanning, inside sweatband label zone for cleaner retail presentation, or carton-only for bulk promotional orders. If you leave label placement to the line supervisor, a 5,000-piece run can easily ship with three different packing methods.
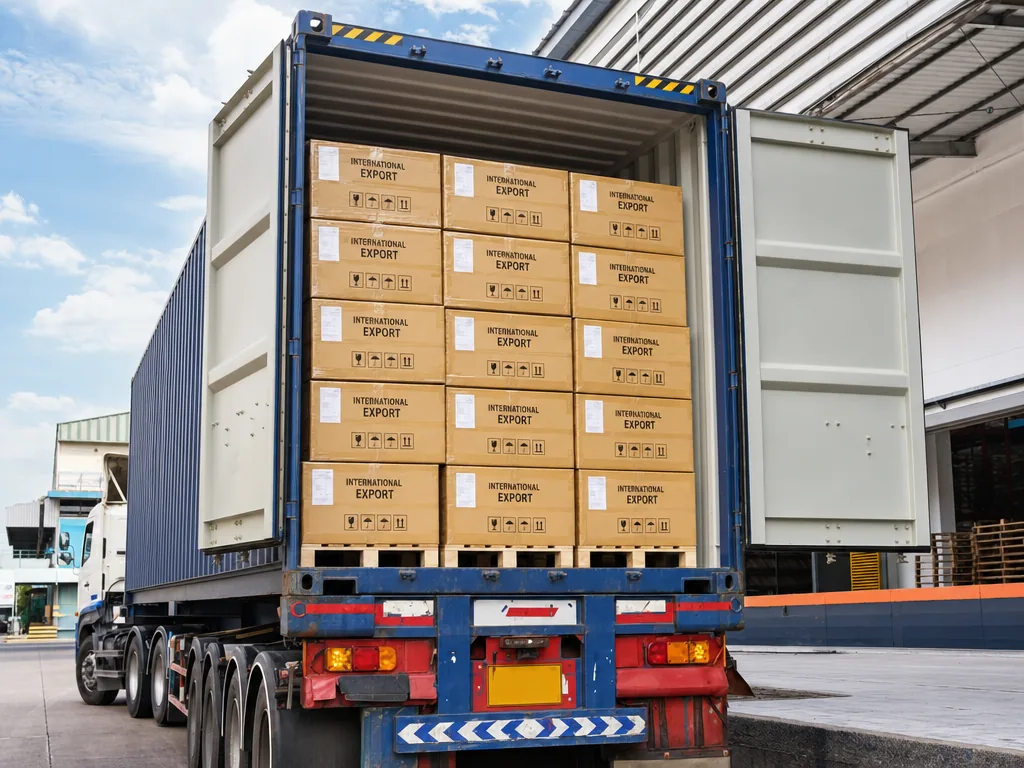
Hangtags and stickers need engineering detail, not just artwork files. A buyer-ready cap tech pack template should state hangtag size, board stock, finish, print tolerance, hole position, and fastening method. A common spec is 55 × 90 mm on 350 gsm C1S with matte lamination, 3 mm drill hole, CMYK plus Pantone spot color, and Delta-E below 2.0 against approved brand chips; for premium programs, ask for spectrophotometer checks under D65 light rather than visual matching only. Attachment point matters just as much: nylon kimble through the care label is the lowest-risk option, while eyelet or crown-panel attachments can leave marks on brushed cotton, wool blends, and peach-finish polyester during carton vibration. For stickers, call out diameter, substrate, adhesive level, and exact placement. Top-brim foil stickers are typically 45–52 mm, but high-tack adhesive can ghost on PU-coated visors or water-repellent nylon. Carton specs should read like an AQL checklist: 24 or 36 pcs per 5-ply export carton, max gross weight 12–14 kg, outer carton marks with PO, style, color, quantity, COO, and carton sequence, plus inserts or brim interleaves for buckram fronts, 3D puff embroidery, metal trims, or suede visors. At CrownsForge, we verify carton marking and barcode scan readability during AQL 2.5 final inspection because warehouse failures usually come from packing errors, not sewing defects.
Frequently Asked Questions
What file format should I send for my logo?
Vector files (AI, EPS, PDF) are ideal. High-resolution PNG or JPG at 300 dpi on transparent background works as a fallback. Provide Pantone color references for accurate reproduction.
How long does production take?
Sampling takes 7 to 12 days. Bulk production runs 20 to 30 days depending on quantity, fabric availability and decoration complexity. Inspection and packing adds another 3 to 5 days before shipment.
What logo decoration techniques do you offer?
3D puff embroidery, flat embroidery, woven patch, leather patch, PVC patch, screen printing, sublimation, applique and laser etching, all in-house with no subcontracting.
Do you support sustainability certifications?
Yes. We work with GOTS organic cotton, GRS-certified recycled polyester, OEKO-TEX Standard 100 fabrics, and are BSCI and Sedex audited. Certification documentation can be provided per order.
What is the minimum order quantity (MOQ) for custom hats?
Our standard MOQ is 100 pieces per design and color, with sampling available from 1 piece. For complex multi-color logos or premium fabric upgrades, the MOQ can be lowered with a small per-piece surcharge.
How does ordering custom patch trucker hat work?
When evaluating custom patch trucker hat, the key considerations are construction quality, decoration capability, MOQ flexibility and lead time. Technique (3D puff / flat embroidery / patch), placement (front center, side, back), dimensions (e.g. 5cm wide × 3cm tall), stitch count if known, color count and Pantone references. Without a tech-pack, your factory invents details that contradict your assumptions. With one, sampling lead time drops from 14 days to 7 and revision rounds drop from 4 to 1.
How does ordering baseball cap custom work?
When evaluating baseball cap custom, the key considerations are construction quality, decoration capability, MOQ flexibility and lead time. Without a tech-pack, your factory invents details that contradict your assumptions. With one, sampling lead time drops from 14 days to 7 and revision rounds drop from 4 to 1. Tech sketches, fabric spec, color spec, decoration spec, construction spec (panels, closure, eyelets, sweatband), packaging spec, label/hangtag spec.
How does ordering custom baseball cap motorcycle helmet work?
When evaluating custom baseball cap motorcycle helmet, the key considerations are construction quality, decoration capability, MOQ flexibility and lead time. Without a tech-pack, your factory invents details that contradict your assumptions. With one, sampling lead time drops from 14 days to 7 and revision rounds drop from 4 to 1. Tech sketches, fabric spec, color spec, decoration spec, construction spec (panels, closure, eyelets, sweatband), packaging spec, label/hangtag spec.
How does ordering custom bucket hat embroidered work?
When evaluating custom bucket hat embroidered, the key considerations are construction quality, decoration capability, MOQ flexibility and lead time. Without a tech-pack, your factory invents details that contradict your assumptions. With one, sampling lead time drops from 14 days to 7 and revision rounds drop from 4 to 1. Tech sketches, fabric spec, color spec, decoration spec, construction spec (panels, closure, eyelets, sweatband), packaging spec, label/hangtag spec.
Need a low-MOQ test order?
We help emerging brands launch with as few as 100 pieces. Premium fabric, in-house embroidery, retail-ready packaging.
Start a small orderRelated guides
Private Label vs White Label Caps: Which Model Fits Your Brand? - Cost & MOQ Breakdown
Read article →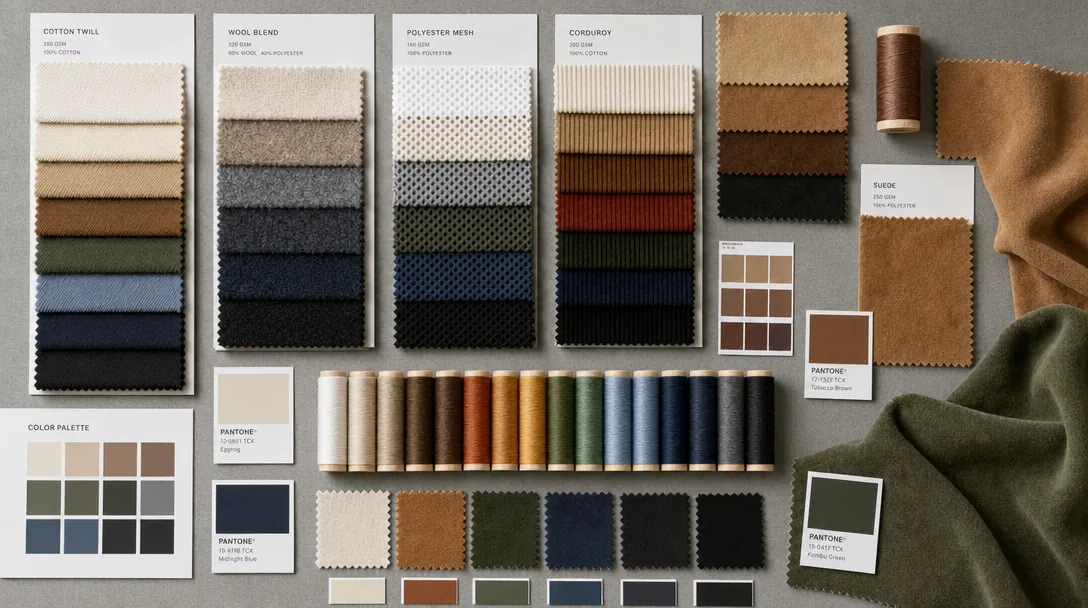
Bucket Hat Corduroy Decoration QC Checklist for Custom Hat Buyers - Supplier Checklist
Read article →Camouflage Bucket Hat: Properties, Costs and How to Spec It Right
Read article →Sourcing custom hats does not have to be complicated. With the right manufacturing partner, clear specifications and a small upfront investment in sampling, you can launch a retail-quality product in 30 to 45 days.