Embroidery Hats Machine: When to Use It, Costs, and What to Ask Your Factory - 2026 Buyer's Guide
For brand owners, wholesalers and procurement teams entering the custom headwear category, embroidery hats machine: when to use it, costs, and what to ask your factory - 2026 buyer's guide is one of the highest-leverage decisions you will make. Get it right and your unit economics, retail story and reorder cycle all improve. Get it wrong and you carry the cost for years.
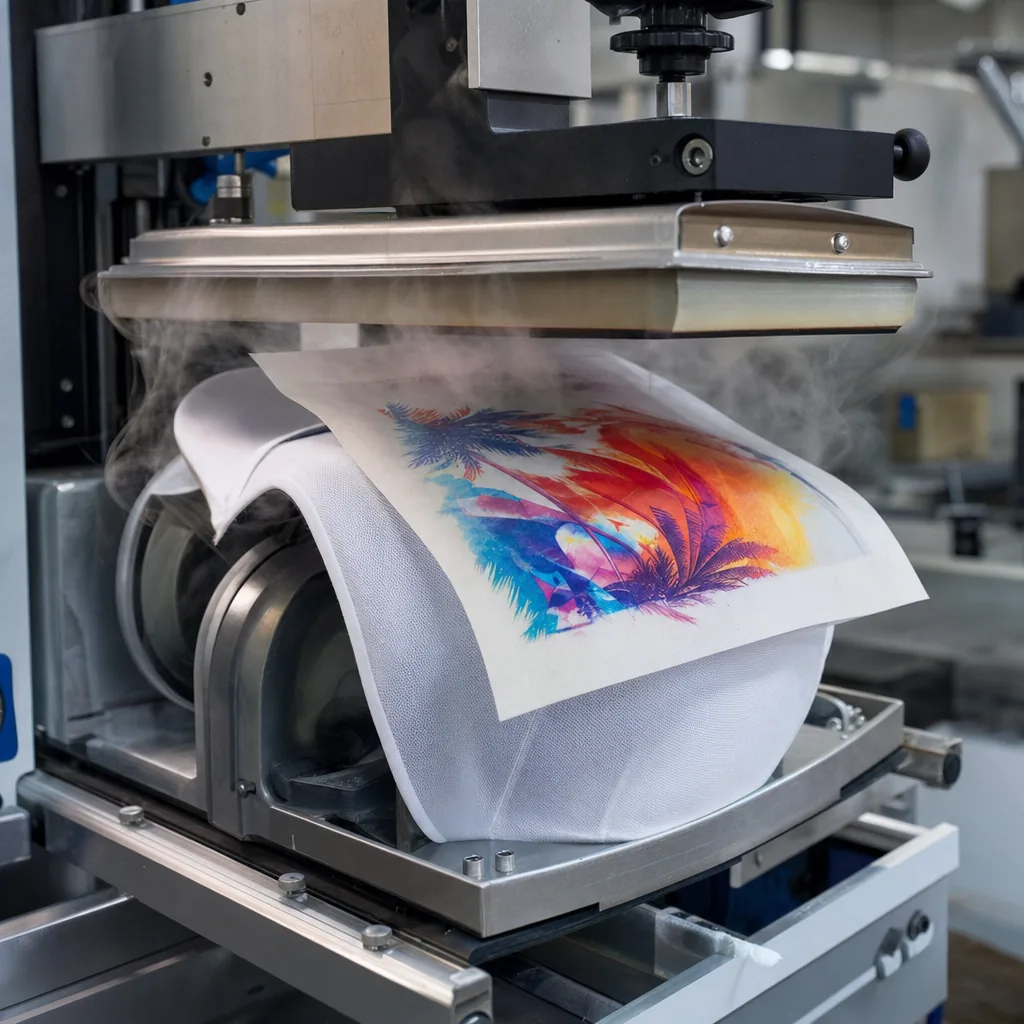
Custom Logo Hats
Lock the decoration method before you ask for pricing; otherwise a factory is quoting blind and you lose a week in preventable re-sampling. A front logo that looks simple on screen can fail quickly on an embroidery hats machine once it hits a curved 6-panel crown with buckram underneath. On Tajima, Barudan, or ZSK multi-heads, direct embroidery is reliable when satin columns stay above roughly 1.0 mm, negative space is not tighter than 0.8 mm, and text is no smaller than about 5 pt equivalent after scaling to the actual logo size. Push below that and you start seeing thread crowding, edge wobble, jump-stitch cleanup, and crowns that torque after sewing. If the artwork has halftones, distress, or hairline outlines, a woven patch or molded TPU badge usually reproduces it more honestly than forcing stitches to do a print job.
A usable spec pack needs manufacturing tolerances, not mood-board language. State crown profile, panel count, visor shape, closure, shell fabric with composition and weight, for example 100% cotton twill at 270 gsm or polyester microfiber at 150 denier, plus sweatband, seam tape, eyelets, logo locations, logo size in millimeters, and center-front placement tolerance; if you do not declare ±2 mm, many factories will default looser. Include Pantone TCX references for dyed fabric, nearest Madeira or Gunold thread conversions for embroidery, backing type, and approved stitch count from the sew-out. In practice, Delta-E under 1.5 is realistic for solid dyed twill, while thread approval is usually visual because polyester thread does not map perfectly to Pantone. Most puckering on unstructured caps is a stabilization problem, not operator error: cut-away or fusible backing is often safer than tear-away on soft cotton crowns.
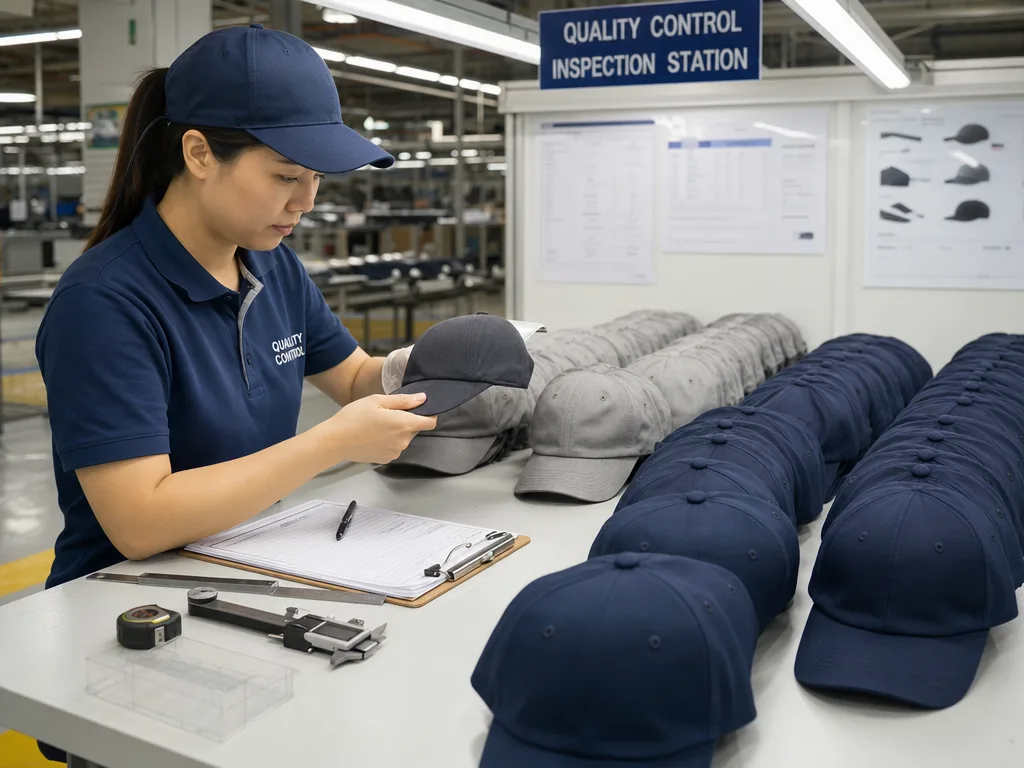
Cost is driven more by logo route than buyers expect. For a stock 6-panel cap in China, practical MOQ is usually 144 to 300 pieces per colorway, while custom crown patterns, dyed-to-match fabric, or special closures can push MOQ to 500 or more. In 2026, a brushed cotton twill cap at 260 to 280 gsm with front flat embroidery commonly prices around $2.10 to $3.40 FOB Ningbo or Shanghai at 300 pieces, assuming a moderate logo under about 8,000 stitches. The same shell with a merrow-edge patch, laser-cut embroidered patch, or heat-applied badge is more often $2.60 to $4.20 because you add a second production step, patch wastage, and attachment labor. Digitizing for direct embroidery typically runs $35 to $80 per logo; patch setup with merrow programming, laser pathing, or custom mold can land at $60 to $120. Inspection is where bad logo decisions become expensive. The repeat defects are logo drift beyond ±2 mm, panel distortion from excessive stitch density, thread tails inside the cap, puckering from inadequate backing, and visor-top embroidery placed too close to the buckram break line. For patches, check merrow width consistency, laser-edge scorching, adhesive bond after 24 hours, and corner lift on a peel check. I would hold final inspection at AQL 2.5 with checkpoints for logo position, stitch count against the approved sew-out, color approval under D65 light, carton drop resistance, and crocking when pale thread sits on dark fabric. CrownsForge’s standard practice is straightforward: if the logo is bold, at least 45 mm tall, and under 8 thread colors, direct embroidery is efficient; if it relies on tiny text, frequent artwork revisions, or faux-vintage texture, a patch is the lower-risk manufacturing choice.
Custom Patch Hats
Patch type sets the limits long before digitizing does. Buyers treat “patch” like one category, but on the floor we separate woven labels, merrow-border embroidered patches, laser-cut twill badges with satin edge, molded PVC, vegetable-tanned leather, and printed twill. If your artwork includes 2.5 to 3.0 mm text or thin serifs, a woven patch made with 50D to 75D yarn is the safer choice; even a well-set Tajima, Barudan, or ZSK embroidery hats machine will start closing counters on 210 gsm cotton twill once density pushes past roughly 0.40 mm and underlay stacks up. For a raised vintage look, embroidered patches work well on 180 to 220 gsm polyester twill, but keep 3D foam only in large fills or block letters over 5 mm stroke width. When the logo has hard corners or an irregular silhouette, laser cutting with a satin border holds shape better than merrow, which naturally rounds corners and adds about 2 to 4 mm of visual mass.
The most reliable workflow is patch-first, cap-second. Build the badge on flat goods, inspect it, then attach it to the crown; that avoids distortion on structured 5-panel and 6-panel fronts with buckram, where sewing a thick patch directly can leave needle tracks and collapse the panel. A proper tech pack should call out patch size in millimeters, base fabric, border type, backing, stitch coverage, and attachment method. I usually write patch tolerance at plus or minus 1 mm, front placement at plus or minus 2 mm from centerline, and color match to Pantone TCX or coated reference within Delta-E 2.0 where thread cards allow it. If heat seal is used, ask for the exact press window—145 to 155 C, 12 to 15 seconds, 3.5 to 4.5 bar, plus hot-peel or cold-peel instruction—because edge lift usually comes from process drift, not the adhesive itself. FOB China, a standard cotton twill or poly-cotton cap with a woven or embroidered patch typically lands around $2.30 to $4.90 at 144 to 300 pieces per colorway; PVC and real leather more often sit at $5.50 to $7.20 before duty and last-mile delivery.
Patch hats fail in inspection, not in quotation. The repeat defects are skewed front placement, perimeter puckering, adhesive bleed, merrow unraveling, jump stitches on embroidered badges, and crown tunneling after wash. Under AQL 2.5, I would mark placement off more than 3 mm, visible corner lift, wrong thread shade, or patch edge waviness on the front panel as major defects. Washed cotton twill, brushed canvas, and 8-wale corduroy need extra caution: if the shell is enzyme washed after attachment, the hat body can shrink 2 to 3 percent while the patch base remains stable, which creates rippling around the border. That is why equipment matters beyond the embroidery hats machine itself. A supplier with only cap-frame embroidery heads will keep pushing direct logo sewing even when a badge is the cleaner technical answer. Ask whether they run dedicated patch production on multi-head Tajima or Barudan units, use post-bed single-needle machines for curved crown attachment, and can provide strike-offs before bulk cutting. Our standard practice is patch approval before full cap assembly, because once a bad badge is sewn onto a shell, you have already lost material, labor, and usually a week on delivery.
Leather Patch for Hats
Use a leather patch when the artwork is below the physical limit of an embroidery hats machine, not because it “looks premium.” On cap fronts, clean stitching starts to break down once strokes fall under roughly 0.8 to 1.0 mm, negative space closes up, and serif letters under 5 mm height turn muddy after the crown is hooped over buckram. A 60 to 75 mm patch solves that by moving detail into deboss, print, or foil instead of thread density. In real production, most export programs are not using full-grain hides; they run PU leather, microfiber PU, or split leather with a PU face at 1.0 to 1.5 mm thickness because the color is more controllable, the sheets laser-cut consistently, and scrap rates stay lower. Full-grain can look better in hand, but hide-to-hide variation often drifts past Delta-E 2.5, which is unacceptable on branded replenishment orders where every cap on the wall has to match. The process spec decides whether the patch works on a cap body. Standard routing is laser cut or steel-rule die cut, then debossed with a heated brass or zinc mold; contrast is added by screen print, UV print, or foil stamp depending on logo fill and rub resistance requirements. I prefer sewn attachment—satin stitch or clean box stitch—over adhesive-only bonding for retail caps unless the supplier can show heat-aging and peel data after 70°C testing. On washed chino dad caps or unstructured 6-panels, patches over 1.6 mm get too stiff, telegraph through the crown, and create puckering at the needle line. Our standard practice is to test the exact patch construction on the final shell fabric before approval, because a patch that lies flat on a bench sample can distort badly once it is sewn onto a curved front panel.
Your tech pack needs to lock down more than artwork and size. Call out material composition, thickness, backing, deboss depth, edge finish, stitch construction, and placement tolerance. For most front-crown caps, 1.2 to 1.4 mm material with 0.4 to 0.6 mm deboss depth is the safest window; above 1.8 mm, the patch fights the crown radius and sewing consistency drops fast. Set front placement tolerance at +/-2 mm, specify thread shade by Pantone TPX/TCX reference plus a physical thread card, and if the patch includes printed color, hold Delta-E under 2.5 against the approved master. If edge paint is used, ask for flex testing because that is where lower-grade patches crack first, especially in winter shipments. The expensive failures are subtle: skewed placement, scorched laser edges, shallow deboss as mold temperature drifts, and bonds that pass packing but fail after wear. I would inspect leather-patch caps at AQL 2.5 with 100% visual review of front logo alignment, then do peel-and-flex checks on carton samples from each production lot. Commercially, standard PU patch MOQs are usually 144 to 300 pieces per color, while a custom emboss mold adds about $60 to $150 in tooling and pushes practical MOQ closer to 300 to 500. Patch cost usually lands at $0.30 to $0.80 each depending on size and finish; a finished cap with a sewn front patch is typically $2.90 to $6.80 FOB China, and higher if the order also runs side or back embroidery on Tajima, Barudan, or ZSK heads.
Leather Patch Hats
Quote leather patch hats as a patch program, not an embroidery-first SKU. An embroidery hats machine only matters if you add a merrow-style stitch line, satin border, or companion side/back logos; the emblem itself is usually produced off-line by laser engraving, blind debossing, hot stamping, or screen printing, then fixed to the crown after front-panel sewing. In practice, 1.2 to 1.6 mm PU gives the best yield for clean die-cut edges, consistent deboss depth, and color matching close to an approved Pantone TCX reference. On decent PU, a realistic factory target is Delta-E 2.0 to 3.0 versus the lab dip; genuine leather is less controllable because grain density, oil content, and dye uptake vary by hide and even by cutting zone. If you want a premium matte look, 1.0 to 1.4 mm cowhide with blind debossing reads better than glossy PU, but expect more shade variation and some dimensional movement after heat pressing. Patch size has to be locked before sampling, because the crown curve punishes oversized badges. On a structured 6-panel cap with buckram, anything above roughly 70 x 50 mm on the front panel starts to fight the shape, especially on lower-profile crowns, and that is where corner lift and puckering show up. Your tech pack should specify material, thickness, finish, edge treatment, backing film, attachment method, and placement tolerance of +/-2 mm. If the patch is sewn down, call out SPI, thread count, and thread type; bonded nylon ticket 40 behaves differently from polyester ticket 30 on curved seams. If direct embroidery is combined with the patch, ask whether the shell runs through Tajima, Barudan, or ZSK heads before or after patch attachment, because sequencing changes hoop burn risk, needle access, and front-panel distortion. In 2026 Zhejiang FOB terms, a stock cotton twill cap with a PU patch usually lands around $2.30 to $3.90; genuine leather versions run closer to $3.60 to $5.90, with MOQ 144 to 300 on stock blanks and 300 to 500 when a new brass deboss mold or custom die is needed.
Most failures come from the emblem supply chain, not the cap sewing line, so QC has to split incoming patch inspection from finished-goods AQL 2.5 checks. The recurring defects are predictable: scorched laser edges, shallow or uneven debossing, oil bloom on natural leather, adhesive squeeze-out, skipped perimeter stitches, and patch curl after carton compression. For heat-applied styles, require a 24-hour post-cure peel test, then a heat-aging check at 50 to 60 degrees C for 4 hours to simulate container conditions. On dark PU and leather, add dry and wet crocking tests, because color rub on sweatbands or fingertips becomes a chargeback issue fast. If the patch uses pressure-sensitive adhesive before stitch-down, check bond uniformity at the corners, where failure usually starts. The factory question is not who owns the most embroidery hats machine capacity; it is who controls patch vendors and documents every transfer point. Our standard practice is to treat placement drift above 2 mm and corner lift above 1.5 mm on front-logo caps as major defects, because retail buyers spot those instantly from one meter away. Ask for incoming QC records by emblem lot, not just final inspection photos, and confirm whether the patch subcontractor is covered under the same compliance system as the sewing plant. Buyers sourcing licensed sports, streetwear, or outdoor accounts should also ask for current sedex-audit-cap-supplier-guide.html">BSCI 2.0 or Sedex SMETA 4-Pillar reports, plus needle policy and restricted-substance declarations for PU coatings, adhesives, and leather finishes. A clean sample means very little if the emblem vendor cannot hold deboss depth, edge quality, and shade consistency across 3,000 pieces.
Leather Patches for Hats
Leather patches are the right call when the logo depends on debossed micro-lines, tonal contrast, or a matte hand that thread cannot reproduce without filling in detail. They also introduce problems an embroidery hats machine does not: corner lift on curved crowns, laser-burn halos, cracked PU topcoats, and lot-to-lot color drift. On caps, the practical materials are usually 0.8-1.2 mm PU, microfiber leather, or split leather with a PU face; full-grain leather looks good on a sample card but is inconsistent for deboss depth and too stiff for many cap profiles. Once you go past 1.4 mm thickness, rejection rates rise sharply on 5-panel foam truckers and low-profile dad caps, especially near the top corners and across the front seam. Standard flow should be specified as die-cut, deboss or laser-etch, optional silk-screen or UV print to a Pantone TCX reference, then stitch-down or heat-press with TPU or hot-melt backing. For export programs, I would require REACH-compliant material, Delta-E 1.5-2.0 against the sealed swatch, and edge paint or folded-edge construction if the patch is mounted on washed cotton twill, brushed canvas, or pigment-dyed shells.
The spec sheet drives outcome more on patches than on embroidery because one vague line item can turn into full-carton rework. Lock the material type, thickness, hardness, backing, logo method, edge finish, stitch run if sewn, and attachment method before sampling. Radius compatibility is the miss most buyers make: a 60 x 35 mm patch can sit perfectly on a structured six-panel snapback with buckram, then wrinkle on an unstructured low crown because the panel break is tighter. In Yiwu, MOQ for PU patches is commonly 200-300 pieces per color if dies are made in-house; genuine leather usually starts around 500 because hide yield is uneven and cutting waste is real. At 500 caps, a standard PU patch typically adds $0.28-$0.65 per unit FOB; real leather is more like $0.70-$1.50 depending on size, edge paint, print layers, and whether the patch is sewn on two sides or four.
Inspection should target subtle failures, not dramatic ones. The defects that actually cause claims are shallow deboss depth, adhesive squeeze-out at the perimeter, crooked placement, scorch marks from overpowered laser settings, and corner lift after 24 hours of relaxation. I would hold placement at +/-2 mm from the approved sample, inspect to AQL 2.5, and add a 3M tape pull test for heat-applied patches plus a 20-cycle dry-rub check when white, metallic, or UV inks sit on dark PU. If the shell fabric is nylon taslon, brushed acrylic, or heavily washed cotton, test adhesion on the actual hat body because surface energy and finishing chemistry change bond strength. Our standard practice is to trial the patch on a finished cap body, not a flat panel, because desk samples hide curvature issues. If a supplier only talks about Tajima, Barudan, or ZSK head count and has no die-cutting SOP, patch jig, or heat-press validation, they may know embroidery well but still be weak on mixed-media headwear.
Custom Leather Patch Hats
For leather patch hats, the limiting factor is usually trim engineering, not the embroidery hats machine. A factory can have 20-head Tajima or Barudan lines and still ship weak product if patch lamination, die cutting, and post-assembly pressing are not under control. Most commercial patches are made from 0.9-1.2 mm PU, 0.8-1.0 mm microfiber leather, or 1.2-1.6 mm split cowhide; each behaves differently under heat and crown curvature. Steel-die cutting is still the fastest option above roughly 1,000 pcs per shape, while CO2 laser cutting works for small runs and fine internal detail but often leaves a darker edge on light tan PU. Decoration is typically debossed, embossed, UV printed, screen printed, or laser engraved. Stitching through the patch is possible, but on thin PU it creates needle drag, corner puckering, and visible distortion unless the patch is backed correctly and sewn on a programmable pattern machine such as a Juki AMS.
The patch has to survive real handling, not just look good on a sample board. Hot-melt film grade, press temperature, dwell time, pressure, and front-panel structure all matter more than buyers expect. On finished caps, we usually see stable bonding around 145-155°C for 10-14 seconds, but that range has to be adjusted for buckram fronts, foam truckers, and washed cotton dad hats because crown rebound changes pressure distribution. Cheap raw-edge faux leather often starts whitening, fuzzing, or edge-cracking after cold storage or flex testing, especially below 5°C. If you want a premium result, specify folded edges or edge paint, plus the exact adhesive system instead of accepting a vague "heat-transfer backing." CrownsForge treats patch making and cap assembly as separate QC gates because a strong sewing line cannot correct poor lamination or uneven press force on a curved front.
Your tech pack should lock down patch specs in millimeters, not adjectives. State finished size, corner radius, substrate, thickness tolerance, backing film, attachment method, logo depth, and placement tolerance. For front-center application, 50 x 25 mm to 65 x 35 mm is the safe zone on most 6-panel dad hats and truckers; past about 70 mm wide, edge lift becomes common on curved crowns, especially with stiff buckram fronts. If color matters, approve against Pantone TCX under D65 light and set a Delta-E tolerance, because brown and tan PU can drift visibly between lots. In Yiwu, a stock cotton twill cap with a standard PU patch usually lands around $2.20-$3.50 FOB at 300-500 pcs per colorway; genuine leather with sewn application is more often $3.40-$5.90 FOB. Inspect at AQL 2.5 and prioritize failures that show up after packing: edge lifting, adhesive bleed, scorch marks, deboss inconsistency, stitch skip, and placement off by more than ±1.5 mm. A 5-piece peel test per lot tells you more than another conversation about embroidery hats machine capacity.
Working with CrownsForge for embroidery hats machine programs
Freeze the sew path before you argue over $0.08 on FOB; that is how you keep an embroidery hats machine program out of rework. If the logo arrives as a usable DST, EMB, or vector AI with exact dimensions, thread spec, and placement from the visor seam, a first cap sample is usually 5 to 7 working days. If we have to build the file from scratch, add center-out compensation, adjust pull on buckram-backed fronts, or engineer 3D puff for a raised satin border, budget 7 to 10 working days. A 6-panel structured cotton twill cap, a brushed chino dad cap, and a 5-panel polyester foam trucker do not sew alike; crown angle, panel seam height, and fabric memory all change how the design runs. On the floor, we test on actual shell panels, not stock swatches, checking underlay, density, and push-pull at around 650 to 850 stitches per minute on structured fronts to reduce flagging, thread breaks, and hoop shine. As a cost benchmark, simple front-logo digitizing is typically $15 to $40, while a 3D puff front with side and back hits is more often $50 to $80.
Direct embroidery is the wrong tool for plenty of logos, even when the buyer asks for an embroidery hats machine build. Fine outlines below 1.0 mm, tonal gradients, and large fill areas above roughly 8,000 to 12,000 stitches usually read cleaner as a patch because direct fill can distort an unstructured crown or make the front panel feel boardy. We run flat and puff files on Tajima and Barudan multi-heads, and switch to woven, merrowed twill, felt, TPU, PU, or laser-cut patches when edge definition or hand feel matters more than stitch texture. Heat-press attachment is acceptable on low-stress promo caps, but for retail programs a stitched patch is safer; summer container heat, crown flex, and repeated sweat exposure expose weak glue quickly. For order control, our standard practice is tech-pack review, Pantone approval, pre-production sample signoff, inline checks, and final AQL 2.5 inspection before shipment. If brand color matters, lock thread to Pantone TCX or coated references and define an acceptable Delta-E, because black-on-black puff and optic-white patch grounds can shift visibly under 5000K factory lighting versus store LEDs.
Frequently Asked Questions
What file format should I send for my logo?
Vector files (AI, EPS, PDF) are ideal. High-resolution PNG or JPG at 300 dpi on transparent background works as a fallback. Provide Pantone color references for accurate reproduction.
What logo decoration techniques do you offer?
3D puff embroidery, flat embroidery, woven patch, leather patch, PVC patch, screen printing, sublimation, applique and laser etching, all in-house with no subcontracting.
Which shipping methods do you support?
We support FOB, CIF and DDP shipping. Air express for samples and small orders, sea LCL for 100 to 500 pieces, sea FCL for 5,000+ pieces. Door-to-door DDP available for US, EU, UK, Canada and Australia.
How long does production take?
Sampling takes 7 to 12 days. Bulk production runs 20 to 30 days depending on quantity, fabric availability and decoration complexity. Inspection and packing adds another 3 to 5 days before shipment.
Do you support sustainability certifications?
Yes. We work with GOTS organic cotton, GRS-certified recycled polyester, OEKO-TEX Standard 100 fabrics, and are BSCI and Sedex audited. Certification documentation can be provided per order.
What's the MOQ for custom leather patch hats no minimum?
When evaluating custom leather patch hats no minimum, the key considerations are construction quality, decoration capability, MOQ flexibility and lead time. Cover everything buyers ask about custom leather patch hats: how it's manufactured, what specs to request from a factory, typical MOQ and pricing, common quality issues to inspect for, and how this ties back to the broader embroidery hats machine sourcing decision. Cover everything buyers ask about custom patch hats: how it's manufactured, what specs to request from a…
How does ordering custom embroidered baseball hats work?
When evaluating custom embroidered baseball hats, the key considerations are construction quality, decoration capability, MOQ flexibility and lead time. Cover everything buyers ask about custom logo hats: how it's manufactured, what specs to request from a factory, typical MOQ and pricing, common quality issues to inspect for, and how this ties back to the broader embroidery hats machine sourcing decision. Cover everything buyers ask about custom patch hats: how it's manufactured, what specs to request from a factory,…
What's the MOQ for custom embroidered patches no minimum?
When evaluating custom embroidered patches no minimum, the key considerations are construction quality, decoration capability, MOQ flexibility and lead time. Cover everything buyers ask about custom logo hats: how it's manufactured, what specs to request from a factory, typical MOQ and pricing, common quality issues to inspect for, and how this ties back to the broader embroidery hats machine sourcing decision. Cover everything buyers ask about custom patch hats: how it's manufactured, what specs to request from a factory,…
What's the MOQ for custom embroidered baseball caps no minimum?
When evaluating custom embroidered baseball caps no minimum, the key considerations are construction quality, decoration capability, MOQ flexibility and lead time. Cover everything buyers ask about custom logo hats: how it's manufactured, what specs to request from a factory, typical MOQ and pricing, common quality issues to inspect for, and how this ties back to the broader embroidery hats machine sourcing decision. Cover everything buyers ask about custom patch hats: how it's manufactured, what specs to request from a factory,…
What type of embroidery machine is best for hats?
Wide 270° sew field to accommodate large designs or embroidery on the side of a hat. High-speed embroidery machine—sew caps at a blazing 1200 stitches per minute (in many cases).
Can an embroidery machine embroider hats?
Hat Embroidery Machine (s) are commercial or professional embroidery machines that are designed to do well embroidering on caps and hats as well as traditional flat garments. So basically, a good professional machine is a good hat and shirt embroidery machine too.
Is it cheaper to print or embroider hats?
The colors of an embroidered design tend to be more subtle, while printing can provide brighter colors. Printing is generally less expensive than embroidery and works best for simple designs that don't require intricate detail.
Need a low-MOQ test order?
We help emerging brands launch with as few as 100 pieces. Premium fabric, in-house embroidery, retail-ready packaging.
Start a small orderRelated guides
BSCI vs Sedex vs WRAP vs WCA: Compliance Audit Standards Compared (2026 Update)
Read article →
Primark Bucket Hat: A Vertical-Specific Sourcing Guide
Read article →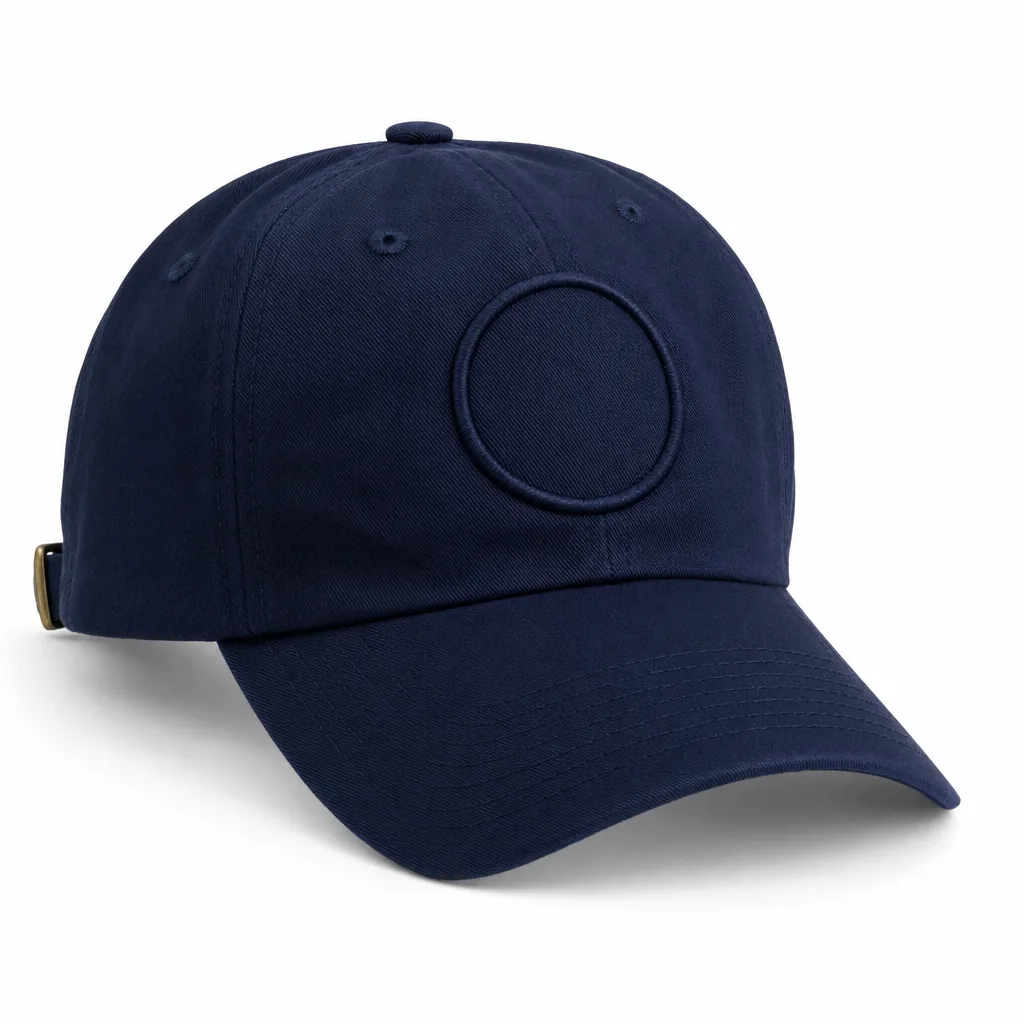
Custom Hat Embroidery: The 2026 Sourcing & Manufacturing Playbook - Supplier Checklist
Read article →We hope this guide demystifies embroidery hats machine: when to use it, costs, and what to ask your factory - 2026 buyer's guide and helps you move forward with confidence. If you have questions specific to your project, our English-speaking sales engineers are one message away.