What's in a Cap Tech-Pack: A Specification Template for Buyers - Supplier Checklist - 2026 Buyer's Guide
What's in a Cap Tech-Pack: A Specification Template for Buyers - Supplier Checklist - 2026 Buyer's Guide is one of the most-asked questions we receive from international buyers, and for good reason. With dozens of factories competing for your order and an alphabet soup of technical terms in every supplier quote, even experienced importers can feel lost. This guide consolidates what we have learned producing custom hats for clients in 40+ countries.
Why a tech-pack saves you weeks of email back-and-forth
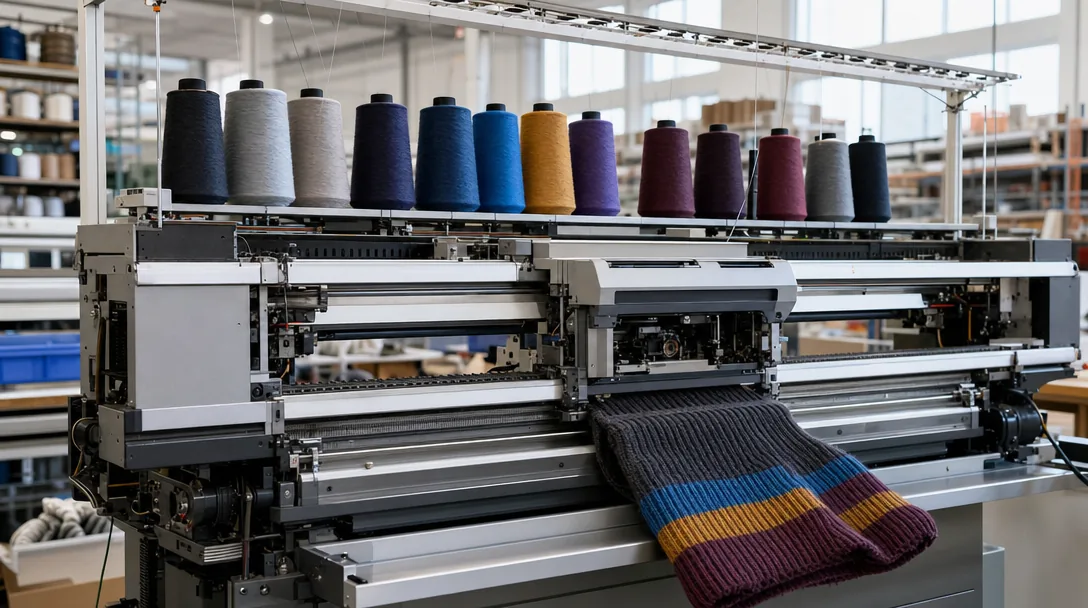
Most avoidable delays happen before sampling, when the factory is forced to guess construction details the buyer never locked down. A front mockup and vector logo are not enough to build a cap consistently. They do not tell the pattern room whether the style is a low-profile 6-panel baseball cap, a high-crown 5-panel foam trucker, or a rope cap with a 5 mm braid and flat visor. They do not define crown height, panel split, visor length, PE buckram thickness, eyelet material, seam tape artwork, closure type, sweatband composition, or whether “navy” means Pantone 19-4025 TCX with an approved lab dip at Delta-E below 1.5. When those calls are missing, the merchandiser defaults to prior orders, the sample room cuts to one assumption, and the digitizer builds to another. The result is a sample that may be technically correct but commercially wrong, and every correction burns another 24 to 72 hours in email, approvals, and rework. A solid cap tech pack template cuts that dead time because each department gets usable specifications on day one. The pattern maker needs crown height in mm, visor width and curve, seam allowance, and panel-by-panel construction. The digitizer needs logo size, placement from seam lines, stitch type, backing, thread brand, and whether the file will run on Tajima, Barudan, or ZSK heads. Sourcing needs exact fabric composition, weave, gsm, denier, trim finish, and color standard. Leave out even one of those items and the process stalls while teams wait across time zones for clarification. On straightforward programs, that usually adds 3 to 5 business days before fabric is cut; on multi-logo or licensed projects, it can easily become a full extra week.
The savings are measurable on the factory floor. Without a complete spec sheet, first samples for custom caps routinely stretch to 12 to 14 calendar days because basic decisions keep getting reopened: 12x12 cotton twill or 16x12 brushed twill, 190 gsm or 240 gsm shell, self-fabric underbill or black anti-glare, center-fold woven label or end-fold, plastic snap in 7-hole PP or 18-line metal buckle, sweatband in 100% cotton twill or polyester foam-backed, and carton pack ratio of 24, 48, or 72 pieces. Revision cycles then stack up fast. It is common to see three sample rounds where the artwork was approved early but the build details were never frozen, so embroidery placement shifts, crown shape changes, and trims have to be rebooked. The best cap tech pack template is not a pretty presentation deck; it is an executable manufacturing document. It should include panel-by-panel materials, stitch count or SPI where relevant, logo placements in mm, Pantone TCX or TPX references, closure width and finish, packaging method, barcode position, and inspection standard such as AQL 2.5. Tolerances matter because they stop subjective arguments later: visor length ±2 mm, embroidery position ±1.5 mm, crown height within agreed spec, and dyed fabric shade within Delta-E 1.5 against the approved standard. Our standard practice is that once those points are fixed before sampling, a standard 6-panel baseball cap can usually move through first sample in 5 to 7 days instead of dragging through two weeks of preventable clarification.
The seven sections of a complete cap tech-pack
Leave out any of the seven sections in a cap tech pack template and the factory will substitute house standards, which is how you end up with a sample that looks “close” but fits wrong. Start with the technical sketch. It should show every production-relevant view: front, both sides, back, underbill, inside seam taping, sweatband, closure, and any label positions. Every callout needs a hard dimension in millimeters. Terms like “mid-profile” or “slightly curved visor” are not specs unless you tie them to a block and measurement table. On a 6-panel baseball cap, I expect crown height from visor seam to top button, front panel width, rear opening width, button diameter, eyelet position from panel apex, visor blank size before sewing, and seam allowance by operation. A typical visor blank may be 180 x 70 mm, but if your fit is built on 175 x 68 mm, that exact number belongs in the file. Sections two and three—materials and color—cause the most avoidable bulk claims because buyers rely on shorthand. Fabric should be specified by fiber content, weave, weight, finish, and trim support: 100% cotton twill, 3/1, 260 gsm; recycled polyester microfiber, 150D, with 0.08 mm PU backing; wool blend melton, 380 gsm, for structured crowns. Call out buckram by location and stiffness, for example 0.4 mm PE-coated front-panel buckram only, not full crown. Include sweatband width, seam tape composition, closure material, visor insert type, and top-button wrap fabric. Color must be broken down by body, visor top, undervisor, eyelets, button, closure, sweatband, and interior tape, using Pantone TCX for textiles and Pantone C for coated trims. JPEG approval is not color control. Set measurable tolerances—Delta-E below 1.5 for retail programs, below 2.0 for promo—and approve under both D65 and TL84 because dark shades like navy and forest shift badly between light sources.
Sections four through seven—decoration, construction, packaging, and labeling—decide whether the order survives bulk production and AQL 2.5 inspection. Decoration needs method, placement, size, stitch count or print colors, backing, and source file. “Front logo embroidery” tells the digitizer nothing; “flat embroidery, center front, 58 mm wide, 11,500 stitches, 40 wt rayon, cutaway backing” is buildable. For 3D puff, specify foam thickness—usually 3 mm or 5 mm—plus minimum stroke width, because artwork that runs cleanly on a Tajima or Barudan can still sink into brushed twill if the density is too aggressive. Construction should lock the cap architecture: 5-panel or 6-panel, profile, structured or unstructured front, visor stitch rows, eyelet type, closure gauge, sweatband width, sandwich piping, and visor insert such as 1.8 mm HDPE or recycled PE. Packaging and labels are not back-office details; they change freight cost, compliance status, and warehouse intake time. The cap tech pack template should state unit packing clearly: no individual polybag, or 25 pcs per PE bag with suffocation warning; 144 pcs per export carton; max carton weight 15 kg; carton size capped at 60 x 45 x 45 cm to avoid oversize surcharges on many DDP lanes. Add barcode symbology, carton marks, assortment ratio, nesting direction, and whether crown support is required to prevent panel crush in transit. Label specs should cover country of origin, fiber content, care instructions, RN or brand ID where required, warning text, and hangtag attachment method. Our standard practice is to also fix ticket placement within 5 mm tolerance, because retailer pre-ticket failures create expensive rework long after sewing is finished.
Tech sketches: front, side, back, optional underbrim
A usable cap tech pack template begins with scaled vector line art, not marked-up photos. Photos lie: they compress crown height, hide seam transitions, and make a pre-curved visor look flatter than it is, which is how two sample rooms cut two different patterns from the same brief. Show front, side, and back views with every construction line that affects the block: 5-panel or 6-panel layout, center-front seam or split front, top button diameter, eyelet placement, visor join seam, sweatband line, back opening shape, closure type, and visible topstitch paths. If the style has sandwich brim, 5 mm cotton braid rope, contrast underbrim, back arch, or a high-profile foam front, draw it directly instead of burying it in notes. Adobe Illustrator remains the cleanest handoff because dimensions, callouts, and Pantone references can sit on the artboard in millimeters; 1:4 scale works for most baseball caps, while 1:5 is usually enough for bucket and camp shapes if proportions are locked. The sketch also needs to identify structural parts that control silhouette, because “same artwork” does not mean “same cap.” Call out front support as 2.0 mm soft buckram, 2.5 mm tricot-fused buckram, or 3.0 mm hard buckram; visor as flat, 10-degree pre-curve, or factory-curved to a set jig; seam tape as self fabric, 12 mm printed twill, or woven logo tape. On embroidery-heavy styles, note whether the front panels are digitized for unstructured or structured support, since a Tajima or Barudan run on soft cotton twill behaves differently from one run on hard-backed acrylic-wool serge. Our standard practice is to include closure hardware details on the same sheet—7-hole PVC snap, 20 mm antique brass buckle, tuck strap, or Velcro—because those parts change the back opening geometry and often the final carton dimensions.
Put the measurement points on the drawing itself, because comment threads are where fit specs go to die. Mark crown height at center front from the sweatband seam line to the top button, not from a tabletop; tabletop measurements vary with blocking pressure and visor curve, so they are useless for repeat production. Visor length should be measured from the crown-brim seam to the brim tip at center. If the brim is pre-curved, define it with a physical target the factory can check on line: for example, 15 mm rise on each edge when laid flat, or a forming radius if the plant uses a metal jig. For fitted and flex styles, specify the head opening circumference at the sweatband seam; for snapbacks and strapbacks, show the base block before adjustment—58 cm is standard adult, but many streetwear buyers now ask for 59 cm on high-profile shapes to reduce forehead pressure. Add an underbrim view whenever there is decoration or hidden construction below the visor. That includes screen print boundaries, sublimation bleed area, seam-safe zones, stitch-row count, and brim board spec such as 1.8 mm PE board, 2.0 mm recycled HDPE, or 1.6 mm paperboard on value programs. If the underbrim carries embroidery, keep a no-sew margin of at least 6 mm from the seam bite to avoid needle strikes during visor turning. If color matters, note the exact Pantone TCX or coated reference and acceptable tolerance; on dark underbrims, Delta-E below 1.5 is realistic for dyed twill, while sublimated poly usually lands looser. These sketch details are what stop one factory from sampling a deep, hard-curved sports cap while another interprets the same cap tech pack template as a flatter fashion block under the same SKU.
Fabric and color spec: GSM, weave, Pantone references
The fabric line in a cap tech pack template needs to eliminate substitution risk, not just describe the look. “Cotton twill” is a buying note; “100% cotton, 3/1 twill, 21s x 21s ring-spun yarn, 108 x 58 ends/picks per inch, 270 gsm, reactive dyed, sanforized, 58/60 in cuttable width” is a usable spec. On structured baseball caps, that level of detail controls front-panel memory, buckram adhesion, seam bulk at the side join, and how a 75/11 needle behaves during embroidery. For wool styles, specify blend and finish because melton and brushed wool-acrylic behave very differently under a 6,000 to 8,000 stitch logo: “80/20 wool-acrylic melton, 16 oz/yd² (542 gsm), singed face, piece dyed.” For performance caps, add denier and finish, not just weight: “100% recycled polyester, 150D x 150D plain weave, 140 gsm, C0 DWR, moisture-management finish, 30+ UPF.” If you leave construction open, mills will quote whatever greige stock is available, and two “matching” samples can swing 80 gsm or more, which is enough to change visor wrap, crown drape, and finished hand feel.
Color specs should be written like pass/fail criteria, because most sampling delays come from buyers approving a shade visually without defining the standard. Use Pantone FHI/TCX references for dyed fabric and trims; Pantone Solid Coated is for printed graphics, not textile dyeing. A workable line is: “Pantone 19-4007 TCX, Delta-E max 1.5 to approved swatch under D65/10°.” Then list every component that must hit that approval: crown fabric, visor top, underbill, top button, eyelets, self-fabric strap, woven label ground, and sweatband tape. Cotton twill, polyester mesh, and brushed tricot sweatbands do not absorb dye the same way, so one Pantone callout without part-by-part approval usually creates avoidable shade variance. Add measurable tolerances next to the fabric item: gsm ±5%, width ±1 in, skew/bow within 3%, colorfastness Grade 4 dry crocking and 3-4 wet, wash fastness Grade 4 minimum. At CrownsForge, we lock bulk fabric to a signed lab dip or strike-off and verify incoming rolls before cutting; AQL 2.5 at final inspection cannot fix the wrong base cloth.
Decoration spec: technique, placement, dimensions, color count
Vague decoration notes are where a cap tech pack template usually breaks down. Write each logo as a manufacturing instruction, not a design comment: front center 3D puff embroidery with 2.0 mm EVA on a structured 6-panel crown, left panel flat embroidery, rear arch woven patch with heat-seal backing, visor screen print, or molded silicone transfer. “Embroidered logo” is useless because the factory will default to the cheapest workable method based on available heads, operator skill, and FOB target. If you approved a specific sew-out character, say so. Tajima, Barudan, and ZSK heads do not handle dense satin columns, tiny counters, and edge definition exactly the same, especially below 0.8 mm stroke width or on text under 4.5 mm tall. Also note whether the artwork crosses the front center seam; on buckram-backed crowns that seam will open outlines and distort registration unless the digitizing compensates for push and pull.
The best decoration pages lock down construction details that directly affect reject rate: cutaway versus tearaway backing, edge-walk underlay, tatami or satin fill, run direction, puff applied only to the top layer, and whether jump threads must be hand-clipped rather than heat-finished. Placement should be tied to fixed landmarks, not a rendering. Specify front logo centered on panels 1 and 2 with bottom edge 18 mm above visor seam; side hit centered between seams 2 and 3 at panel midpoint; rear wordmark centered 12 mm above back opening. Give final dimensions in millimeters for every position—50 x 32 mm front, 28 x 28 mm side, 65 x 18 mm rear arch—because a 4 mm scale change can add 2,000-3,500 stitches and shift embroidery cost by about $0.18-$0.45 per cap, depending on quantity and backing.
Color control needs the same precision. Call out thread colors by Pantone TCX or approved manufacturer chart, and state the maximum thread count per position: for example Pantone 19-4052 TCX navy, 11-0601 TCX white, maximum 6 colors on the front embroidery. If the brand has tight shade standards, require Delta-E under 2.0 against the approved thread card or patch material under D65 lighting. For patches and appliques, specify the substrate, edge finish, and attachment method: 210 gsm twill with merrow border, laser-cut felt with satin stitch, or TPU badge applied at 150-160°C for 12-15 seconds at defined pressure. Our standard practice is to tie every decoration callout to an approval path—digitized file version, strike-off reference, and tolerance of ±1.5 mm for placement—so QC can inspect to AQL 2.5 against something measurable instead of arguing over a mockup.
Packaging and label spec: polybag, hangtag, sticker, carton
Packaging errors trigger chargebacks faster than a bad stitch line, so your cap tech pack template should treat packing specs as production-critical, not admin detail. Lock the unit polybag by size, resin, gauge, venting, closure, and warning copy. For most adult 6-panel caps, 280 x 320 mm in 30–40 micron LDPE is fine; high-crown snapbacks and truckers usually need 300 x 340 mm to avoid crushing the buckram front or distorting mesh. If the style has a hard 5-panel front, specify whether the factory must use 1 sheet tissue fill, a folded paper crown support, or a 2–3 mm EVA insert. Also call out bag format: self-adhesive flap, tape seal, or open-mouth bag packed at factory. That choice affects packing speed, rework, and whether operators can repack without wrinkling the visor sticker or hangtag.
If sustainability or retailer compliance matters, write it plainly: mono-material PE only, recycle code 4, no laminated OPP/CPP mixes, and no unnecessary inner sleeves. Hangtags need the same discipline. Specify finished size, stock, surface finish, Pantone references, barcode type, COO line, and tie method. A common retail spec is 50 x 90 mm on 300–350 gsm C2S with matte lamination; uncoated 350 gsm stock often scuffs less obviously on dark headwear. For color-critical branding, set print tolerance at Delta-E below 2.5 against the approved hard proof. State attachment method exactly—7 inch nylon loop, kimble gun, cotton string, or safety pin—because each leaves different marks and changes line efficiency. Our standard practice is to approve a 1:1 print mockup with barcode position and punch-hole location before bulk tag printing starts.
Sticker and carton instructions should be impossible to improvise on the packing line. Define sticker position from brim edge in mm, diameter, substrate, finish, adhesive, and clean-removal requirement. A 45 mm silver PET foil sticker with permanent adhesive behaves nothing like a removable paper size dot on brushed cotton twill, especially in summer humidity above 70% RH. If the top visor must stay presentation-clean, move the UPC or EAN label to the underbrim and state orientation. For cartons, specify pieces per carton, size ratio, max gross weight, board grade, and shipping marks. A workable export standard is 24 or 48 pcs per 5-ply K=K carton with gross weight capped at 12 kg; larger counts save freight but raise deformation risk on structured crowns. Include PO, style, color, carton number, COO, and outer dimensions in cm. If shipping to Amazon FBA or licensed retail, also define FNSKU placement, suffocation-warning rules, drop-test expectation, and whether mixed colors or mixed sizes are permitted in one carton under AQL 2.5 final inspection.
Frequently Asked Questions
What file format should I send for my logo?
Vector files (AI, EPS, PDF) are ideal. High-resolution PNG or JPG at 300 dpi on transparent background works as a fallback. Provide Pantone color references for accurate reproduction.
How long does production take?
Sampling takes 7 to 12 days. Bulk production runs 20 to 30 days depending on quantity, fabric availability and decoration complexity. Inspection and packing adds another 3 to 5 days before shipment.
Can I order a sample before bulk production?
Yes. We strongly recommend approving a pre-production sample before mass production. Samples are charged at 35 to 60 USD each plus express shipping, fully refundable against confirmed bulk orders over 500 pieces.
What is the minimum order quantity (MOQ) for custom hats?
Our standard MOQ is 100 pieces per design and color, with sampling available from 1 piece. For complex multi-color logos or premium fabric upgrades, the MOQ can be lowered with a small per-piece surcharge.
Which shipping methods do you support?
We support FOB, CIF and DDP shipping. Air express for samples and small orders, sea LCL for 100 to 500 pieces, sea FCL for 5,000+ pieces. Door-to-door DDP available for US, EU, UK, Canada and Australia.
How does ordering custom patch trucker hat work?
When evaluating custom patch trucker hat, the key considerations are construction quality, decoration capability, MOQ flexibility and lead time. Technique (3D puff / flat embroidery / patch), placement (front center, side, back), dimensions (e.g. 5cm wide × 3cm tall), stitch count if known, color count and Pantone references. Without a tech-pack, your factory invents details that contradict your assumptions. With one, sampling lead time drops from 14 days to 7 and revision rounds drop from 4 to 1.
How does ordering baseball cap custom work?
When evaluating baseball cap custom, the key considerations are construction quality, decoration capability, MOQ flexibility and lead time. Without a tech-pack, your factory invents details that contradict your assumptions. With one, sampling lead time drops from 14 days to 7 and revision rounds drop from 4 to 1. Tech sketches, fabric spec, color spec, decoration spec, construction spec (panels, closure, eyelets, sweatband), packaging spec, label/hangtag spec.
How does ordering custom baseball cap motorcycle helmet work?
When evaluating custom baseball cap motorcycle helmet, the key considerations are construction quality, decoration capability, MOQ flexibility and lead time. Without a tech-pack, your factory invents details that contradict your assumptions. With one, sampling lead time drops from 14 days to 7 and revision rounds drop from 4 to 1. Tech sketches, fabric spec, color spec, decoration spec, construction spec (panels, closure, eyelets, sweatband), packaging spec, label/hangtag spec.
How does ordering custom bucket hat embroidered work?
When evaluating custom bucket hat embroidered, the key considerations are construction quality, decoration capability, MOQ flexibility and lead time. Without a tech-pack, your factory invents details that contradict your assumptions. With one, sampling lead time drops from 14 days to 7 and revision rounds drop from 4 to 1. Tech sketches, fabric spec, color spec, decoration spec, construction spec (panels, closure, eyelets, sweatband), packaging spec, label/hangtag spec.
Ready to start your custom hat project?
Send us your tech-pack, sketch or even just an inspiration photo. We will respond with a detailed quotation and digital mock-up within 24 hours.
Request a free quoteRelated guides
Custom Made Trucker Hat: The 2026 Sourcing & Manufacturing Playbook (2026 Update) - Cost & MOQ Breakdown
Read article →
Blank Hats MOQ And Pricing Plan for Custom Hat Buyers
Read article →Ball Caps for Women: A 2026 Sourcing Playbook for International Buyers
Read article →If you are ready to take the next step on what's in a cap tech-pack: a specification template for buyers - supplier checklist - 2026 buyer's guide, our team can put a tailored quotation and digital mock-up in your inbox within 24 hours. Send the inquiry form on our contact page or message us directly on WhatsApp.