What's in a Cap Tech-Pack: A Specification Template for Buyers - 2026 Buyer's Guide
What's in a Cap Tech-Pack: A Specification Template for Buyers - 2026 Buyer's Guide is one of the most-asked questions we receive from international buyers, and for good reason. With dozens of factories competing for your order and an alphabet soup of technical terms in every supplier quote, even experienced importers can feel lost. This guide consolidates what we have learned producing custom hats for clients in 40+ countries.
Why a tech-pack saves you weeks of email back-and-forth
Most lost time comes from undefined construction, not factory speed. When a buyer sends only logo art and says “match our last cap,” the merchandiser still has to make production-critical calls: low-profile or mid-profile crown, 55-degree or 70-degree visor curve, 0.8 mm or 1.2 mm fused buckram, self-fabric or metal eyelets, snapback or antique brass buckle, terry sweatband or moisture-wicking polyester, and whether the front panel needs EVA support for 3D puff. Every missing decision triggers internal back-and-forth between pattern room, cutter, embroidery digitizer, and sewing line leader. A proper cap tech pack template removes that guesswork by locking specs into one sheet: crown height in millimeters, visor length and curvature, fabric weight in gsm, closure code, Pantone TCX references, logo placement from center front or visor seam, and carton pack method. On the factory floor, that usually cuts first proto lead time from 12–14 calendar days to 6–8, because the sample is built from measurable inputs instead of reconstructed from scattered emails.
The bigger gain is fewer correction rounds and tighter costing. If artwork size, stitch count, and color tolerance are documented upfront—say front logo centered on CF, 12 mm above visor seam, capped at 8,500 stitches, with thread matching held within Delta-E 1.5—the digitizer can run a clean test on Tajima or Barudan heads without three rounds of rework. The same applies to materials: 265 gsm brushed cotton twill, 300 gsm recycled canvas, and 210 denier nylon all behave differently in sewing, embroidery, and pressing, and their prices do not land in the same range. A missing trim detail like woven wrap labels, printed seam tape, branded taping, or moisture-wicking sweatbands can move FOB cost by $0.18 to $0.90 per piece at 1,000 units. Our standard practice is to treat the cap tech pack template as the single source of truth from quotation through AQL 2.5 final inspection, which is why development often drops from three or four revisions to one real correction cycle.
The seven sections of a complete cap tech-pack
A usable cap tech pack template lives or dies on seven pages: technical sketch, material specification, color standard, decoration spec, construction sheet, packaging plan, and labels/hangtags. If one page is soft, the sewing line fills the gap with house practice, and that is how a buyer asking for a mid-profile 6-panel cap receives a deeper crown, flatter visor, or the wrong snapback post. The sketch page should carry front, side, back, top, underbill, and inside views with measurable callouts, not just arrows. On caps we build, the dimensions that prevent fit disputes are crown height at center front, visor length and width, opening circumference, panel seam positions, eyelet diameter, top button diameter, sweatband width, and closure strap length. A difference of 8 mm in crown height can change the silhouette more than most first-time buyers expect. Write those numbers as production targets with tolerances. For example: crown height 16.5 cm +/- 0.3 cm, visor length 7.0 cm +/- 0.2 cm, visor width 18.0 cm +/- 0.2 cm, finished circumference 58 cm +/- 1 cm, top button 12 mm, sweatband 32 mm, front panel width 8.5 cm. The material page should read like a mill sheet. “Cotton twill” is too vague; “100% cotton brushed twill, 280 gsm, 2/1 weave, reactive dyed, enzyme washed” gives the cutter and finishing team something usable. For performance styles, specify the shell, lining, and reinforcement separately: 100% recycled polyester microfiber 140 gsm, C0 DWR, UPF 40+, 70D buckram on front panels, 1.8 mm PE visor insert, polyester seam tape 15 mm, and moisture-wicking sweatband 180 gsm. Add shrinkage tolerance under steaming, crocking grade, and colorfastness target so bulk fabric is judged before sewing, not after packing.
Color and decoration are where most revisions get burned. Break every visible component into its own color line: crown, underbill, sandwich if any, top button, eyelets, seam tape, sweatband, closure strap, buckle or clip finish, woven label ground, and hangtag print. Use Pantone FHI TCX for dyed textiles and Pantone Solid Coated for paper or printed trims; mixing systems is one of the easiest ways to create avoidable mismatch claims. A realistic standard is Delta-E less than or equal to 1.5 for main shell lab dips under D65 lighting, Delta-E less than or equal to 2.0 for woven-label grounds, and visual approval for embroidery thread because rayon and polyester thread reflect differently from fabric. “Match sample” only works if both sides hold a signed counter sample at the factory and at the buyer’s office. Decoration needs machine-level instructions because logo behavior changes between a soft unstructured front and a buckram-backed crown. For 3D puff embroidery, call out foam thickness, usually 2 mm or 3 mm, thread type, stitch density, pull compensation, maximum logo height before the crown break, and placement from center front seam and visor stitch line. If the approved sample was digitized for Tajima, Barudan, or ZSK heads, note it; satin columns and edge sharpness can shift enough to trigger a resubmission. The remaining three sections should be just as exact: construction, packaging, and labels. Specify profile, panel count, visor rows, seam type, closure hardware, and tolerance standards such as embroidery centering +/- 2 mm and AQL 2.5 major / 4.0 minor. Then state inner pack, carton count, maximum carton gross weight such as 12 kg, barcode symbology, country-of-origin text, fiber content, care wording, and any FSC, CPSIA, or California Proposition 65 labeling requirement. In real production, missing legal label text delays shipments more often than bad stitching.
Tech sketches: front, side, back, optional underbrim
Use vector tech sketches, not photos. A factory cannot build a crown pattern, set a visor angle, or lock embroidery placement from a 30-degree lifestyle image with lens distortion. A usable cap tech pack template needs true-proportion front, side, and back views, plus an underbrim view whenever you specify sublimation, contrast undervisor fabric, seam tape artwork, sandwich piping, or undervisor embroidery. Build the drawings in Adobe Illustrator and deliver editable vector files with layers intact; flattened JPGs are fine for reference, but not for production. Every structural line should read instantly: panel breaks, center-front seam, visor join seam, eyelet positions, top button, sweatband line, closure opening, and visible stitch paths. On a 6-panel baseball cap, show all six crown seams and the visor seam presentation. On a 5-panel camper, call out front panel width, crown slope, and visor set angle, because those three points change the cutting pattern and front-profile shape immediately.
Put every feature that changes sewing, trimming, or finishing directly on the sketch. That includes visor topstitching count such as 6-row, 8-row, or 10-row; eyelet type as embroidered or metal; inside seam finish as taped or clean; and closure type such as 7-hole PVC snap, self-fabric strap with tri-glide, hook-and-loop, fitted back, or elasticized Flexfit-style sweatband. Decorative details should also live on the drawing, not buried in a note block: rope at crown base, front panel quilting, rear arch woven label, side split seam, or underbrim print registration. Add point-of-measure callouts with arrows, finished dimensions, and tolerances that a sample room can actually hold, typically ±3 mm on visor length, ±3 mm on visor width, and ±5 mm on crown height. Those numbers matter. A 5 mm brim change or an 8 mm front-panel height shift is visible on-head, especially on shallow-profile caps, and can move the fit from clean retail shape to obvious mismatch. If the cap tech pack template does not pin those dimensions to the sketch, the pattern room will default to its house block and you lose control before proto one.
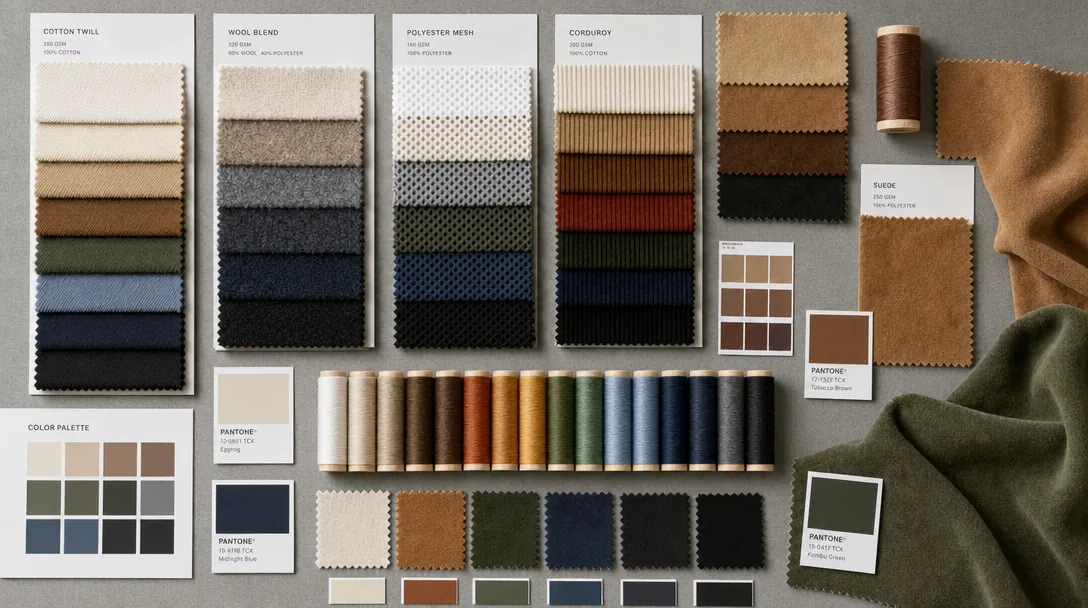
Fabric and color spec: GSM, weave, Pantone references
A weak fabric line is where most cap errors start. In a cap tech pack template, one shorthand like “cotton twill” is not a specification; it is an invitation for the mill to substitute whatever is cheapest and available that week. Write the full construction in one line: fiber content, weave, yarn count, density, finish, finished weight, and tolerance. A usable example is 100% cotton 3/1 twill, Ne 16/1 x 12/1, 108 x 56, enzyme-washed, 280 gsm finished weight, tolerance +/-5%; or 100% recycled polyester plain weave, 75D x 150D, moisture-management finish, C0 DWR, 140 gsm, tolerance +/-3%. Those numbers directly affect panel recovery, seam bulk, visor wrap, and whether a structured 6-panel front keeps its shape after heat pressing and transport. If you only give a nominal gsm, many mills will treat it as a suggestion, and a 220 gsm substitute can slide in because it looks “close enough” on first inspection. Call out fabric placement by component, not just by style name. Front crown, side panels, back panels, visor top, undervisor, sweatband, seam tape, and back strap regularly use different substrates, and each one takes dye differently. A brushed cotton twill front and polyester mesh back will not hit the same visual depth under one Pantone reference, even if both are technically “matched.” Require separate lab dips by substrate, state whether cross-component shade variance is acceptable, and ban substitutions without written approval. That matters most on small runs of 144 to 300 pieces, where stock-lot swaps can save roughly $0.18 to $0.40 per cap but create avoidable failures at inline and final AQL 2.5 inspection. Our standard practice is to lock shell fabric, sweatband composition, and closure material before sampling, because those are the areas buyers end up disputing later.
Color control on caps is a textile problem before it is a graphic problem. Use Pantone TCX or FHI references for dyed fabrics, not Pantone Solid Coated, because dye houses are matching fabric standards rather than ink on paper. Write the code and method in full: Pantone 19-3921 TCX, piece-dyed cotton twill; Pantone 18-0622 TCX, yarn-dyed acrylic rib; heather gray matched to approved blend standard, not a solid chip. For dark navy, washed black, olive, and burgundy, screen proofs are nearly worthless because metamerism shows up fast under retail lighting. Attach an approved Pantone chip or physical fabric cutting, then specify viewing conditions such as D65 primary light, TL84 secondary check, and 10-degree observer if shade is being read on a spectrophotometer. Do not write “match as close as possible.” Set measurable limits. A practical tolerance is Delta-E 1.5 maximum for core solids and 2.0 for washed, melange, brushed, or heavily textured fabrics, with visual approval overriding the instrument when surface texture distorts the read. Add fastness targets so the dyed base does not fail once embroidery, binding, or closure tape is added: crocking grade 4 minimum dry and wet, wash fastness grade 4, and light fastness grade 4 for fashion programs or grade 5 and above for outdoor and team use. If the same color appears on crown fabric, sandwich piping, closure tape, undervisor, and embroidery thread, state clearly whether exact cross-material matching is required or whether tonal harmony is acceptable. That single line cuts out a lot of sample-round arguments.
Decoration spec: technique, placement, dimensions, color count
Most sample failures start at decoration, so a solid cap tech pack template has to lock down technique by logo and by panel, not just say “embroidered logo” beside a mockup. Write the construction the way the factory will build it: front-center 3D puff embroidery with 2.0 mm EVA foam, wearer-left flat fill embroidery, rear woven damask patch with merrow edge, or right-panel molded TPU badge with heat-press backing. If embroidery is involved, specify whether the factory will digitize from AI/PDF artwork or run your approved DST/EMB file; that one line changes sampling time, edit fees, and stitch quality. On Tajima, Barudan, or ZSK heads, sharp serif corners, narrow bridges, and stitch angles that look fine on screen can break down once they hit curved buckram over a center seam. Any logo crossing a seam should be called out explicitly, and artwork under 1.0 mm line width or with very tight counters should be simplified before sampling because it will close up fast on structured 6-panel crowns.
Placement needs production coordinates, not visual guesswork. Use fixed reference points and metric dimensions first: front-center logo aligned to crown midpoint, baseline 15 mm above visor seam, finished size 50 mm W x 32 mm H; left-side embroidery centered on panel 3, 20 mm above bottom seam; rear mark centered above closure at 60 mm W. A 3 mm drift is enough to push stitching into a seam, clip an eyelet, or make the cap look crooked at TOP stage, especially on low-profile crowns. Color and complexity also need hard limits. State the exact color count per logo, list each color as Pantone Solid Coated or Pantone TCX, and identify the matching method: polyester thread, patch yarn, screen ink, or badge paint. If printed or molded parts require tighter approval, note D65 viewing and Delta-E under 2.0; embroidery is usually approved against thread cards or a strike-off instead of lab data. Add stitch count when known—8,000 versus 18,000 stitches materially changes run time and cost—and flag premium finishes such as metallic thread, chenille, laser-edge twill applique, or glow yarn, which typically add USD 0.20 to 0.90 per logo and raise reject risk at AQL 2.5 inspection.
Packaging and label spec: polybag, hangtag, sticker, carton
Packaging mistakes are expensive because they are usually found last, after sewing, embroidery, and finishing are already paid for. In a proper cap tech pack template, the polybag spec should call out film material, bag size, venting, suffocation warning, and recycle mark instead of just saying "individual polybag." For adult baseball caps, a common export setup is a 0.03 to 0.05 mm LDPE or OPP bag around 28 x 30 cm, with one warning print panel and a recycle logo such as LDPE 4 if the destination market accepts it. If the cap has a high-profile crown, flat bill, or metal trim, bag dimensions need to increase or you will crush the front panel and scratch hardware during carton compression. Our standard practice is to note whether the cap ships with a crown insert, tissue support, or no insert at all, because that changes CBM, packing labor, and the shape the customer receives.
Hangtags need the same level of control as the crown logo. A buyer's hat specification sheet should state finished tag size, paper stock, print process, Pantone reference, barcode type, and attachment method. Typical hangtag stock is 250 to 400 gsm coated card, but uncoated kraft around 300 gsm is common for outdoor and heritage programs; if color matters, the brand should approve against Pantone Solid Coated or Pantone TCX references and define an acceptable Delta-E tolerance, usually under 2.0 for premium retail. Attachment is not a minor detail: plastic kimble loop, cotton string, or metal safety pin each affects labor time and can damage sweatbands or eyelets if placed badly. Sticker placement should also be fixed on the custom cap spec sheet, especially whether the foil size sticker sits on the brim top, under-brim, or is omitted entirely for ecommerce orders where retailers want a cleaner presentation.
Carton specs are where freight cost gets won or lost. A serious headwear tech pack should list inner quantity if used, master carton count, gross and net weight limits, carton board grade, dimensions, and shipping marks. For most structured caps, export masters are commonly packed 24, 48, or 72 pcs per carton using 5-ply corrugated board, with a practical gross weight target below 12 kg to reduce deformation and rough handling damage. Markings should include PO number, style number, color, quantity, carton number sequence, country of origin, and destination code, all in a defined print size and position. If the buyer is sending a tech pack for hat manufacturer review, I strongly recommend adding whether cartons must pass edge crush requirements, whether mixed-color cartons are allowed, and whether Amazon FNSKU, retailer routing labels, or "Made in China" carton marks must be applied before palletization.
Frequently Asked Questions
What logo decoration techniques do you offer?
3D puff embroidery, flat embroidery, woven patch, leather patch, PVC patch, screen printing, sublimation, applique and laser etching, all in-house with no subcontracting.
What file format should I send for my logo?
Vector files (AI, EPS, PDF) are ideal. High-resolution PNG or JPG at 300 dpi on transparent background works as a fallback. Provide Pantone color references for accurate reproduction.
Can I order a sample before bulk production?
Yes. We strongly recommend approving a pre-production sample before mass production. Samples are charged at 35 to 60 USD each plus express shipping, fully refundable against confirmed bulk orders over 500 pieces.
How long does production take?
Sampling takes 7 to 12 days. Bulk production runs 20 to 30 days depending on quantity, fabric availability and decoration complexity. Inspection and packing adds another 3 to 5 days before shipment.
Do you support sustainability certifications?
Yes. We work with GOTS organic cotton, GRS-certified recycled polyester, OEKO-TEX Standard 100 fabrics, and are BSCI and Sedex audited. Certification documentation can be provided per order.
How does ordering custom patch trucker hat work?
When evaluating custom patch trucker hat, the key considerations are construction quality, decoration capability, MOQ flexibility and lead time. Technique (3D puff / flat embroidery / patch), placement (front center, side, back), dimensions (e.g. 5cm wide × 3cm tall), stitch count if known, color count and Pantone references. Without a tech-pack, your factory invents details that contradict your assumptions. With one, sampling lead time drops from 14 days to 7 and revision rounds drop from 4 to 1.
How does ordering baseball cap custom work?
When evaluating baseball cap custom, the key considerations are construction quality, decoration capability, MOQ flexibility and lead time. Without a tech-pack, your factory invents details that contradict your assumptions. With one, sampling lead time drops from 14 days to 7 and revision rounds drop from 4 to 1. Tech sketches, fabric spec, color spec, decoration spec, construction spec (panels, closure, eyelets, sweatband), packaging spec, label/hangtag spec.
How does ordering custom baseball cap motorcycle helmet work?
When evaluating custom baseball cap motorcycle helmet, the key considerations are construction quality, decoration capability, MOQ flexibility and lead time. Without a tech-pack, your factory invents details that contradict your assumptions. With one, sampling lead time drops from 14 days to 7 and revision rounds drop from 4 to 1. Tech sketches, fabric spec, color spec, decoration spec, construction spec (panels, closure, eyelets, sweatband), packaging spec, label/hangtag spec.
How does ordering custom bucket hat embroidered work?
When evaluating custom bucket hat embroidered, the key considerations are construction quality, decoration capability, MOQ flexibility and lead time. Without a tech-pack, your factory invents details that contradict your assumptions. With one, sampling lead time drops from 14 days to 7 and revision rounds drop from 4 to 1. Tech sketches, fabric spec, color spec, decoration spec, construction spec (panels, closure, eyelets, sweatband), packaging spec, label/hangtag spec.
Ready to start your custom hat project?
Send us your tech-pack, sketch or even just an inspiration photo. We will respond with a detailed quotation and digital mock-up within 24 hours.
Request a free quoteRelated guides
Corduroy Hat Vintage Sample Approval Process for Custom Hat Buyers
Read article →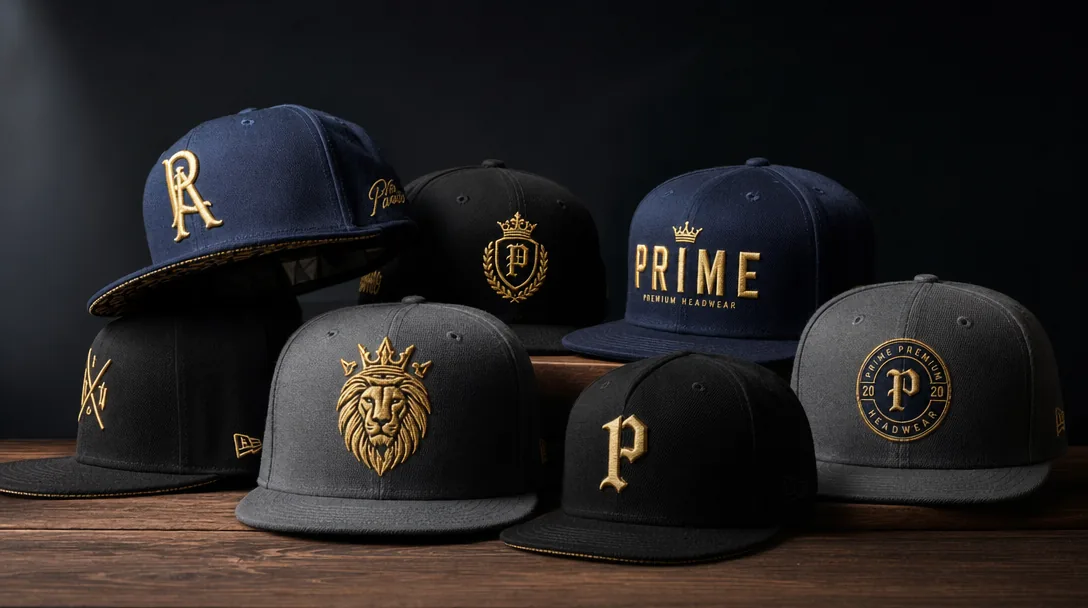
5 Panel Camp Cap Wholesale: A 2026 B2B Sourcing Guide
Read article →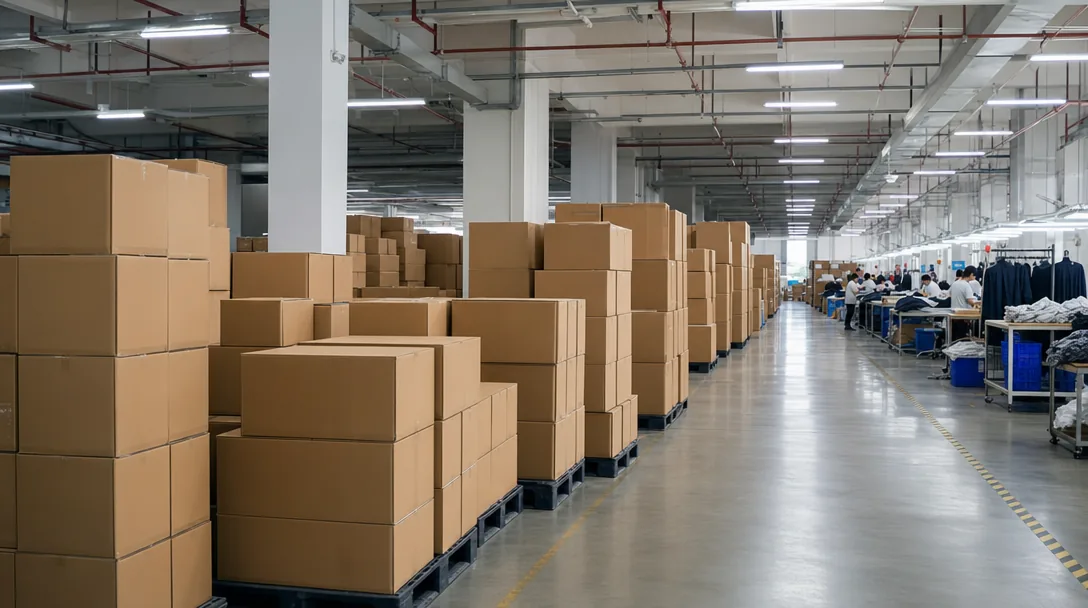
How to Vet a China Hat Manufacturer Before You Wire the Deposit
Read article →Sourcing custom hats does not have to be complicated. With the right manufacturing partner, clear specifications and a small upfront investment in sampling, you can launch a retail-quality product in 30 to 45 days.