5-Panel vs 6-Panel Caps: Construction, Use Cases and Cost Compared - Supplier Checklist
5-Panel vs 6-Panel Caps: Construction, Use Cases and Cost Compared - Supplier Checklist is one of the most-asked questions we receive from international buyers, and for good reason. With dozens of factories competing for your order and an alphabet soup of technical terms in every supplier quote, even experienced importers can feel lost. This guide consolidates what we have learned producing custom hats for clients in 40+ countries.
The visual and structural difference
The biggest difference in a 5 panel vs 6 panel cap is crown architecture, not the visor or closure. A 6-panel cap is built from two front panels, two side panels, and two back panels, with every seam converging at the top button. That seam layout creates a rounder, more anatomical crown and gives the front natural symmetry, especially when 0.5-0.8 mm PE buckram is fused behind 220-280 gsm cotton twill, brushed chino, or poly-cotton drill. A 5-panel cap eliminates the center-front seam and uses one continuous front panel with two side and two back panels. On paper, it is one less seam; on the head, it is a different silhouette. The face of the cap looks flatter, wider, and more rectangular, which is why 5-panel campers, truckers, and streetwear silhouettes read more graphic, while 6-panel caps still dominate baseball, golf, and team programs where a domed crown looks more familiar.
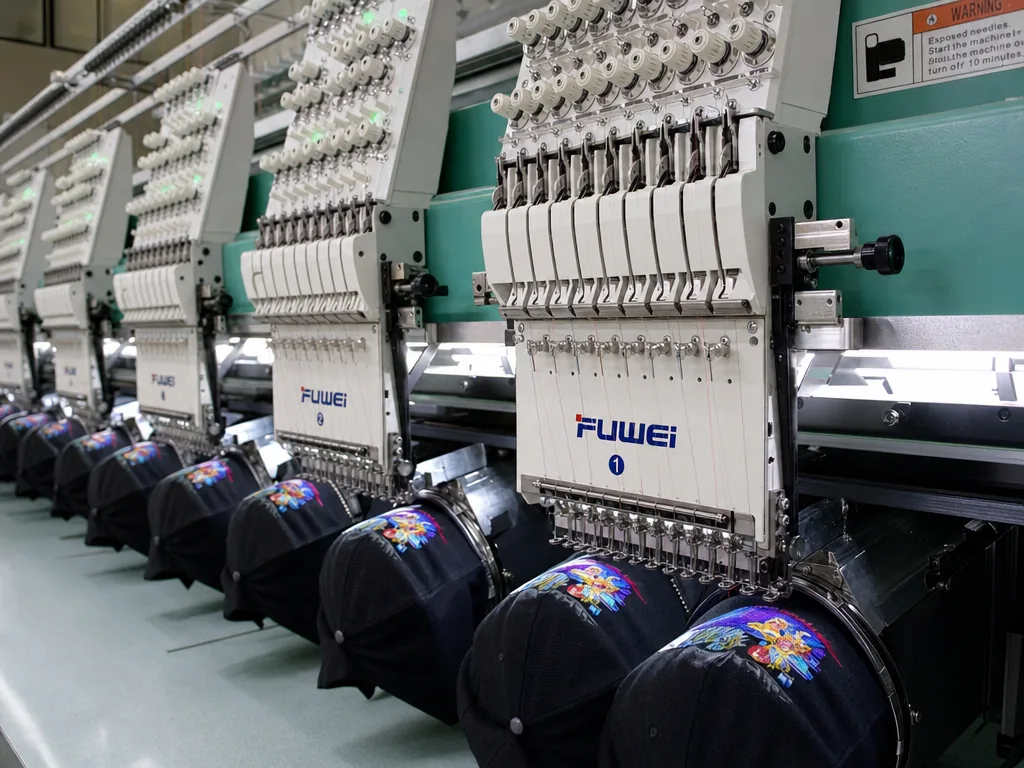
That uninterrupted front panel is also why decoration behaves differently. On a 5-panel, you can place a larger woven patch, screen print, sublimated badge, or flat embroidery without artwork being split by a center seam; a front logo width of 90-110 mm is common and usually reads cleaner than on a 6-panel. A 6-panel often suits smaller embroidery better, roughly 50-70 mm wide, because the center seam visually anchors the design and helps hide minor distortion. The downside is tolerance. On Tajima or Barudan heads, any poor digitizing, weak backing, or thread-tension imbalance shows immediately on a 5-panel because the front is one uninterrupted surface. Structurally, visor board, sweatband, eyelets, seam tape, and rear strap can be identical between both builds; the real variable is front-panel stability. With washed chino, pigment-dyed cotton, nylon taslon, or 70D microfiber, even 3-5 mm front-panel drift can push the logo off center enough to fail bulk inspection under AQL 2.5. That is the real construction gap buyers are paying for.
Decoration sweet spots for each construction
Decoration is where the 5 panel vs 6 panel cap choice stops being stylistic and starts affecting pass rate. A 6-panel cap puts a center-front seam directly under the logo, and that seam will telegraph through embroidery, especially on structured cotton twill or poly/cotton fronts backed with 1.8-2.2 mm buckram. For clean sewouts, I usually cap detailed front embroidery at 45-55 mm wide on a 6-panel, keep satin columns above 1.0-1.2 mm, and open fill density to about 0.42-0.48 mm so the stitch pack does not rope over the seam. On Tajima, Barudan, or ZSK heads, 3D puff initials, simple badge silhouettes, and block lettering are stable if the digitizing uses edge-run plus zigzag underlay and reasonable pull compensation. What fails first is tiny serif text below 4 mm high, long horizontal fills crossing the seam, and faux-merrow borders that need perfectly even coverage edge to edge. You can push a 6-panel front larger than 55 mm, but once artwork straddles the seam with fine detail, reject risk rises quickly from thread breaks, seam spread, coverage gaps, and post-steam distortion after crown shaping. Our standard practice is to flag any seam-crossing embroidery above roughly 7,000-8,000 stitches for a sewout review before bulk, because that is where the difference between an approval sample and a production run starts showing up in real numbers. For team logos, sponsor marks, and promo graphics under about 60 mm, 6-panel caps are still efficient and forgiving; for artwork-led programs, the seam is the limiting factor, not the machine.
A true 5-panel front gives you a single uninterrupted decoration field, which is why streetwear and fashion buyers keep choosing it when the graphic carries the sale. On most adult caps, you can place an 80-100 mm woven patch, 75-90 mm silicone badge, or 90-110 mm heat-transfer graphic without splitting straight lines or forcing the logo to bridge a seam. That matters on microfiber, taslon, or peach-skin polyester in the 120-160 gsm range, where heat-applied decorations and screen prints show any panel break immediately. The flatter front also helps with patch squareness and press consistency: platen temperature around 145-155°C and dwell time 10-14 seconds will behave far more predictably on a single panel than across a raised center seam. In factory terms, 5-panel construction usually trims decoration-related rejects by about 1-2 percentage points at final inspection under AQL 2.5, mainly from better alignment and fewer edge-lift issues on TPU, PU, or woven badges. It is also the safer option when the brief specifies a rectangular lockup that must sit dead center, a woven label above 70 mm wide, or dense embroidery with broad fill areas that would otherwise tunnel on a 6-panel seam. If the logo is small, classic, and stitch-led, a 6-panel remains the practical all-rounder for sports, uniforms, and promotions. If the front graphic is the product, the 5 panel vs 6 panel cap decision usually ends in favor of the 5-panel because it gives production more room and fewer ways to fail.
Cost difference and MOQ implications
On a real PO, the cost gap in a 5 panel vs 6 panel cap is usually narrow: about $0.04 to $0.10 per piece at 300 to 1,200 units per colorway, assuming the same shell fabric, closure, and decoration. Buyers often expect the 5-panel to be materially cheaper because it deletes the center-front seam, but on the line that only saves roughly 0.02 to 0.05 SMV, or about 8 to 18 seconds depending on operator skill and whether the front is buckrammed. You do remove one defect risk—front seam grin, seam slippage, and off-center embroidery registration are all more common on a 6-panel—but cutting efficiency often swings the other way. On 7x7 cotton twill at 240 to 280 gsm, brushed chino, nylon taslon, or directional camo, a 5-panel front frequently delivers 1.5% to 3.0% worse marker yield because the larger face panel has fewer nesting options and print or grain direction has to stay consistent. Once decoration is added, the panel-count delta gets smaller still: flat embroidery at 6,000 to 8,000 stitches typically adds $0.18 to $0.32, while 3D puff on Tajima or Barudan machines usually adds $0.42 to $0.80, enough to dwarf any sewing-minute savings.
MOQ is usually a sourcing question, not a crown-geometry question. If both caps use the same stock twill, PE visor board, cotton sweatband, eyelets, top button, and plastic snap, most factories will quote the same custom MOQ: around 144 pieces per color for in-stock materials, 300 pieces for Pantone-dyed fabric, and 500 to 1,000 pieces when you introduce custom woven labels, molded patches, or Pantone-matched closures. The 5-panel becomes less MOQ-friendly only when the front panel spec is unique—for example a separate 600D polyester face, laminated foam, sublimated panel, or a different buckram weight—because that creates isolated cutting bundles, extra setup, and slower balancing across the sewing line. A 6-panel is generally more forgiving for mixed-material builds like cotton front panels with polyester mesh backs or corduroy crowns with a suede visor, since smaller panels usually waste less fabric in the marker. The practical move is to ask for the quote broken into shell consumption, labor SMV, trim, and decoration. If a supplier shows a $0.20-plus spread either way on a 5 panel vs 6 panel cap, they should be able to justify it with marker yield, SMV, and setup allocation, not vague claims about one style being inherently cheaper.
Retail positioning by panel count
If you are buying for broad retail sell-through, the 6-panel silhouette is still the safest bet. A standard 6 panel cap construction gives customers the shape they already recognize from team, golf, workwear, and promo channels: two front panels, two side panels, two rear panels, usually with a center-front seam and a more familiar crown break. In practical terms, that means less education at point of sale and fewer fit complaints from first-time buyers. For mass programs, I usually see 6-panel styles convert better because they read immediately as a cap, especially when paired with curved visor profiles, buckram-supported fronts, and medium crown heights around 11.5 to 12 cm. That is the real commercial answer to 5 panel vs 6 panel cap decisions: 6-panel wins on instant recognition and market width.
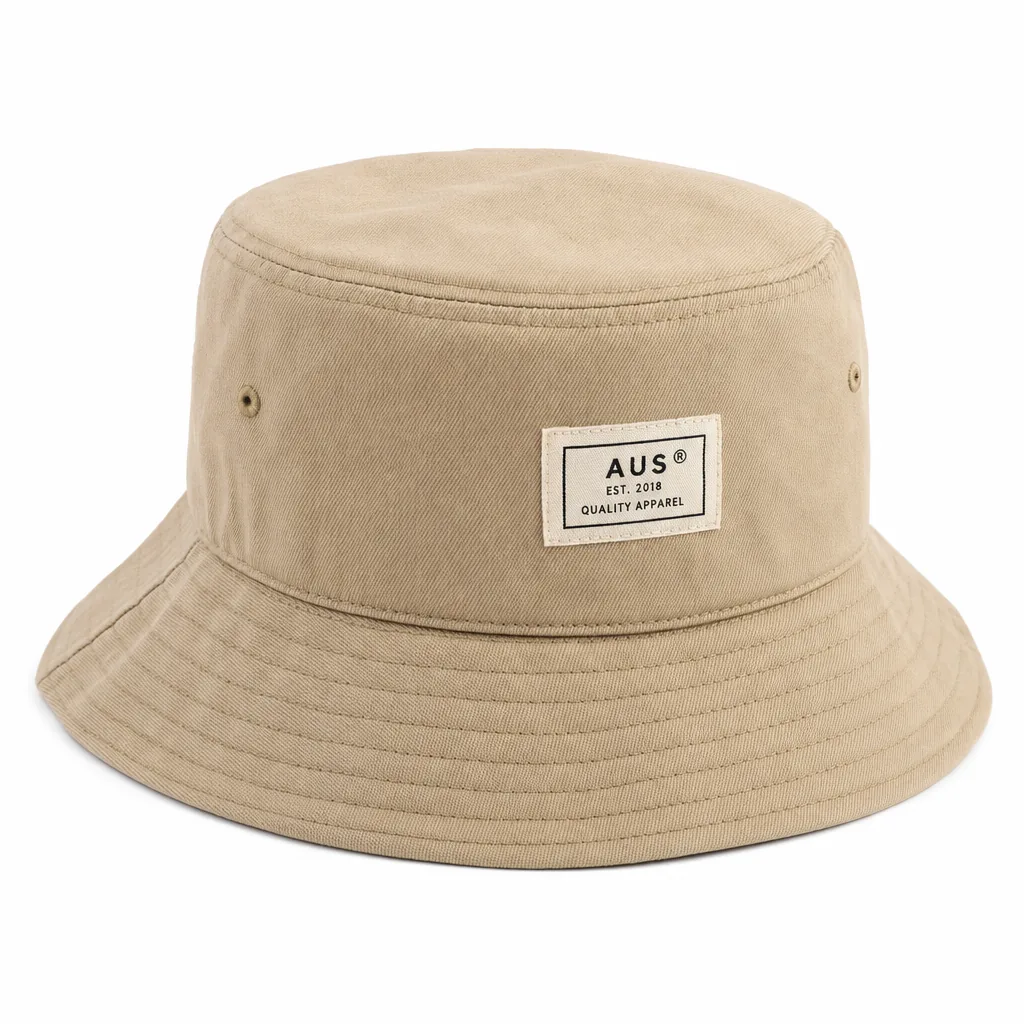
A 5-panel cap construction shifts the product into a more selective but more identity-driven lane. The single uninterrupted front panel gives decorators a clean embroidery or heat-transfer area, but more importantly it changes how the hat is perceived on shelf. Buyers associate it with outdoor running, cycling, trail, skate, surf, festival merchandise, and technical streetwear rather than traditional athletic headwear. That narrower audience is exactly why some brands choose it. A good 5-panel can separate a collection from generic baseball inventory, especially in nylon taslon, ripstop, supplex, or lightweight cotton around 140 to 220 gsm. When people ask about 5 panel cap vs baseball cap positioning, the distinction is mostly cultural: baseball-cap language still points customers toward 6-panel structure, while 5-panel styling suggests a more modern, niche, and design-led product.
Panel count changes merchandising logic as much as construction. A 6-panel style works across corporate giveaways, licensed sports, school programs, and entry-price streetwear because factories, trim suppliers, and decorators all know the spec cold; that keeps MOQ planning, replacement production, and QC more predictable. A 5 panel hat manufacturer has to control shape retention more carefully, because one bad front-panel fuse or incorrect foam density can make the crown collapse or wrinkle after packing. At CrownsForge, we usually recommend 6-panel for programs chasing volume and repeatability, and 5-panel for brands where differentiation matters more than total addressable audience. If your retail strategy depends on mainstream acceptance, choose 6-panel. If the brand is targeting outdoor, skate, or technical fashion accounts, the stronger answer in a 5 panel vs 6 panel cap comparison is often the 5-panel because it looks deliberate, not default.
Closure and brim pairings buyers commonly request
Closure choice is driven by pattern geometry before it is driven by fashion. On a 6-panel cap, the back opening sits between two rear seams, so tension feeds more evenly into the sweatband, rear binding, and button line during sewing. That gives the factory more room to switch between a PP snap, 20 mm hook-and-loop, self-fabric tuck strap, or metal buckle without rebalancing the whole crown. On a standard adult block, we usually see cleaner results on 6-panel bodies when working with 240-280 gsm brushed cotton twill, 10 oz canvas, or 80/20 acrylic-wool, because the seam structure absorbs closure variation better during topstitching and edge binding. If a buyer is weighing a 5 panel vs 6 panel cap for one logo program across retail, promo, and team channels, the 6-panel is the lower-risk platform: closure swaps often stay within the same grading set and do not force a new crown profile. The 5-panel is less tolerant because the silhouette is judged off one uninterrupted front panel and a flatter, boxier side wall. Adjustable closures usually perform best: plastic snapbacks, nylon webbing with side-release clip, or self-fabric straps with a metal slider keep size risk under control and preserve the intended shape. Fitted 5-panel caps are possible, but they stop making commercial sense quickly unless volume is high enough to absorb extra development. In practice, once you introduce S/M and L/XL splits or numeric sizes, sampling rounds increase, approval time stretches, and dead-stock exposure climbs fast. On factory runs below about 1,200-1,500 pieces per colorway, a fitted 5-panel commonly adds $0.25-$0.50 per cap in development and handling cost before you even account for unsold size breaks.
Brim pairing tells you what the buyer actually wants the cap to do. A 6-panel cap accepts either a pre-curved visor or a flat peak without looking structurally wrong, which is why it remains the default for licensed sports, golf, and uniform programs. A typical curved brim uses a 2.8-3.0 mm PE visor insert with 6-8 rows of stitching; flatter fashion versions often use a stiffer board, lighter finishing steam, and less manual curl after sewing. Because the crown has more natural roundness, the visor angle can move several degrees either way without distorting the front view. That flexibility matters when buyers want one shell that can serve different channels or regions. A 5-panel usually looks best with a flat brim or only a shallow curve, especially in cotton canvas, nylon taslon, or lightweight ripstop where the front panel already carries most of the visual weight. Over-curve the visor and the side profile starts fighting the crown; the front panel can read collapsed even when the sewing is correct. That is why a serious 5 panel vs 6 panel cap comparison should never stop at artwork or tech pack notes. Sample approval needs an actual brim-angle check, ideally against a sealed counter sample, because a 5-10 degree change in visor curvature can alter the sell-through potential more than moving from 210 gsm taslon to 300 gsm cotton canvas. On embroidery-heavy styles, that balance becomes even tighter once the front panel stiffness changes after backing, underlay, and stitch density are added.
When to spec each construction for your brand
Spec a 6-panel first when the program needs broad size acceptance, predictable repeats, and the lowest production risk. On the factory floor, 6-panel remains the safe default for licensed sports, golf events, school programs, and high-volume promo because the two front panels support structure better and the center seam helps stabilize the crown after sewing and blocking. For a standard adult cap, I’d usually set finished circumference at 58 cm ±0.5 cm, crown height at 10.5-11.5 cm, peak length at 7 cm, and front buckram at 0.8-1.0 mm if the artwork is a dense embroidery file above about 9,000 stitches. That combination runs more cleanly on Tajima or Barudan machines, especially when the logo uses 0.35-0.4 mm satin columns, and it reduces puckering, flagging, and seam distortion during inline QC. In a practical 5 panel vs 6 panel cap decision, 6-panel wins when the brand cannot afford fit complaints, inconsistent crown shape, or replenishment issues across multiple POs. Decoration tolerance is another reason buyers default to 6-panel. A left-chest-scale logo centered on the front can usually absorb minor sewing variation, while a large-format graphic on a 5-panel has nowhere to hide if the fabric stretches or the crown collapses. For bulk programs, I’d rather put 260-280 gsm brushed cotton twill or 8x8 canvas into a 6-panel body, hold color to within Delta-E under 1.5 against the approved Pantone TPX/TCX reference, and inspect to AQL 2.5 than gamble on a fashion silhouette that may fit only one channel. Our standard practice is to push buyers toward 6-panel whenever the brief mentions chain retail, uniforms, or repeat seasonal restocks, because consistency matters more than novelty once you are shipping thousands of units.
Choose 5-panel when the shape itself is part of the product, not just the carrier for a logo. A proper 5-panel gives you one uninterrupted front panel, so oversized screen prints, sublimation, 3D silicone badges, or embroidery layouts wider than 90-100 mm don’t get split by a center seam. That matters for skate, cycling, trail, and streetwear capsules where the crown should sit lower and flatter, often with a shorter 6-6.5 cm visor and lighter shell fabrics such as 120-140 gsm nylon taslan, 75D polyester with PU coating, or cotton-nylon blends around 180 gsm. Those materials look intentional in a soft 5-panel build, but they can expose every mistake in pattern balance, foam thickness, and stitch tension if the tech pack is vague. In a real 5 panel vs 6 panel cap review, 5-panel makes sense only when the visual payoff justifies the tighter process window. The cost gap is usually modest until trims and performance details start stacking up. At 1,000 pieces FOB China, a basic 6-panel in brushed twill with flat embroidery, woven loop label, and plastic snapback commonly lands around $2.10-$3.30; a 5-panel starts closer to $2.40-$3.80 and climbs fast if you add rope across the seam, laser-perforated side panels, moisture-wicking sweatband, printed seam tape, or custom visor board. I’ve seen buyers lose margin because they picked 5-panel for looks, then forgot to control crown depth, visor angle, fabric gsm tolerance, and label placement in the approval sample. The right choice is not aesthetic theory. It is a spec decision tied to decoration method, fabric memory, expected sell-through, and whether your QC team can enforce measurements, trim shade, and workmanship to AQL 2.5 without constant rework.
Working with CrownsForge on either construction
Lead time is almost never the deciding factor in a 5 panel vs 6 panel cap program. If the pattern is approved and the fabric is already in the mill’s running shade, both constructions move through the same line: 7-10 calendar days for a proto, 3-5 days for revisions, and roughly 22-28 days for bulk on 3,000-5,000 pieces. MOQ also stays broadly similar in real factories: 144-300 pieces per colorway for cut-and-sew caps in 10x10 cotton twill, 228T nylon taslon, or 12-14 oz brushed canvas. The real manufacturing difference sits at the front crown. A 5-panel gives you one uninterrupted decoration field, which is why buyers use it for oversized screen prints, 3D foam embroidery, woven patches, or 0.8-1.2 mm silicone heat transfers without fighting a center seam.
That seam matters more than many tech packs admit. On a 6-panel cap, any logo crossing the center front has to be digitized with proper pull compensation, underlay adjusted for seam bulk, and test-run on Tajima, Barudan, or ZSK heads before bulk approval. If not, you see the usual failures on the factory floor: stitch spread at the join, small gaps in satin columns, needle deflection, and artwork drifting off center by 1.5-2.0 mm. The buying choice is really about silhouette and decoration strategy. A 5-panel usually works better for streetwear, skate, cycling, and promo drops where artwork runs wider than 90 mm and the front crown needs to read flat. A 6-panel is still the safer commercial shape for golf, team, uniform, and licensed sports programs because the fit is more familiar and the crown holds a classic baseball profile. At CrownsForge, the practical way to approve either build is side-by-side physical samples in the same fabric, same visor, same closure, and same trim package, then inspect crown symmetry, buckram weight at 140-180 gsm, color tolerance within Delta-E 1.5-2.0, and final workmanship to AQL 2.5 rather than trusting flat mockups.
Frequently Asked Questions
What file format should I send for my logo?
Vector files (AI, EPS, PDF) are ideal. High-resolution PNG or JPG at 300 dpi on transparent background works as a fallback. Provide Pantone color references for accurate reproduction.
Which shipping methods do you support?
We support FOB, CIF and DDP shipping. Air express for samples and small orders, sea LCL for 100 to 500 pieces, sea FCL for 5,000+ pieces. Door-to-door DDP available for US, EU, UK, Canada and Australia.
Can I order a sample before bulk production?
Yes. We strongly recommend approving a pre-production sample before mass production. Samples are charged at 35 to 60 USD each plus express shipping, fully refundable against confirmed bulk orders over 500 pieces.
What logo decoration techniques do you offer?
3D puff embroidery, flat embroidery, woven patch, leather patch, PVC patch, screen printing, sublimation, applique and laser etching, all in-house with no subcontracting.
What is the minimum order quantity (MOQ) for custom hats?
Our standard MOQ is 100 pieces per design and color, with sampling available from 1 piece. For complex multi-color logos or premium fabric upgrades, the MOQ can be lowered with a small per-piece surcharge.
How does ordering baseball cap embroidered custom work?
When evaluating baseball cap embroidered custom, the key considerations are construction quality, decoration capability, MOQ flexibility and lead time. The 6-panel cap has six fabric triangles meeting at a center seam at the top of the crown; the 5-panel cap has a single seamless front panel plus two side and two back panels. Brim, sweatband and closure are identical between the two; the front panel construction is the entire difference. 6-panel is the universal sports/streetwear/promotional default — instantly readable as…
How does ordering custom embroidered trucker hat work?
When evaluating custom embroidered trucker hat, the key considerations are construction quality, decoration capability, MOQ flexibility and lead time. The 6-panel cap has six fabric triangles meeting at a center seam at the top of the crown; the 5-panel cap has a single seamless front panel plus two side and two back panels. Brim, sweatband and closure are identical between the two; the front panel construction is the entire difference. 6-panel has visible front seam that runs vertically through center; embroidery is…
How does ordering custom dad hat embroidery work?
When evaluating custom dad hat embroidery, the key considerations are construction quality, decoration capability, MOQ flexibility and lead time. 6-panel has visible front seam that runs vertically through center; embroidery is normally placed offset from the seam (4-5 cm wide centered logos work). 5-panel has uninterrupted front canvas — perfect for wider patches, woven labels, larger embroidery (8-10 cm wide), all-over sublimation print. The 6-panel cap has six fabric triangles meeting at a center seam at the top…
What's the MOQ for custom embroidered baseball caps no minimum?
When evaluating custom embroidered baseball caps no minimum, the key considerations are construction quality, decoration capability, MOQ flexibility and lead time. Choose 6-panel for: retail-distribution baseball caps, snapbacks, sports licensee programs, promotional/event programs. Choose 5-panel for: outdoor/skate brand capsules, festival merch, technical headwear, brand differentiation from competing 6-panel programs. The 6-panel cap has six fabric triangles meeting at a center seam at the top of the crown; the 5-panel cap has a…
How to know if a 5 panel or 6 panel cap suits?
A key difference is the fit. 5-panels have a boxier silhouette, while 6-panels feature a rounded crown with a more secure feel. 5-panel hats are often linked to streetwear style and skate culture, while 6-panel hats are popular in sports (think classic baseball hats) and everyday wear.
Ready to start your custom hat project?
Send us your tech-pack, sketch or even just an inspiration photo. We will respond with a detailed quotation and digital mock-up within 24 hours.
Request a free quoteRelated guides
Embroidery Stitch Count & Thread Density: A Cost-and-Quality Reference - 2026 Buyer's Guide
Read article →
FOB vs CIF vs DDP: Incoterms Compared for Hat Imports - Cost & MOQ Breakdown
Read article →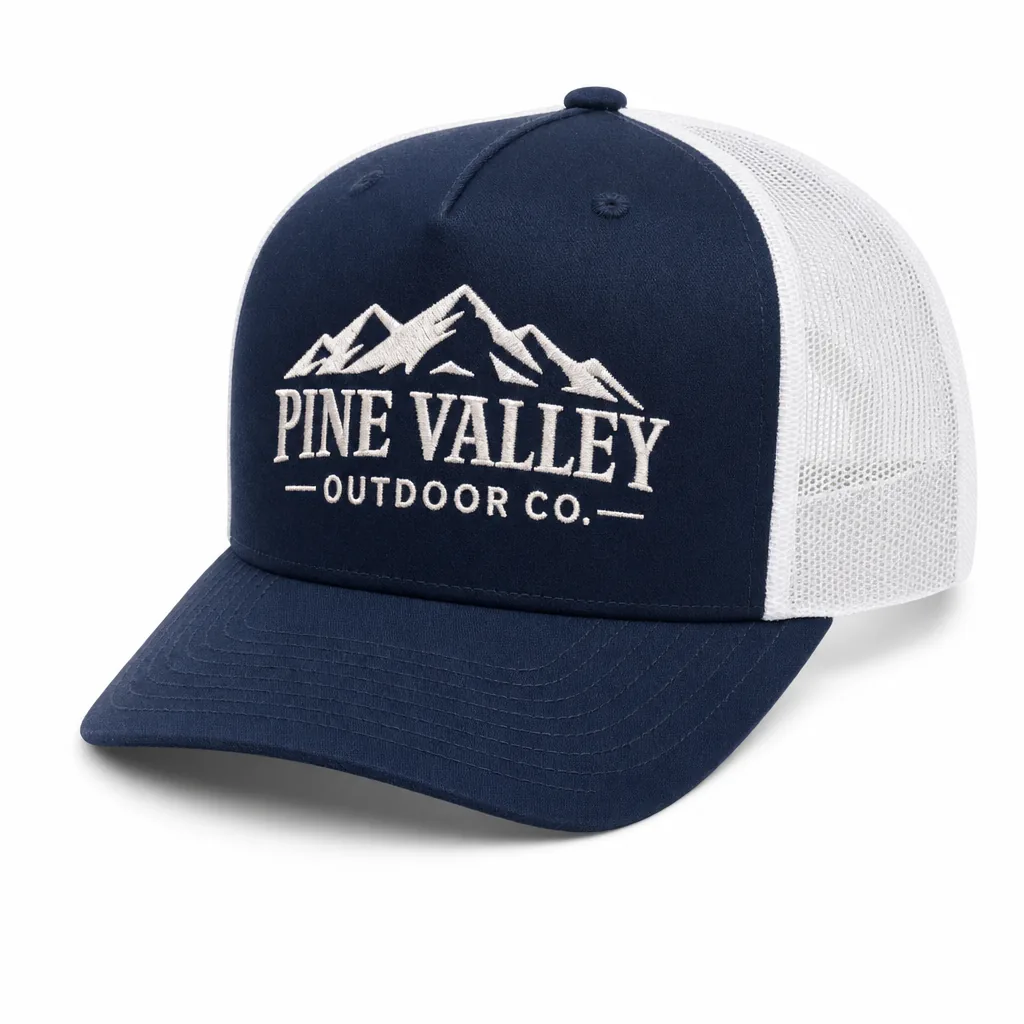
Wholesale Trucker Hats with Custom Logo: A Complete Bulk Sourcing Playbook
Read article →If you are ready to take the next step on 5-panel vs 6-panel caps: construction, use cases and cost compared - supplier checklist, our team can put a tailored quotation and digital mock-up in your inbox within 24 hours. Send the inquiry form on our contact page or message us directly on WhatsApp.