What's in a Cap Tech-Pack: A Specification Template for Buyers (2026 Update) (2026 Update)
What's in a Cap Tech-Pack: A Specification Template for Buyers (2026 Update) (2026 Update) is one of the most-asked questions we receive from international buyers, and for good reason. With dozens of factories competing for your order and an alphabet soup of technical terms in every supplier quote, even experienced importers can feel lost. This guide consolidates what we have learned producing custom hats for clients in 40+ countries.
Why a tech-pack saves you weeks of email back-and-forth
A front sketch and an .AI logo do not give a factory enough to quote, pattern, or sample a cap with any confidence. When key specs are missing, the line falls back to house standards, and those defaults are rarely what a buyer had in mind: 270 gsm brushed cotton twill instead of 210 gsm chino twill, 2.5 mm PE visor board instead of a softer paper insert, standard 8-row visor stitching instead of a cleaner 6-row fashion finish, or a low-profile crown block when you actually wanted a deeper 58–60 mm front rise. That is where lead time gets burned—not on sewing, but on clarification loops between sales, sample room, purchasing, and embroidery digitizing. A solid cap tech pack template closes those gaps before patterning starts by fixing crown shape, panel count, buckram spec, fabric composition, Pantone TCX color references, visor curve, closure type, artwork placement, and packing method. In practice, complete specs can cut first-sample lead time from roughly 12–14 calendar days to 6–8 because trims can be sourced while the sample pattern and embroidery file are prepared in parallel.
Most delays come from ordinary omissions, not difficult customization. If the spec sheet does not state undervisor color, top button self-fabric versus contrast, eyelet thread color, sweatband material, seam tape print, back arch embroidery placement, or whether the closure is a 7-hole plastic snap, antique brass buckle, or 20 mm Velcro strap, the factory will fill in the blanks with standard trims and keep moving. Embroidery is another recurring choke point: on Tajima, Barudan, or ZSK heads, the digitizer needs finished logo width in millimeters, target stitch count, foam thickness for 3D puff, thread brand and sheen if relevant, and guidance on text under 3 mm cap height, where fill often holds better than satin because of pull compensation and edge collapse. A disciplined cap tech pack template also protects margin. One late change can mean a revised digitizing file, re-sourced trims, and another DHL sample shipment at $35–$90, while unclear specs often get padded into FOB pricing as risk. At CrownsForge, we tie sample approval tolerances—visor length ±3 mm, crown height ±5 mm, embroidery position ±2 mm—and final AQL 2.5 inspection to the same approved document, not to scattered email threads.
The seven sections of a complete cap tech-pack
A complete cap tech pack template should have seven controlled sections: technical drawings, measurement specs, materials and colors, decoration, construction and trims, labeling and packaging, and QC approval history. Put the drawings first, but do not let them carry vague notes. Front, side, back, inside, and under-visor views should call out crown height, visor length, front panel width, seam position, eyelet diameter, button position, closure type, sweatband width, and logo placement from fixed points. For a structured 6-panel cap, a workable starting spec is 16.5 cm crown height with +/-0.3 cm tolerance, 7.0 cm visor length with +/-0.2 cm tolerance, 58 cm sample head circumference, and OSFM fit range of 56-60 cm for plastic snap or self-fabric strap. Fitted caps need graded circumference, normally 0.8 cm between sizes; stretch-fit caps need both relaxed and extended measurements after recovery testing.
The materials and decoration pages should read like factory purchasing and production instructions, not design direction. Replace “black cotton twill” with 100% cotton brushed twill, 280 gsm, 3/1 weave, reactive dyed, enzyme washed, ISO 105-X12 rubbing Grade 4 dry and Grade 3-4 wet. For performance caps, list polyester denier, mesh hole size, wicking or UPF finish, recycled percentage, and whether GRS transaction certificates are required. Fabric color should use Pantone TCX or TPX, printed trims should use Pantone C, and bulk approval should state Delta-E: under 1.5 for retail headwear, under 2.0 for lower-cost promotional runs. Decoration must include method, artwork file type, stitch count, thread brand, backing, placement tolerance, and inspection standard. Tajima, Barudan, and ZSK machines can all run clean embroidery, but 3D puff under 4 mm letter height is usually a bad spec because foam collapses or tears during trimming.
The construction, packaging, labeling, and QC sections decide whether the same cap can be repeated at 500 pieces or 50,000 pieces. Specify panel count, structured or unstructured crown, buckram stiffness, visor board material, visor stitch rows, seam tape, eyelets, top button, closure hardware, sweatband, and inside finishing. A usable construction line is: 5-panel unstructured camper, 180 gsm cotton ripstop, soft cotton seam tape, flat PE visor board, 6 rows visor stitching, tonal embroidered eyelets, nylon webbing strap with matte black ladder lock, and 3 cm cotton sweatband. Packaging should state fold method, 0.03 mm or 0.04 mm individual polybag, carton size, carton gross weight limit, pieces per carton, desiccant, barcode position, and drop-test requirement. QC records should include signed PP sample photos, shade band, measurement report, needle detector log when required, and final inspection level, typically AQL 2.5 major and AQL 4.0 minor.
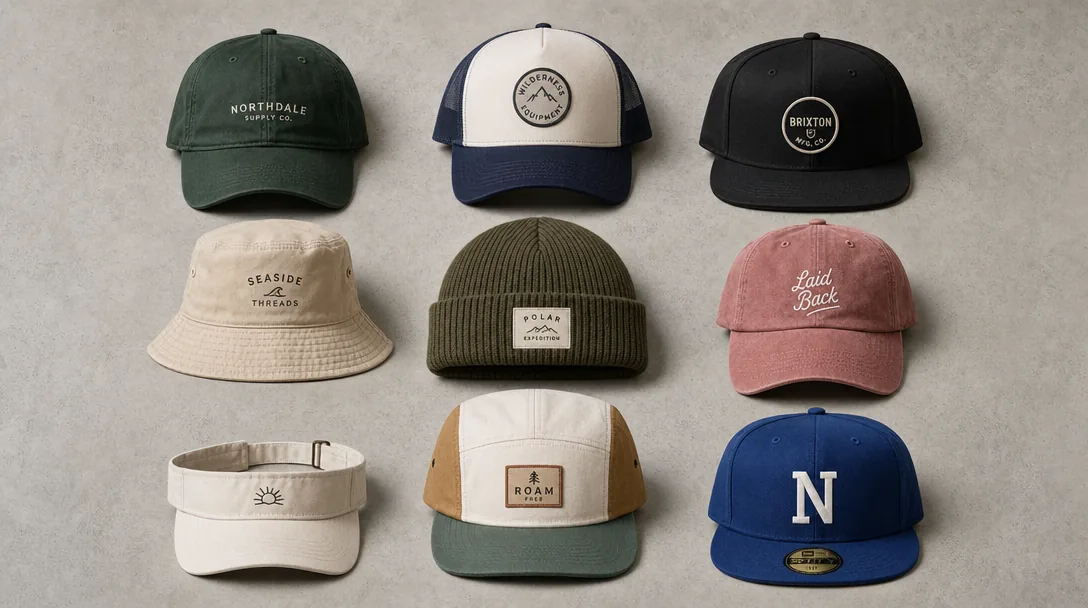
Tech sketches: front, side, back, optional underbrim
The sketch page is where a cap tech pack template becomes production data, not artwork. Use flat vector drawings at 1:1 or clearly scaled 1:2, with separate front, left-side, back, and underbrim views; perspective photos belong in the reference page only. Identify the construction before adding details: 6-panel structured cap with fused buckram, 5-panel foam trucker with 4 mm polyester foam, low-profile unstructured dad cap, 7-panel camp cap, rope cap, or snapback with high crown. Show every panel seam, eyelet, top button, sweatband join, closure anchor, visor seam, rope position, and piping line. Call out whether the front panel uses hard buckram, soft buckram, 160 gsm nonwoven backing, or no reinforcement, because that one choice changes crown stance more than most buyers expect. Define visor condition as flat, pre-curved, or blocked after sewing, and tie it to an approved sample or radius tolerance. If fit matters, add crown depth at center front, side wall height, and back opening height; two 58 cm caps can sit completely differently on head.
Measurement callouts should be tied to fixed datum points that an inline QC inspector can check with a ruler, not interpreted from a pretty drawing. Specify crown depth from sweatband seam to top button, visor length from front crown seam to tip, visor width at the widest point, back opening width before closure adjustment, strap cut length, and tuck-in allowance for tri-glide, metal buckle, or fabric tuck strap. Replace vague notes like “slight curve” with a reference sample number or tolerance, because a 2-3 mm shift in PE visor insert lamination, sandwich binding, or edge stitching can change the profile. Draw stitch construction directly on the sketch: 6-row or 8-row visor stitch, 3 mm topstitch offset, single-needle panel seams, double-needle sweatband attach, 20 mm polyester twill seam tape, contrast piping, or edge binding. Give the underbrim its own view when using black anti-glare cotton twill, Kelly green satin, sublimated 240 gsm polyester, woven label, or undervisor embroidery. Our standard practice at CrownsForge is to keep these sketch callouts aligned with AQL 2.5 inspection points so sampling, embroidery, and final QC read the same specification.
Fabric and color spec: GSM, weave, Pantone references
The fabric line is where most cap failures are baked in. “Cotton twill” is not a spec; it is an invitation for the mill to swap in whatever is cheapest that week. A usable cap tech pack template should lock fabric by fiber content, yarn count, construction, density, finished weight, finish, and acceptable variance. For a structured baseball cap, I would write: “Shell: 100% cotton twill, 21s x 21s ring-spun, 108 x 58, 3/1 twill, 260 gsm ±5%, reactive dyed, enzyme washed, sanforized.” For a lightweight dad cap: “100% cotton chino twill, 16s x 12s, 128 x 60, 240 gsm ±5%, peach finish.” For performance headwear: “100% polyester microfiber, 75D x 150D, plain weave, 180 gsm ±5%, C0 DWR, moisture-wicking sweat test pass.” If you leave out yarn count or gsm, the supplier can send fabric 30 gsm lighter with a softer finish; it may look acceptable on the table, then collapse after crown fusing and first wear.
Separate every component that affects shape or handfeel, because substitutions rarely happen on the visible shell first. List shell, underbill, sweatband, seam tape, front-panel backing, and buckram independently, with material and weight. A practical callout is: “Underbill: 65/35 poly-cotton twill, 220 gsm, black, low crocking”; “Sweatband: 35% cotton / 65% polyester terry, 180 gsm ±10 gsm”; “Buckram: 100% polyester hard buckram, 0.35-0.45 mm thickness, resin finished.” On structured styles, front-panel backing thickness matters as much as shell fabric; a 0.10 mm difference changes crown memory and logo presentation after embroidery on Tajima or Barudan heads. Our standard practice is to reject any replacement fabric that matches color but misses weight or construction tolerance, because a cap that passes visual approval can still fail shape retention, needle penetration, or seam puckering in production.
Color control breaks down when the spec gives one Pantone and assumes every material will behave the same. In a cap tech pack template, use Pantone TCX for dyed textiles and identify the approval basis: physical swatch, lab dip, strike-off, or previous bulk lot. Write the viewing condition into the spec: D65 light box, 10° observer, and Delta-E tolerance by component. For premium retail programs, Delta-E ≤1.5 on shell fabric is realistic; for promotional volume, ≤2.0 is more common. Then classify components as “exact match” or “commercial match”: shell, underbill, top button, eyelets, closure strap, and embroidery thread do not all read the same. Madeira or Gunold polyester thread often looks half a tone brighter than matte twill because of filament sheen, even when the spectro reading is inside tolerance. For repeat orders, include previous mill lot number, approved handfeel reference, and a 0.5-meter cutting for sign-off; an A4 lab dip will not reveal twill angle, slub variation, coating stiffness, or shade shift across panel grain.
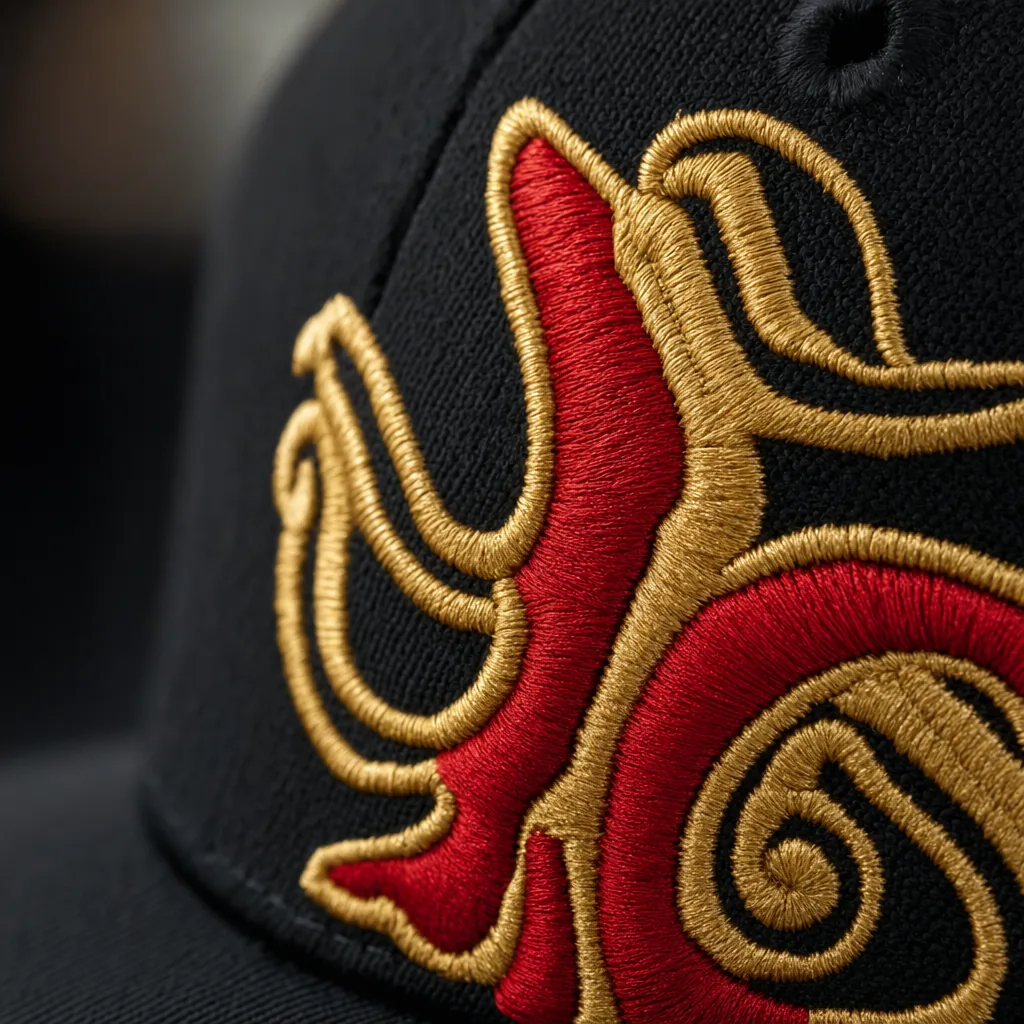
Decoration spec: technique, placement, dimensions, color count
Lock the decoration method before the first sample, because one logo will not survive every process. A cap tech pack template should put technique, source file, finished size, color count, placement reference, and approval sample in the same callout. Separate flat embroidery, 3D puff, woven patch, printed twill patch, PVC patch, heat transfer, sublimated patch, and direct screen print; they price and fail differently. For embroidery, include stitch count if known: 8,000-10,000 stitches is a normal front logo, while 18,000-22,000 stitches adds machine time, thread breaks, and cost. Flat embroidery in Yiwu bulk production usually adds $0.18-$0.45 per location; 3D puff front embroidery is closer to $0.35-$0.80 depending on density, trims, and thread changes. For puff, specify 2 mm or 3 mm EVA foam, raised areas only, minimum column width of 2.5 mm, and clear gaps above 1.0 mm after pull compensation. Tajima, Barudan, and ZSK heads handle puff well on structured cotton twill or brushed canvas, but nylon taslon, soft dad-cap crowns, and trucker mesh often need lower density, backing, or a patch instead.
Placement must be written as an inspection rule, not a designer’s hint. “Front center logo” leaves too much judgment on the sewing floor; write the reference point, dimensions, and tolerance: front embroidery centered on crown seam, bottom edge 12 mm above visor seam, finished size 50 mm W x 30 mm H, tolerance +/-2 mm. For side logos, state left or right as worn, distance from the crown seam, eyelet, or back opening, and whether the artwork stays level to the cap opening or follows the panel angle. For back decoration, identify the closure and exact position: above snapback opening, over arch, split across arch, or shifted wearer-left to clear a brass buckle. Panel geometry changes the limit. A structured 6-panel with buckram can usually carry a 55-58 mm high front logo before distortion becomes obvious; low-profile unstructured caps usually look cleaner at 45-50 mm. Mark no-decoration zones around eyelets, top-button reinforcement, seam tape, sweatband joins, and inner fusing, because these are the places where production will otherwise make a fast, inconsistent decision.
Color count is a production control, not a mood-board note. List the exact number of thread, ink, PVC, or patch colors with Pantone references: front logo, 4 thread colors, Pantone 186 C, Black C, Cool Gray 7 C, White; side logo, 1 color, Pantone 877 C equivalent metallic thread. Use Pantone Solid Coated for most logo artwork and Pantone TCX only when the decoration must visually align with dyed fabric. Thread is not ink, so set a realistic tolerance: Delta-E under 2.0 against an approved Madeira, Gunold, FUJIX, or factory thread card is achievable for many core shades, but fluorescents, heathers, metallics, and deep neons will shift. Require a physical sew-out, strike-off, or molded PVC sample before bulk approval. During AQL 2.5 inspection, check placement from fixed panel reference points with a steel ruler, finished size, thread breaks, fill coverage, loose trims, backing show-through, color consistency, and patch edge quality. A 3 mm front-logo drift is visible at retail and is especially risky for licensed sports and uniform programs.
Packaging and label spec: polybag, hangtag, sticker, carton
Packaging belongs in the cap tech pack template because it affects chargebacks, freight cube, shelf presentation, and legal labeling before the buyer sees the product. For a standard 6-panel cotton twill cap, call out one individual LDPE or PP polybag, typically 280 x 300 mm at 25-35 microns, with a 5 mm vent hole unless the retailer requires sealed dust protection. Do not write “eco polybag”; specify LDPE 4, PP 5, GRS recycled-content film with percentage, or EN 13432 compostable film if the market accepts it. For Amazon FBA, club shops, and big-box retail, add suffocation-warning copy when the bag opening exceeds 5 inches, UPC/EAN or FNSKU barcode format, minimum ANSI scan grade B, and sticker placement tolerance within +/-3 mm. Also state whether caps ship crown-folded, with a paper saddle, or with molded crown support; structured buckram fronts and foam truckers deform quickly when packed flat.
Hangtags, brim stickers, and price labels need the same control as embroidery DST files or woven label artwork. A workable hangtag spec gives size, stock, finish, hole, attachment, and position: 50 x 90 mm, 300-350 gsm C2S art card, matte lamination, 4 mm drill hole, black cotton cord, plastic swift tack, or nickel-free safety pin through the rear strap only. The packing team should never pierce the front panel, sweatband, leather patch, TPU badge, or side embroidery unless that location is approved in the tech pack drawing. Brim stickers should define top brim, brim edge, or under-brim placement, usually 45-55 mm diameter with removable acrylic adhesive. Test residue after 72 hours at 40°C on cotton twill, polyester, PU suede, wool blend, nylon taslan, and coated fabrics; metallic foil can lift cheap PU coating or leave a halo on dark brushed cotton. Printed items should hold Delta-E 2.0-3.0 against approved proofs, and barcodes must scan after lamination, shrink-wrap glare, and carton handling.
Carton specs should be locked before costing, not corrected by email after production, because carton cube can move DDP cost by US$0.08-0.25 per cap on air freight and still changes LCL sea freight efficiency. Typical packing is 25 pcs per inner carton and 100 or 144 pcs per master carton, but high-crown truckers, foam-front caps, and structured wool-blend styles often need 50 or 72 pcs per master to avoid crushed panels. Keep gross weight around 15-18 kg; many US and EU 3PLs surcharge or reject manual cartons above 20 kg. For ocean freight, specify 5-ply K=A or K=K corrugated board with ECT 44 or equivalent burst strength when pallets will be stacked. Carton marks should include buyer PO, SKU, style, color, size, quantity, gross/net weight, carton dimensions, country of origin, carton number, and routing-label position. Our standard practice at CrownsForge is to check carton labels against the packing list during AQL 2.5 final inspection, because one wrong SKU label can cost more than a full carton of minor sewing defects.
Frequently Asked Questions
What file format should I send for my logo?
Vector files (AI, EPS, PDF) are ideal. High-resolution PNG or JPG at 300 dpi on transparent background works as a fallback. Provide Pantone color references for accurate reproduction.
Can I order a sample before bulk production?
Yes. We strongly recommend approving a pre-production sample before mass production. Samples are charged at 35 to 60 USD each plus express shipping, fully refundable against confirmed bulk orders over 500 pieces.
How long does production take?
Sampling takes 7 to 12 days. Bulk production runs 20 to 30 days depending on quantity, fabric availability and decoration complexity. Inspection and packing adds another 3 to 5 days before shipment.
Which shipping methods do you support?
We support FOB, CIF and DDP shipping. Air express for samples and small orders, sea LCL for 100 to 500 pieces, sea FCL for 5,000+ pieces. Door-to-door DDP available for US, EU, UK, Canada and Australia.
What logo decoration techniques do you offer?
3D puff embroidery, flat embroidery, woven patch, leather patch, PVC patch, screen printing, sublimation, applique and laser etching, all in-house with no subcontracting.
How does ordering custom patch trucker hat work?
When evaluating custom patch trucker hat, the key considerations are construction quality, decoration capability, MOQ flexibility and lead time. Technique (3D puff / flat embroidery / patch), placement (front center, side, back), dimensions (e.g. 5cm wide × 3cm tall), stitch count if known, color count and Pantone references. Without a tech-pack, your factory invents details that contradict your assumptions. With one, sampling lead time drops from 14 days to 7 and revision rounds drop from 4 to 1.
How does ordering baseball cap custom work?
When evaluating baseball cap custom, the key considerations are construction quality, decoration capability, MOQ flexibility and lead time. Without a tech-pack, your factory invents details that contradict your assumptions. With one, sampling lead time drops from 14 days to 7 and revision rounds drop from 4 to 1. Tech sketches, fabric spec, color spec, decoration spec, construction spec (panels, closure, eyelets, sweatband), packaging spec, label/hangtag spec.
How does ordering custom baseball cap motorcycle helmet work?
When evaluating custom baseball cap motorcycle helmet, the key considerations are construction quality, decoration capability, MOQ flexibility and lead time. Without a tech-pack, your factory invents details that contradict your assumptions. With one, sampling lead time drops from 14 days to 7 and revision rounds drop from 4 to 1. Tech sketches, fabric spec, color spec, decoration spec, construction spec (panels, closure, eyelets, sweatband), packaging spec, label/hangtag spec.
How does ordering custom bucket hat embroidered work?
When evaluating custom bucket hat embroidered, the key considerations are construction quality, decoration capability, MOQ flexibility and lead time. Without a tech-pack, your factory invents details that contradict your assumptions. With one, sampling lead time drops from 14 days to 7 and revision rounds drop from 4 to 1. Tech sketches, fabric spec, color spec, decoration spec, construction spec (panels, closure, eyelets, sweatband), packaging spec, label/hangtag spec.
Need a low-MOQ test order?
We help emerging brands launch with as few as 100 pieces. Premium fabric, in-house embroidery, retail-ready packaging.
Start a small orderRelated guides
Custom Logo Hats: When to Use It, Costs, and What to Ask Your Factory (2026 Update)
Read article →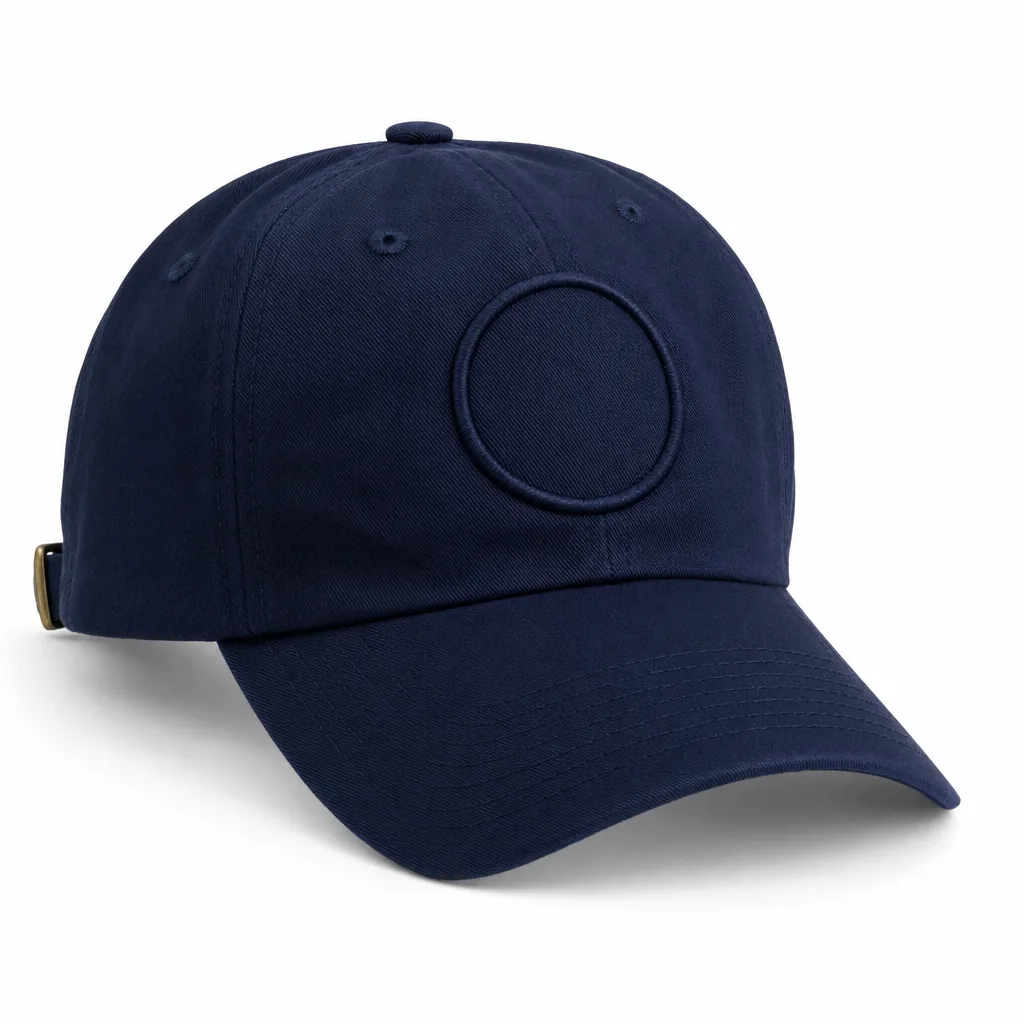
Custom Hat Embroidery: The 2026 Sourcing & Manufacturing Playbook
Read article →
Festival Bucket Hats Reorder Planning Guide for Custom Hat Buyers
Read article →We hope this guide demystifies what's in a cap tech-pack: a specification template for buyers (2026 update) (2026 update) and helps you move forward with confidence. If you have questions specific to your project, our English-speaking sales engineers are one message away.