Cap Defect Catalog: 32 Production Issues to Inspect For (2026 Update)
Cap Defect Catalog: 32 Production Issues to Inspect For (2026 Update) is one of the most-asked questions we receive from international buyers, and for good reason. With dozens of factories competing for your order and an alphabet soup of technical terms in every supplier quote, even experienced importers can feel lost. This guide consolidates what we have learned producing custom hats for clients in 40+ countries.
How to read this catalog
Read the catalog in two passes: first by cap area, then by defect severity. The 32 categories are grouped the way inspectors actually work a line—front panels, side and back panels, brim and sandwich, sweatband and closure, embroidery, print, labeling, and packing—because defects cluster by process. A warped visor usually traces back to board weight or heat-setting, while loose underbill stitching points to sewing tension or operator handling. After locating the area, judge the defect against the AQL 2.5 defect catalog: critical, major, or minor. Critical means automatic rejection regardless of sample allowance; think broken needle contamination, sharp metal burrs on closure hardware, or incorrect care labeling that creates compliance risk. Major defects are functional or clearly visible hat quality issues that must stay below the sample acceptance number, while minor defects cover lower-impact appearance faults within wider tolerance bands.
Severity matters more than how annoying a defect looks on one piece. Under a standard ANSI/ASQ Z1.4 single-sampling plan at AQL 2.5, a shipment is accepted or rejected based on the count of major and minor findings in the sample size, not on factory arguments about whether the cap is "basically wearable." A center-front embroidery shifted 3 mm off seam may be major on a team cap with strict logo placement, while the same deviation on a washed dad hat may still fail if the approved sample specifies +/-2 mm. That is why a proper cap inspection checklist always ties each point to an objective standard: Pantone TCX color tolerance, stitch density, visor curvature, crown height, seam puckering, fabric flaws, measurement tolerances, and carton marking accuracy. Without that framework, common cap manufacturing problems get downgraded by opinion instead of controlled by evidence.
Use the catalog as a defect language between buyer, factory, and third-party QC, not as a generic glossary. When everyone tags the same issue the same way—say, crown panel skew, hook-and-loop misalignment, embroidery thread breaks, oil marks, or underbill shade mismatch—the corrective action becomes faster and cheaper. Our standard practice at CrownsForge is to link every defect category to three things: inspection method, severity under AQL 2.5, and likely process origin. That makes hat factory QC defects easier to isolate before final packing, whether the root cause sits in fabric spreading, die-cutting, Tajima embroidery setup, visor pressing temperature, or carton drop damage. If you read the catalog with that mindset, cap production defects stop being a random punch list and become a practical tool for acceptance decisions, chargeback prevention, and supplier improvement.
Panel and crown defects (8 categories)
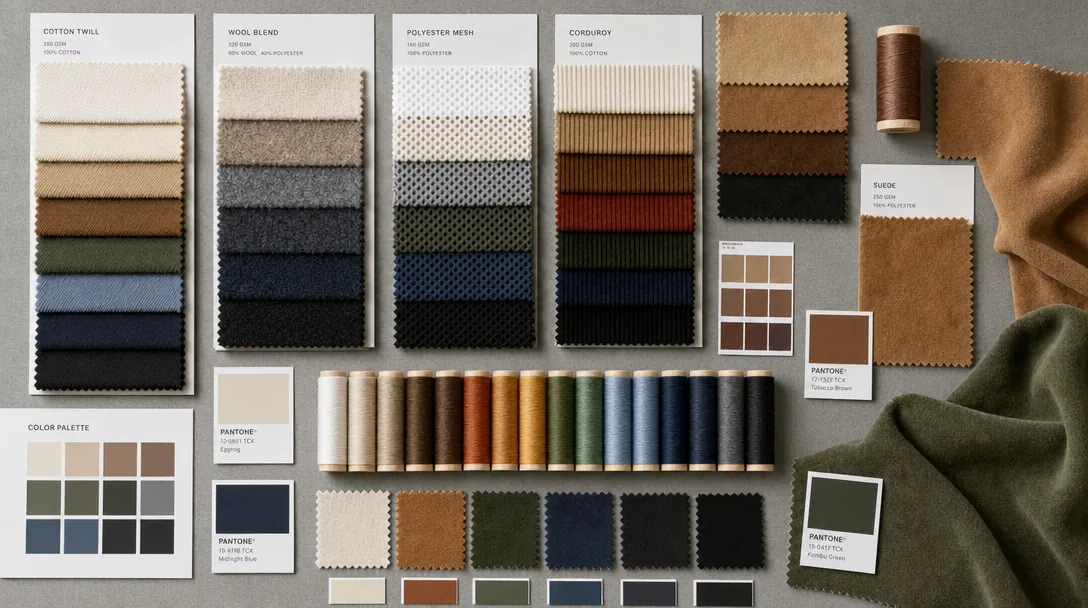
Panel and crown defects decide whether a cap looks sellable from two meters away, so they belong at the top of any serious cap inspection checklist. Stitch puckering on front or side panels usually starts upstream, not at final sewing: excessive top-thread tension, mismatched needle size, or fusing that shrank more than the shell fabric after heat press. On brushed cotton twill and peach-finish microfiber, I start flagging puckering when the seam line visibly tunnels under normal ambient light or distorts logo placement by more than 2 mm. Fabric weave irregularity is another frequent source of cap production defects, especially on low-gsm twills where warp density drifts between dye lots. You will see slubs, thin bars, or uneven twill lines that make one panel reflect light differently from the next, even when the Pantone reference is technically correct.
Color shading between supposedly identical panels is one of the most expensive hat quality issues because it often survives sewing and only shows up clearly under D65 light box conditions or outdoor daylight. In practice, a Delta-E above 1.5-2.0 between adjacent panels is enough for premium retail programs to reject, particularly on black, navy, forest, and khaki where piece-to-piece variation is easy to miss in-line. Premium surfaces also expose pilling fast: wool blends, suede-touch polyester, and sanded cotton can fuzz after abrasion from bundling or cap-form loading, which is why our standard practice is to rub high-risk areas before packing and compare against a sealed approval sample. In an AQL 2.5 defect catalog, pilling severe enough to break surface uniformity on the crown is not cosmetic trivia; it changes the perceived fabric grade and pushes the unit into second-quality territory.
Panel misalignment at the crown seam is a classic example of common cap manufacturing problems that buyers underestimate until a whole lot is on the table. If the center front panels do not meet symmetrically at the peak, or side-panel seam heights vary by more than 3 mm, the cap looks twisted even when the brim is straight. Eyelet defects are equally telling because they reveal sewing control: loose eyelet stitching unravels after a few wears, eyelet thread color mismatch stands out badly on contrast programs, and ventilation holes that are missing or undersized affect both appearance and airflow. In hat factory QC defects review, I treat a missing eyelet or blocked ventilation hole as more than a minor visual miss, because it usually means the operator skipped a step or the punching guide drifted off spec. On structured six-panel caps, check eyelet diameter consistency against the tech pack, typically 4-6 mm, and inspect all six positions rather than sampling only the visible sides.
Brim defects (5 categories)
Brim defects are easy to miss in cartons and painfully obvious once the cap is on a head, so I treat them as high-visibility failures, not cosmetic footnotes. The first two checks are geometry and hand feel. A brim curve that drifts more than ±2 mm from the approved sample changes the silhouette immediately, especially on 6-panel baseball caps and flat bills with a pre-set steam curve. In a proper cap inspection checklist, we gauge left-right symmetry at the tip and both corners, then compare arc height against the sealed spec. Stiffness inconsistency in the same batch is usually a materials-control problem rather than an operator problem: mixed PE boards, recycled filler with unstable density, or different press temperature histories. On the factory floor, you can feel the difference between a 1.8 mm insert and a softer board long before lab data confirms it. These are classic cap production defects because they affect both appearance and wear performance, and they tend to multiply when incoming brim inserts are not lot-segregated.
Undervisor defects sit in that dangerous zone where some buyers call them minor and end users call them cheap-looking. Color mismatch is the most common offender. A black undervisor that lands half a shade warm against a Pantone TCX-approved crown fabric often traces back to dye-lot variation, not sewing. We measure against the approved swatch under D65 light and flag anything beyond a Delta-E buyers have pre-agreed, commonly under 1.5 for premium programs. Printed undervisors add another failure mode: misregistration. If a camo, logo repeat, or sublimated pattern shifts even 1.5 to 2.0 mm off center, the brim looks twisted once stitched and turned. On multi-SKU runs, common cap manufacturing problems often start when printed panels and cut brim pieces are stacked without direction marks, so the artwork wanders from cap to cap. Our standard practice is to sign off the first 20 pieces by SKU before bulk sewing continues.
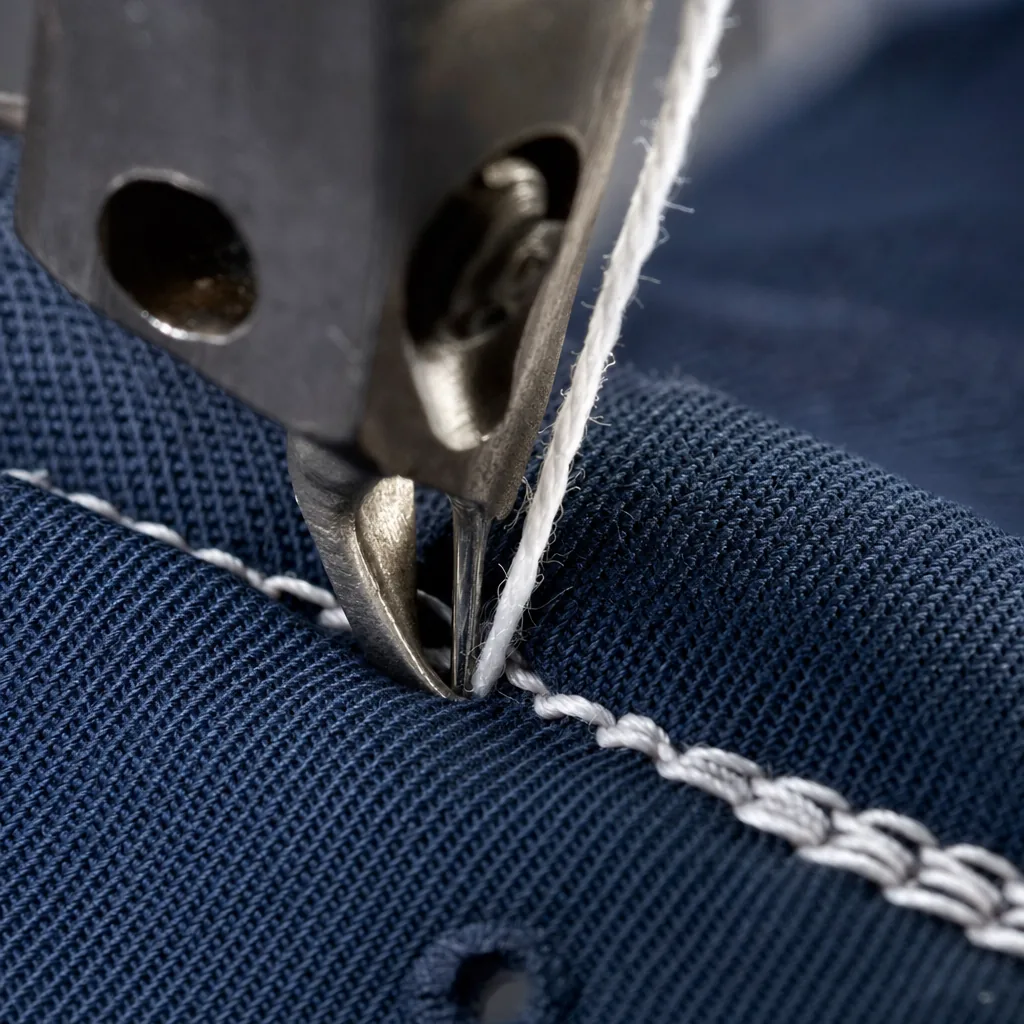
Brim stitching defects deserve their own line in any AQL 2.5 defect catalog because they are both visible and structural. Loose topstitching, skipped stitches, or uneven row spacing usually come from poor thread tension, worn guides, or operators forcing heavy layers through a machine set too fast for the material stack. With sandwich brims or contrast rows, the problem becomes more obvious because every wobble shows against the edge. I have seen perfectly acceptable crown sewing paired with brim rows drifting by over 1 mm, which is enough to trigger hat quality issues on licensed sports and streetwear programs. The better factories monitor SPI consistency, thread size, and needle condition by shift, especially when sewing brushed cotton twill, wool blends, or 600D poly constructions that react differently under the presser foot. In a real hat factory QC defects review, skipped brim stitches are not a minor nuisance; they are a durability risk that can open the seam after a few weeks of normal flexing.
Embroidery defects (6 categories)
The costliest embroidery failures are the ones buyers notice from two meters away: color drift, crooked placement, and puckering that makes the front panel look cheap. For embroidered logos, I treat Pantone mismatch as a top-tier visual defect, especially on white, khaki, and pastel cotton twill where thread undertone is obvious. A practical tolerance is to verify approved thread against the Pantone TCX or solid coated reference under D65 lighting, then reject any logo where the visible Delta-E shift is clearly outside the sealed sample standard. In real production, this usually happens when the floor substitutes Madeira or Gunold shades without lab-dipping approval, or mixes thread lots across a 3,000-piece run. Placement is just as unforgiving: a center-front design that leans 3 mm left or sits 5 mm too high above the brim seam will fail most U.S. brand specs. Among cap production defects, embroidery that is technically clean but visibly off-center still lands in the major column on a serious cap inspection checklist.
Patchy fill density and color-to-color misregistration are the hat quality issues that tell you the digitizing file or machine setup was wrong before sewing even started. On Tajima, Barudan, and ZSK heads, uneven density usually comes from bad compensation settings, loose top tension, inconsistent backing weight, or operators pushing speed too high on low-profile structured caps. A satin border may look full at one edge and thin at the other; filled areas can expose the twill base if the stitch count drops below what the fabric and logo size require. Misregistration shows up when adjacent colors leave hairline gaps, overlap into a muddy edge, or fail to meet on small text under 4 mm high. These are common cap manufacturing problems on multi-layer sports logos, especially with puff embroidery and fine outlines. Our standard practice is to compare first-off samples against the approved sew-out and record machine, head, RPM, backing spec, and thread lot, because registration drift often tracks back to one unstable head rather than the full line.
The defects buyers often miss during inline checks but catch during final packing are trim-thread exposure on the back, underlay showing through the face, and stitching tension that puckers the panel after the cap cools down. Backside trimming matters more than many factories admit: long jump-thread tails, bird nesting, and messy lock-offs on the inside of the crown are classic hat factory QC defects because they snag hair, irritate the wearer, and indicate poor housekeeping at the trimming table. On the front side, underlay should support the top stitching, not telegraph through it; when edge-run or zigzag underlay peeks out beyond the fill, the logo looks fuzzy and cheap. Puckering is usually the combined result of excessive stitch density, weak backing, and unstable shell fabric such as 100% cotton twill under 240 gsm or brushed chino with too much mechanical give. In any AQL 2.5 defect catalog, I would classify severe fabric distortion, obvious logo skew, and visible underlay on the face as major defects, because they change both appearance and sell-through.
Patch defects (4 categories)
Patch defects get rejected fast because buyers see them before they touch fabric or check seam density. The first failure mode is placement drift: on a structured 6-panel cap, a front patch that sits more than 3 mm off center from the panel seam already looks crooked at retail distance, and on youth caps the tolerance is closer to 2 mm because the front crown area is smaller. Any serious cap inspection checklist should measure from the seam line and visor center, not from the operator’s eye, because patch skew often comes from manual jig loading or a heat-transfer platen that is not square to the crown block. In our standard practice, patch placement is checked at first article, inline every 50 pieces, and again at final audit under AQL 2.5, since this is one of the most visible cap production defects and a common chargeback trigger for licensed programs.
Glue residue is the patch defect buyers underestimate until cartons land. You typically see it around heat-applied leatherette, TPU, or woven patches when film adhesive flows beyond the die-cut edge under excessive dwell time or platen pressure; on dark brushed cotton twill it leaves a glossy halo, and on pigment-washed chino it can lock in lint and look like oil staining. The fix is process control, not wiping after the fact: adhesive film weight needs to match the patch substrate, platen temperature should be verified with an IR gun rather than trusting the display, and press time usually needs to stay in the 8 to 14 second window depending on material stack. These are classic hat factory QC defects because glue spread, edge lift, and surface shine often appear together, turning one bad setup into several hat quality issues across a full lot.
Edge finishing separates acceptable patches from cheap-looking ones. Leather patches should have clean die-cut or laser-finished edges with no fuzzy nap, dark burn line, or split lamination; if the edge paint is specified, it needs even coverage and no cracking after a 24-hour flex check. Woven patch borders fray when merrow density is too low, the cut edge is not heat sealed, or the patch is sewn too close to the border and clips the locking yarns. PVC patches create a different problem: color mismatch. If the approved sample references a Pantone TCX or coated chip, soft PVC can still shift by Delta-E 2.0 to 3.5 depending on pigment loading and curing, so the sample should be judged under D65 light, not warehouse fluorescent tubes. In any AQL 2.5 defect catalog, these belong under common cap manufacturing problems because unfinished edges, fraying, and PVC color variance all hit perceived value immediately.
Sweatband defects (3 categories)
Loose sweatband attachment is a wear-failure defect, not a cosmetic nuisance, and it usually starts at the back seam, overlap joint, or the first 20 to 30 mm beside the taping where needle density changes. On a structured cap, the sweatband should sit flat against the inside crown with even SPI, normally 6 to 8 stitches per inch for lockstitch attachment, and no skipped stitches, roping, or twisting after turning. When operators run too fast on post-bed machines or use the wrong needle point for brushed cotton twill, the seam bites unevenly and the band starts peeling after a few wears. In a practical cap inspection checklist, I pull the sweatband lightly at four points around the circumference and check whether the attachment seam recovers without popping threads. Under AQL 2.5, repeated loose attachment in the same carton quickly moves from a minor appearance issue to a major functional defect because it affects fit, sweat absorption, and resaleability. Sweatband fabric mismatch is one of the most avoidable hat factory QC defects, yet it still shows up when purchasing substitutes a 100% cotton jersey band with 100% polyester tricot or a poly-cotton blend without updating the BOM. Buyers usually catch it by handfeel first: cotton has a drier, warmer hand and absorbs perspiration faster, while polyester feels slicker and often reflects more under light. The problem gets worse on licensed or premium programs where the approved standard specifies fiber content, gsm, color shade, and even moisture-management finish. I have seen approved black cotton bands at 180 to 220 gsm replaced with lighter poly around 140 to 160 gsm, which changes both comfort and perceived quality. For cap production defects like this, QC should verify incoming material against the spec sheet, supplier test report, and bulk swatch card, not just visual color. Our standard practice is to spot-check fiber composition before sewing because material substitution creates returns even when the stitching itself looks clean. Sweatband size inconsistency across a batch is a classic source of hat quality issues because a cap can pass visual inspection and still fit differently from unit to unit. The defect usually comes from poor cutting control, uneven elastic recovery, or operators stretching the band during attachment, especially on 5-panel and low-profile styles where internal tolerance is tighter. A 5 to 8 mm variance in finished sweatband circumference is enough for end users to notice, particularly in fitted sizes or small production runs for teams and retail drops. In an AQL 2.5 defect catalog, I treat random variance differently from systematic variance: if one cap is off, check cutting; if an entire sewing line runs tight, check attachment tension and template settings immediately. The clean way to inspect this category of common cap manufacturing problems is to measure finished inside circumference, band height, and overlap length across multiple cartons, then compare against the approved tolerance, typically within plus or minus 3 mm on component cut size and within agreed finished spec after sewing. These are textbook cap production defects because they damage consistency, and consistency is what buyers are actually paying for.
Closure defects (3 categories)
Closure failures create outsized claim rates because the customer touches the back strap before they notice crown shape or embroidery. I split closure defects into three categories on a cap inspection checklist: function, appearance, and attachment strength. For plastic snapbacks, the functional test is non-negotiable: close and reopen all 8 snap positions, not just the middle two. We regularly find male pegs that look acceptable in static inspection but do not seat fully at positions 1 or 8 because of short-shot molding, flash around the socket, or panel tension pulling the strap off line. In a proper AQL 2.5 defect catalog, a snap that releases under light hand tension or requires excessive force to engage counts as a major defect, not cosmetic. Color mismatch also matters more than some factories admit. If the shell is black 19-4007 TCX and the injected snap reads warm charcoal, the Delta-E shift is obvious under D65 light box conditions, especially on licensed sports programs where trim consistency gets audited lot to lot.
Fabric-strap closures fail differently. The most common cap manufacturing problems here are loose stitch formation at the strap base, skipped backtacks, and seam grin where the needle has cut into low-denier twill or brushed cotton. On washed chino caps, I want at least a clean box-X or reinforced bartack where the strap joins the back opening, with no loose tails longer than 3 mm and no stitch slippage after 10 firm pulls by hand. If the strap is fed through a metal tri-glide or D-ring buckle, check both hardware geometry and surface finish. A bent buckle will track poorly and twist the strap; a scratched buckle usually points to bulk handling without separators after plating. For brushed nickel, matte black, or antique brass finishes, compare hardware against the approved swatch because mixed plating lots are one of the quieter hat quality issues that buyers catch immediately during warehouse inbound.
Velcro closures look simple, but they generate repeat complaints when inspectors mishandle them. The hook side often arrives lightly bonded to the loop side from carton pressure, and inexperienced QC teams call that a defect before any actual test. Separate it first, then inspect engagement strength, alignment, edge stitching, and contamination from loose thread or embroidery backing fibers. A weak hook field, misaligned sew-on tape, or curling edge after cycling is a real closure defect; pre-test sticking is not. This is where hat factory QC defects often come from process discipline rather than materials alone. If the sewing line trims too aggressively, the tape edge frays; if the operator runs the hook tape under uneven presser-foot pressure, one side tunnels and loses contact area. At CrownsForge, our standard practice is to classify closure defects by user impact first: failure to fasten or hold is major, visible finish mismatch is usually minor, and any sharp burr on metal hardware becomes critical if it can scratch skin or snag fabric.
Packaging defects (3 categories)
Packaging failures are usually treated as low-risk, but they trigger chargebacks faster than crooked embroidery because they are visible at receiving and easy for retailers to score. In a practical cap inspection checklist, I split them into three categories: bagging defects, ticketing defects, and carton identification defects. A torn polybag is not just cosmetic; once the seam opens more than about 10 mm, dust, needle oil transfer, and brim abrasion become real risks during line-haul and DC handling. For EU and UK retail programs, a polybag missing the recycle mark or resin identification can also become a compliance issue, especially when the customer spec calls out LDPE 04 or printed disposal language. These are classic cap production defects because the sewing floor may be fine while the packing station still turns a good cap into a rejectable unit. Our standard practice is to sample packaging against the approved packing card under the same AQL 2.5 defect catalog used for finished goods, because packaging misses often cluster by shift rather than by isolated piece.
Hangtag and sticker errors sit in the middle zone between appearance defect and compliance defect. A hangtag missing entirely is normally treated as major for retail orders, while a crookedly attached tag depends on tolerance: if the swift-attach needle is off-center by 5 to 8 mm and covers branding or size data, most buyers will reject it as one of the more avoidable hat quality issues. Sticker placement is the same story. A size or price sticker placed off the visor centerline by more than 3 mm looks sloppy on shelf, and the bigger problem is inconsistency across the case pack, which signals weak process control at final packing. In common cap manufacturing problems, these faults rarely start with materials; they come from poor workstation guides, no placement jigs, and rushed rework after finishing. On high-volume lines, I prefer a fixed acrylic template for visor stickers and a marked piercing point for hangtags rather than asking packers to judge by eye.
Carton label defects cause the most warehouse friction because once the outer mark is illegible, the whole shipment slows down. If the SKU, color code, PO number, carton count, or destination mark is blurred by thermal printer heat drift, weak ribbon, or wet carton surface, the importer may have to open random cartons just to identify stock. That is a direct labor cost, not a theoretical QC note. For export cartons, I look for label contrast, barcode scanability, and placement consistency within a 15 mm tolerance from the approved panel position. In hat factory QC defects, a bad carton label is often tied to upstream discipline: mixed sizes packed into the wrong master carton, outdated revision labels left at the station, or carton sidewall crush reducing scan readability. CrownsForge treats unreadable carton marks as a major packaging defect when they affect traceability, because once goods hit a 3PL, a label problem can create short-ship claims even when the caps themselves are fine.
Frequently Asked Questions
How long does production take?
Sampling takes 7 to 12 days. Bulk production runs 20 to 30 days depending on quantity, fabric availability and decoration complexity. Inspection and packing adds another 3 to 5 days before shipment.
Can I order a sample before bulk production?
Yes. We strongly recommend approving a pre-production sample before mass production. Samples are charged at 35 to 60 USD each plus express shipping, fully refundable against confirmed bulk orders over 500 pieces.
What is the minimum order quantity (MOQ) for custom hats?
Our standard MOQ is 100 pieces per design and color, with sampling available from 1 piece. For complex multi-color logos or premium fabric upgrades, the MOQ can be lowered with a small per-piece surcharge.
Do you support sustainability certifications?
Yes. We work with GOTS organic cotton, GRS-certified recycled polyester, OEKO-TEX Standard 100 fabrics, and are BSCI and Sedex audited. Certification documentation can be provided per order.
What logo decoration techniques do you offer?
3D puff embroidery, flat embroidery, woven patch, leather patch, PVC patch, screen printing, sublimation, applique and laser etching, all in-house with no subcontracting.
What should buyers know about cotton twill army cap kangol?
When evaluating cotton twill army cap kangol, the key considerations are construction quality, decoration capability, MOQ flexibility and lead time. Sweatband attachment loose, sweatband fabric mismatch (cotton requested but polyester delivered), sweatband size inconsistency (varies cap-to-cap within batch). The 32 defect categories below group by area of the cap (panel, brim, embroidery, etc.) and severity (critical, major, minor under AQL 2.5). Critical defects mean reject. Major defects must remain under the AQL 2.5…
How does ordering baseball cap embroidered custom work?
When evaluating baseball cap embroidered custom, the key considerations are construction quality, decoration capability, MOQ flexibility and lead time. The 32 defect categories below group by area of the cap (panel, brim, embroidery, etc.) and severity (critical, major, minor under AQL 2.5). Critical defects mean reject. Major defects must remain under the AQL 2.5 sample limit. Minor defects are tolerated within wider limits. Stitch puckering on panels, fabric weave irregularity, color shading between panels of supposedly…
How does ordering custom embroidered trucker hat work?
When evaluating custom embroidered trucker hat, the key considerations are construction quality, decoration capability, MOQ flexibility and lead time. The 32 defect categories below group by area of the cap (panel, brim, embroidery, etc.) and severity (critical, major, minor under AQL 2.5). Critical defects mean reject. Major defects must remain under the AQL 2.5 sample limit. Minor defects are tolerated within wider limits. Stitch puckering on panels, fabric weave irregularity, color shading between panels of supposedly…
What should buyers know about kangol bucket hat mens?
When evaluating kangol bucket hat mens, the key considerations are construction quality, decoration capability, MOQ flexibility and lead time. The 32 defect categories below group by area of the cap (panel, brim, embroidery, etc.) and severity (critical, major, minor under AQL 2.5). Critical defects mean reject. Major defects must remain under the AQL 2.5 sample limit. Minor defects are tolerated within wider limits. Stitch puckering on panels, fabric weave irregularity, color shading between panels of supposedly…
What are the defects of plastic bottle caps?
Types of bottle caps defects that can be detected damages (chips, cracks, scratches); deformations (pinches, bents, dents, warping, buckling, roundness loss); missing parts (absence of caps, absence of tamper rings);
What are production defects?
A production defect is any deviation in a manufactured part from its defined specification — dimensional, functional, visual or material. The definition sounds simple; in practice, most disagreements in a quality meeting come from confusing four related terms that are not the same thing.
What are common manufacturing defects?
Manufacturing defects arise during the production process, where an otherwise safe product is rendered dangerous due to errors or irregularities in its manufacturing. This might include issues such as substandard materials, improper assembly, or other deviations from the intended design.
Need a low-MOQ test order?
We help emerging brands launch with as few as 100 pieces. Premium fabric, in-house embroidery, retail-ready packaging.
Start a small orderRelated guides
Slouchy Beanie: Properties, Costs and How to Spec It Right
Read article →
Launching a Hat Brand: Marketing Playbook for the First 12 Months
Read article →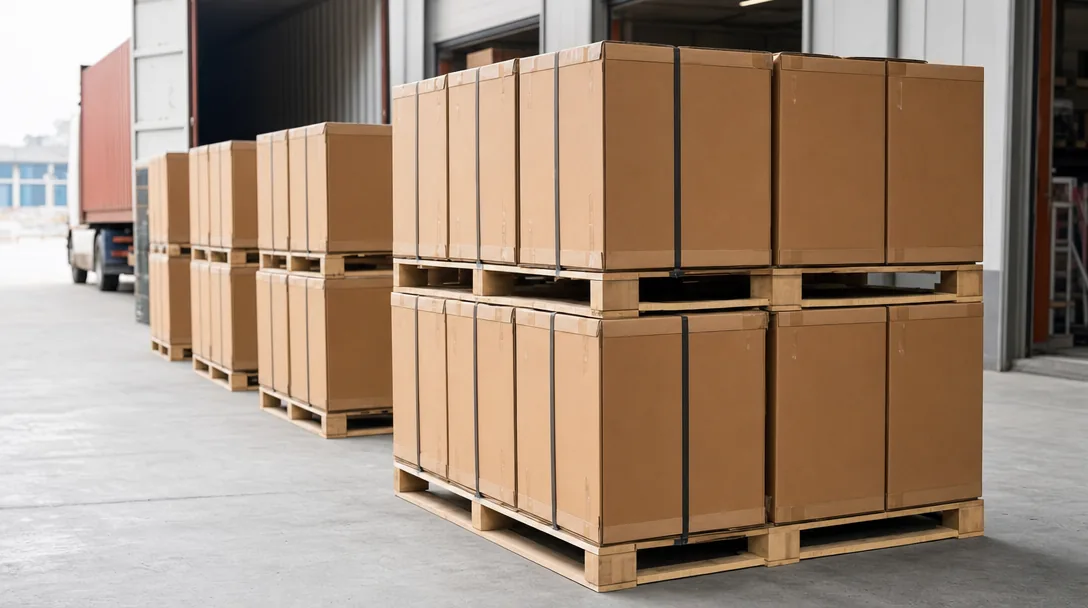
Embroidery Hats Machine: When to Use It, Costs, and What to Ask Your Factory
Read article →Sourcing custom hats does not have to be complicated. With the right manufacturing partner, clear specifications and a small upfront investment in sampling, you can launch a retail-quality product in 30 to 45 days.